Assumptions
If you've been following along with our other Claris Connect posts, it won't surprise you to learn that we're going to make some assumptions as below before we move on, so if some of these are not yet applicable to you, head off and get them sorted out and come back when done!
- You have a FileMaker ID
- You have signed up for the Claris Connect trial or a paid package
- You're logged into Claris Connect
- You understand what a Project, Flow, Steps and Step Data is
If you're unsure about any of the above, check out our previous blog article Intro to Claris Connect: Part 1: Creating A Project & Flow and that should introduce all these concepts to you and get you on the right track.
How To Know That An Error Has Occurred
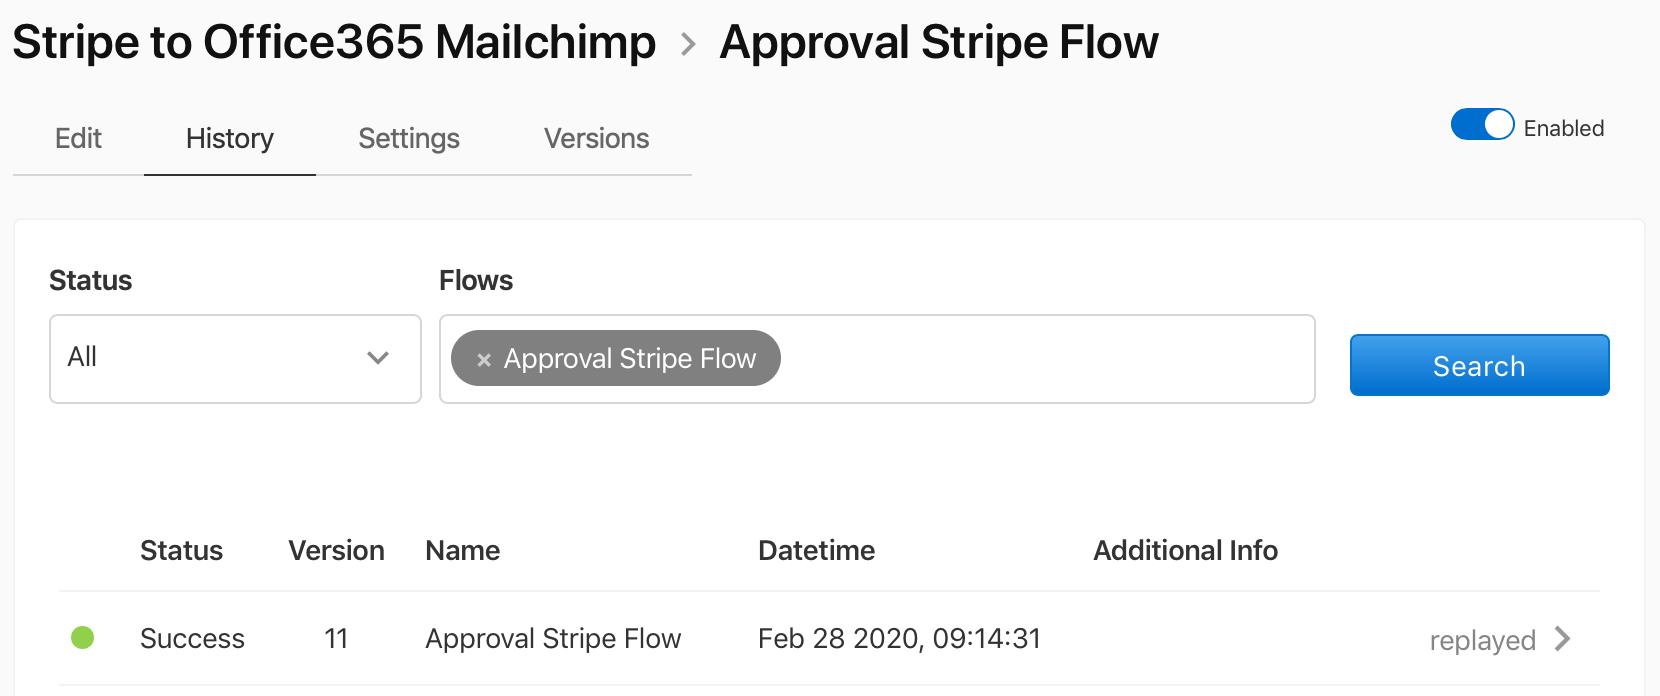
In the last flow we built, where we introduced the concept of the approval process, the last step was to add the email address to our Mailchimp list. We also touched on the history section of a flow that shows you all the occurences of a flow running, the detail and the outcome. Below is what happened at the end of our last post.

Uh oh... That doesn't look good. Now what? Well, no need to freak out and panic. Let's see what happened and where our error occurred. We can click on our history row to see the detail of all the steps. In this instance, it automatically scrolls us to the step that had the error and displays the response from the API that was called.
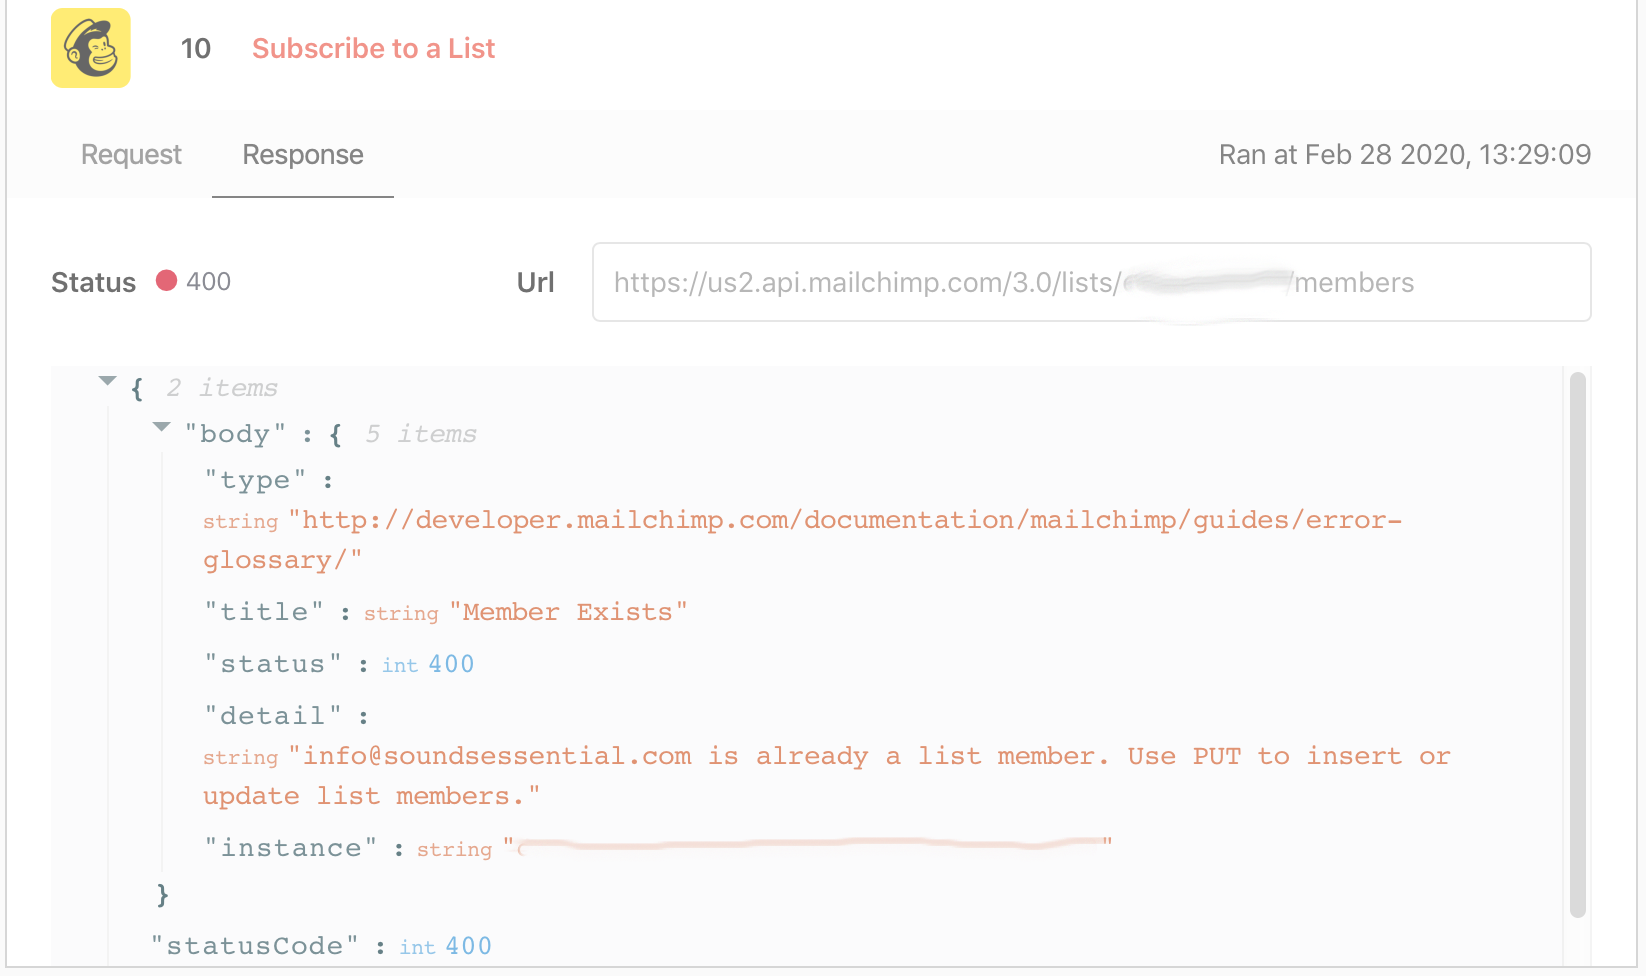
The resulting message from the API will be different for each error and every service or app that you are interacting with. Generally speaking, though, there's some sort of human readable description as to what went wrong. In our case, we were trying to add a new list member and the error message is telling us it already exists and to do something different if we want to update that member.
Now it's up to you at this point if this is an error worth worrying about. On the one hand, the email address is on the list and maybe that's enough. On the other hand, depending on your flow and what data you're sending along with the email address to Mailchimp, perhaps the member's details have changed since they were first added. We would advocate that an error is an error and shouldn't be ignored. You should trap for errors and handle them appropriately.
Step 1: Setting Up Error Capture
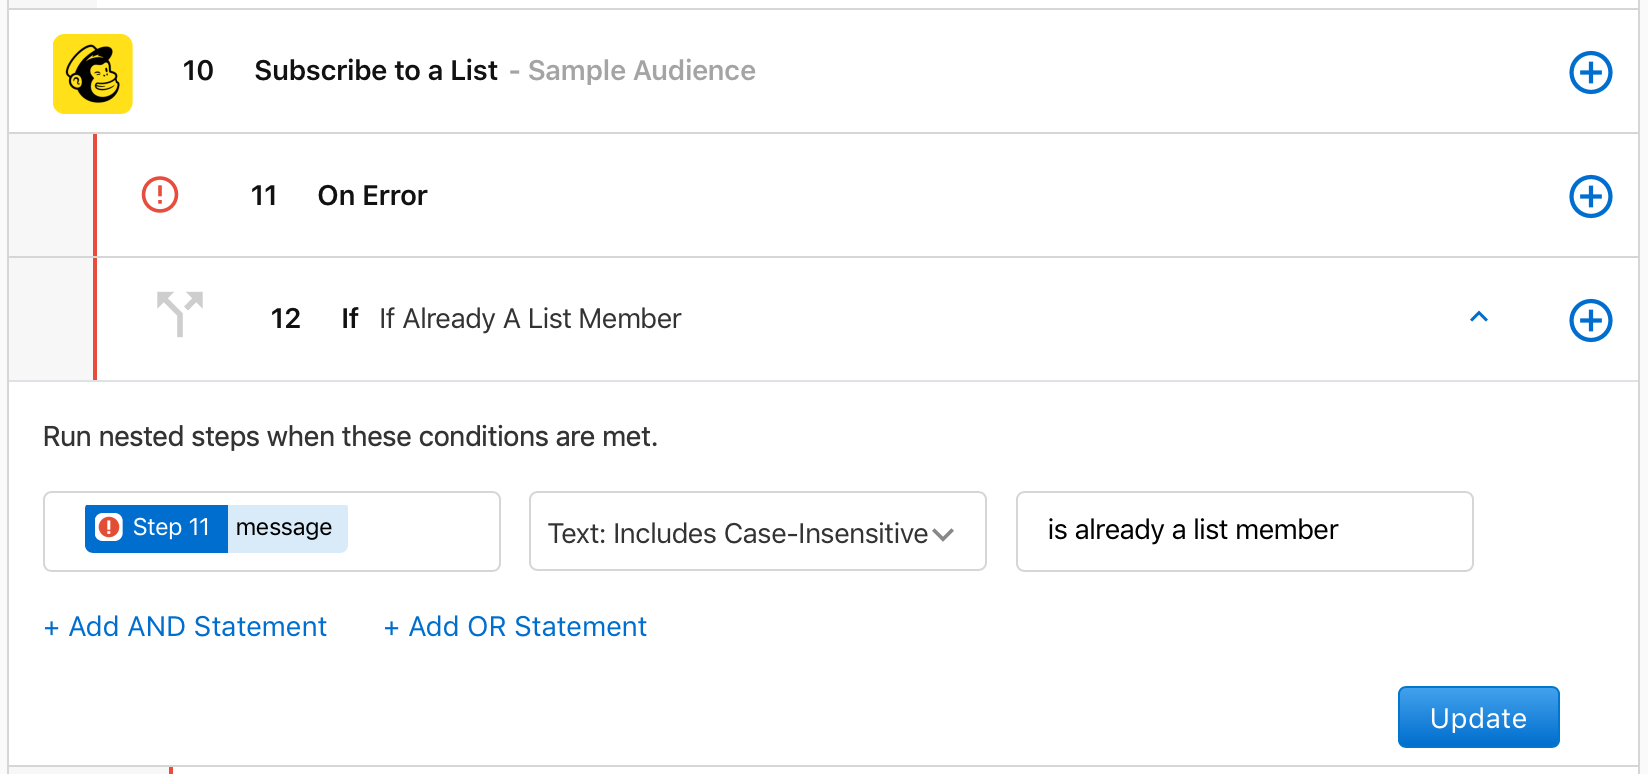
If we want to trap for errors, how do we know when one occurs in our flow? If we head back over to the flow steps and hover the mouse over the plus button on our Mailchimp step, you'll see "On Error". If we click that then you'll see a new step is added that is indented, a bit like our conditional steps we used before. This gives us a clear indication that the error trapping is directly related to the step above.

Now, using the button on the end of step 11, we can add an action if an error occurs. How you handle the error is entirely up to you but at this point, you've captured it. It's worth pointing out that if we go back to the history tab, click into our history row that had the error and replay the flow using the blue arrow button, we'll get a success notification, even though Mailchimp reported the same error as before. The difference is that now we've caught the error and are handling it so the flow executed as expected.
Step 2: Handling The Error
To handle the error, we're going to do a couple of things. First, we'll check to see if the error being reported was because the member is already on the list. If, so, then we're going to use another Mailchimp step to update the member. That may not always be the error received from Mailchimp, though. So we'll implement a catch-all by sending an email if the error is not that the member is on the list.
In this instance, we're adding an If-Then step and populating it using the message Step Data from step 9 as shown below. Note that we're using the case-insensitive condition.
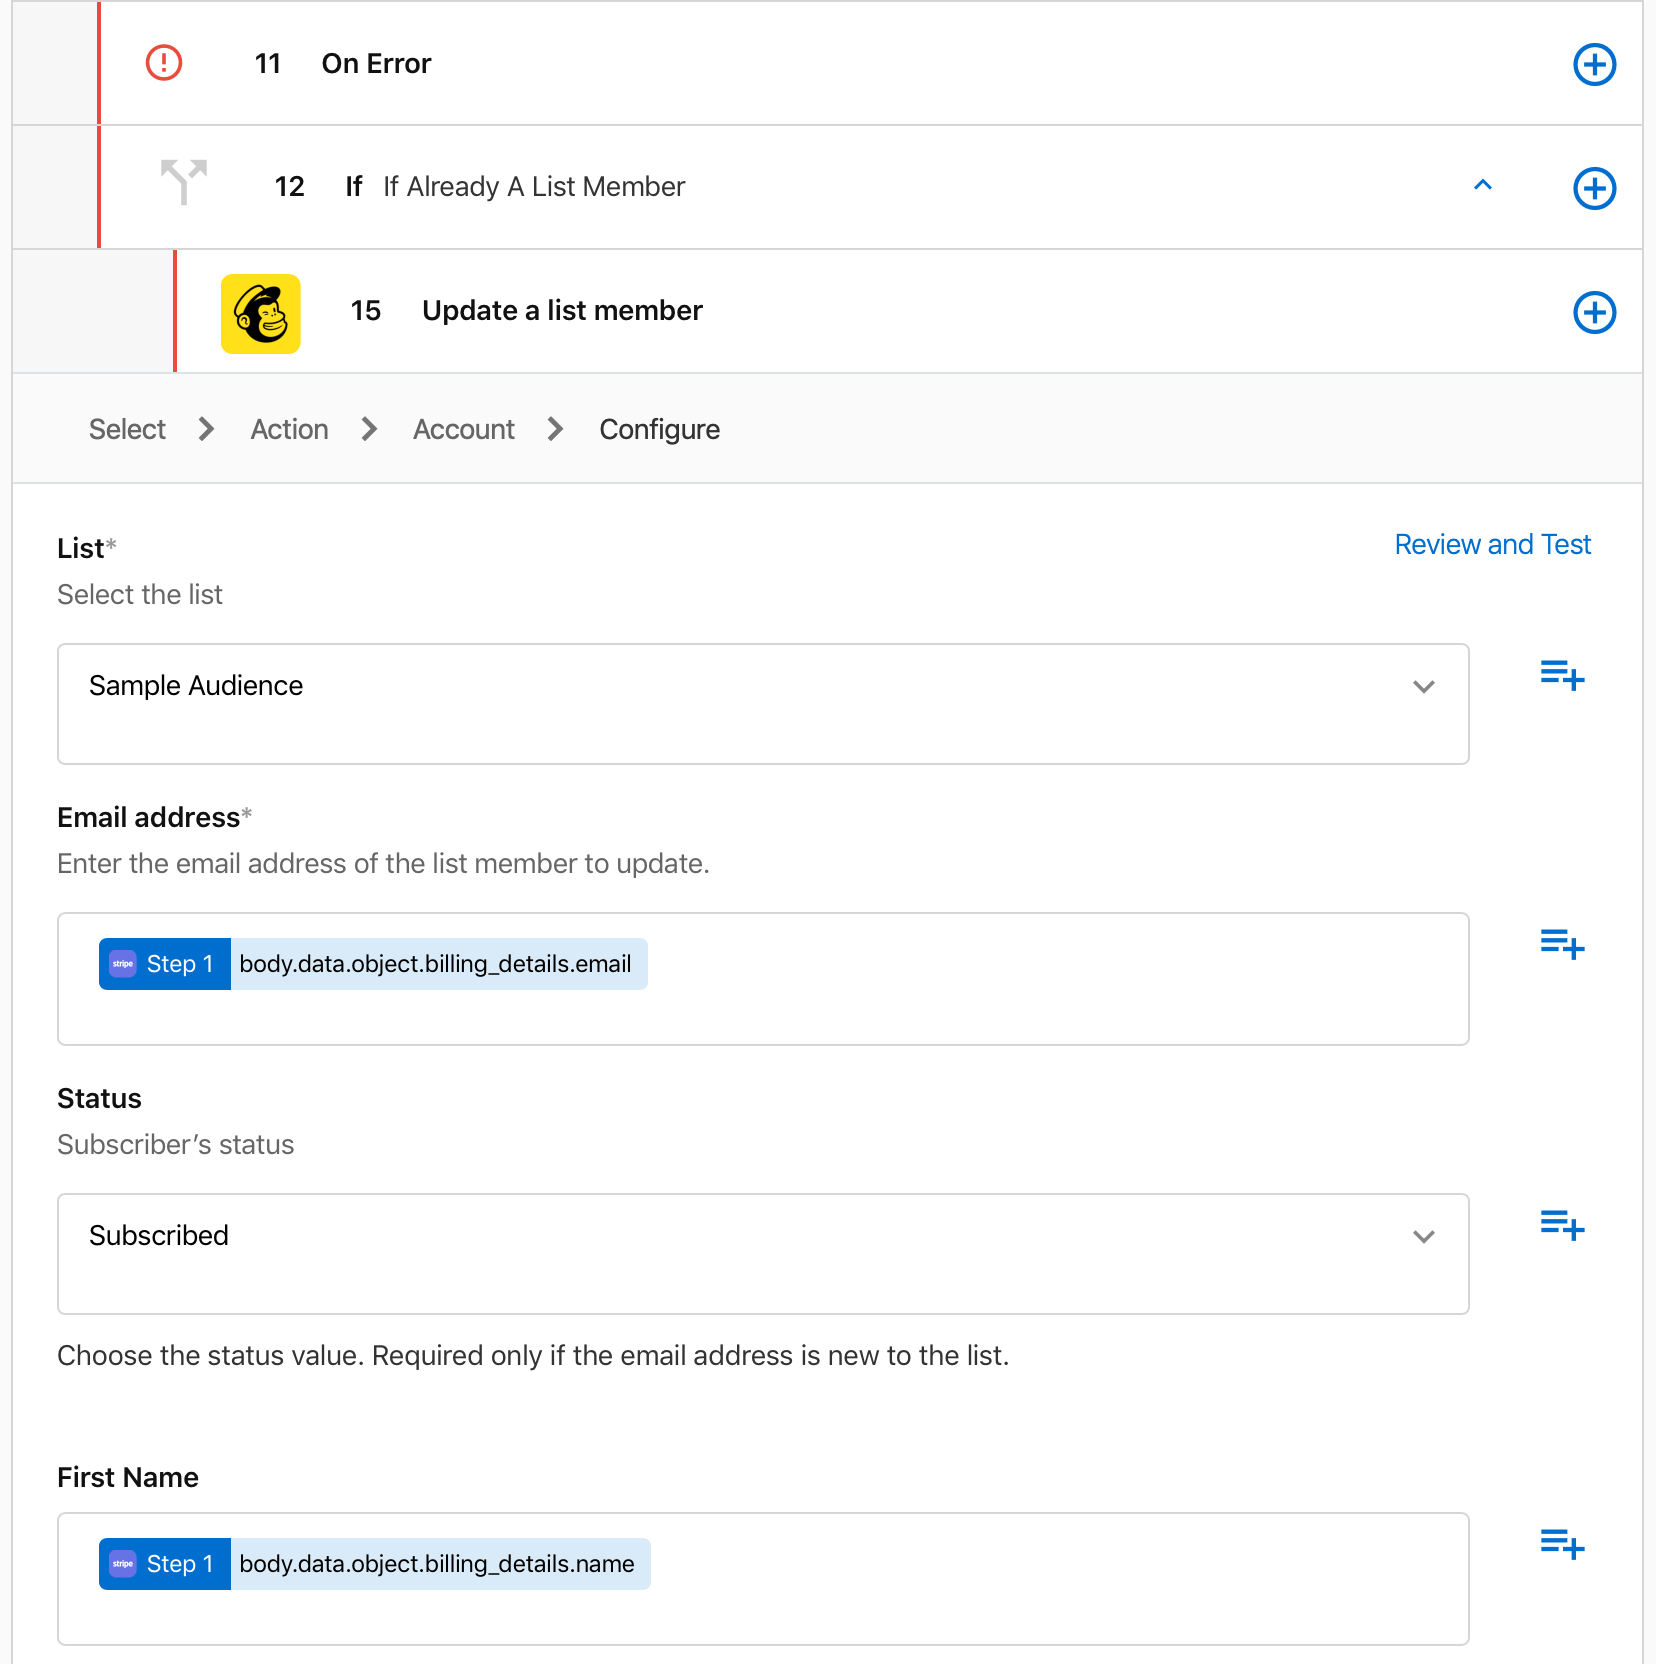
And if this condition is true, then we execute a different Mailchimp step to update the member.
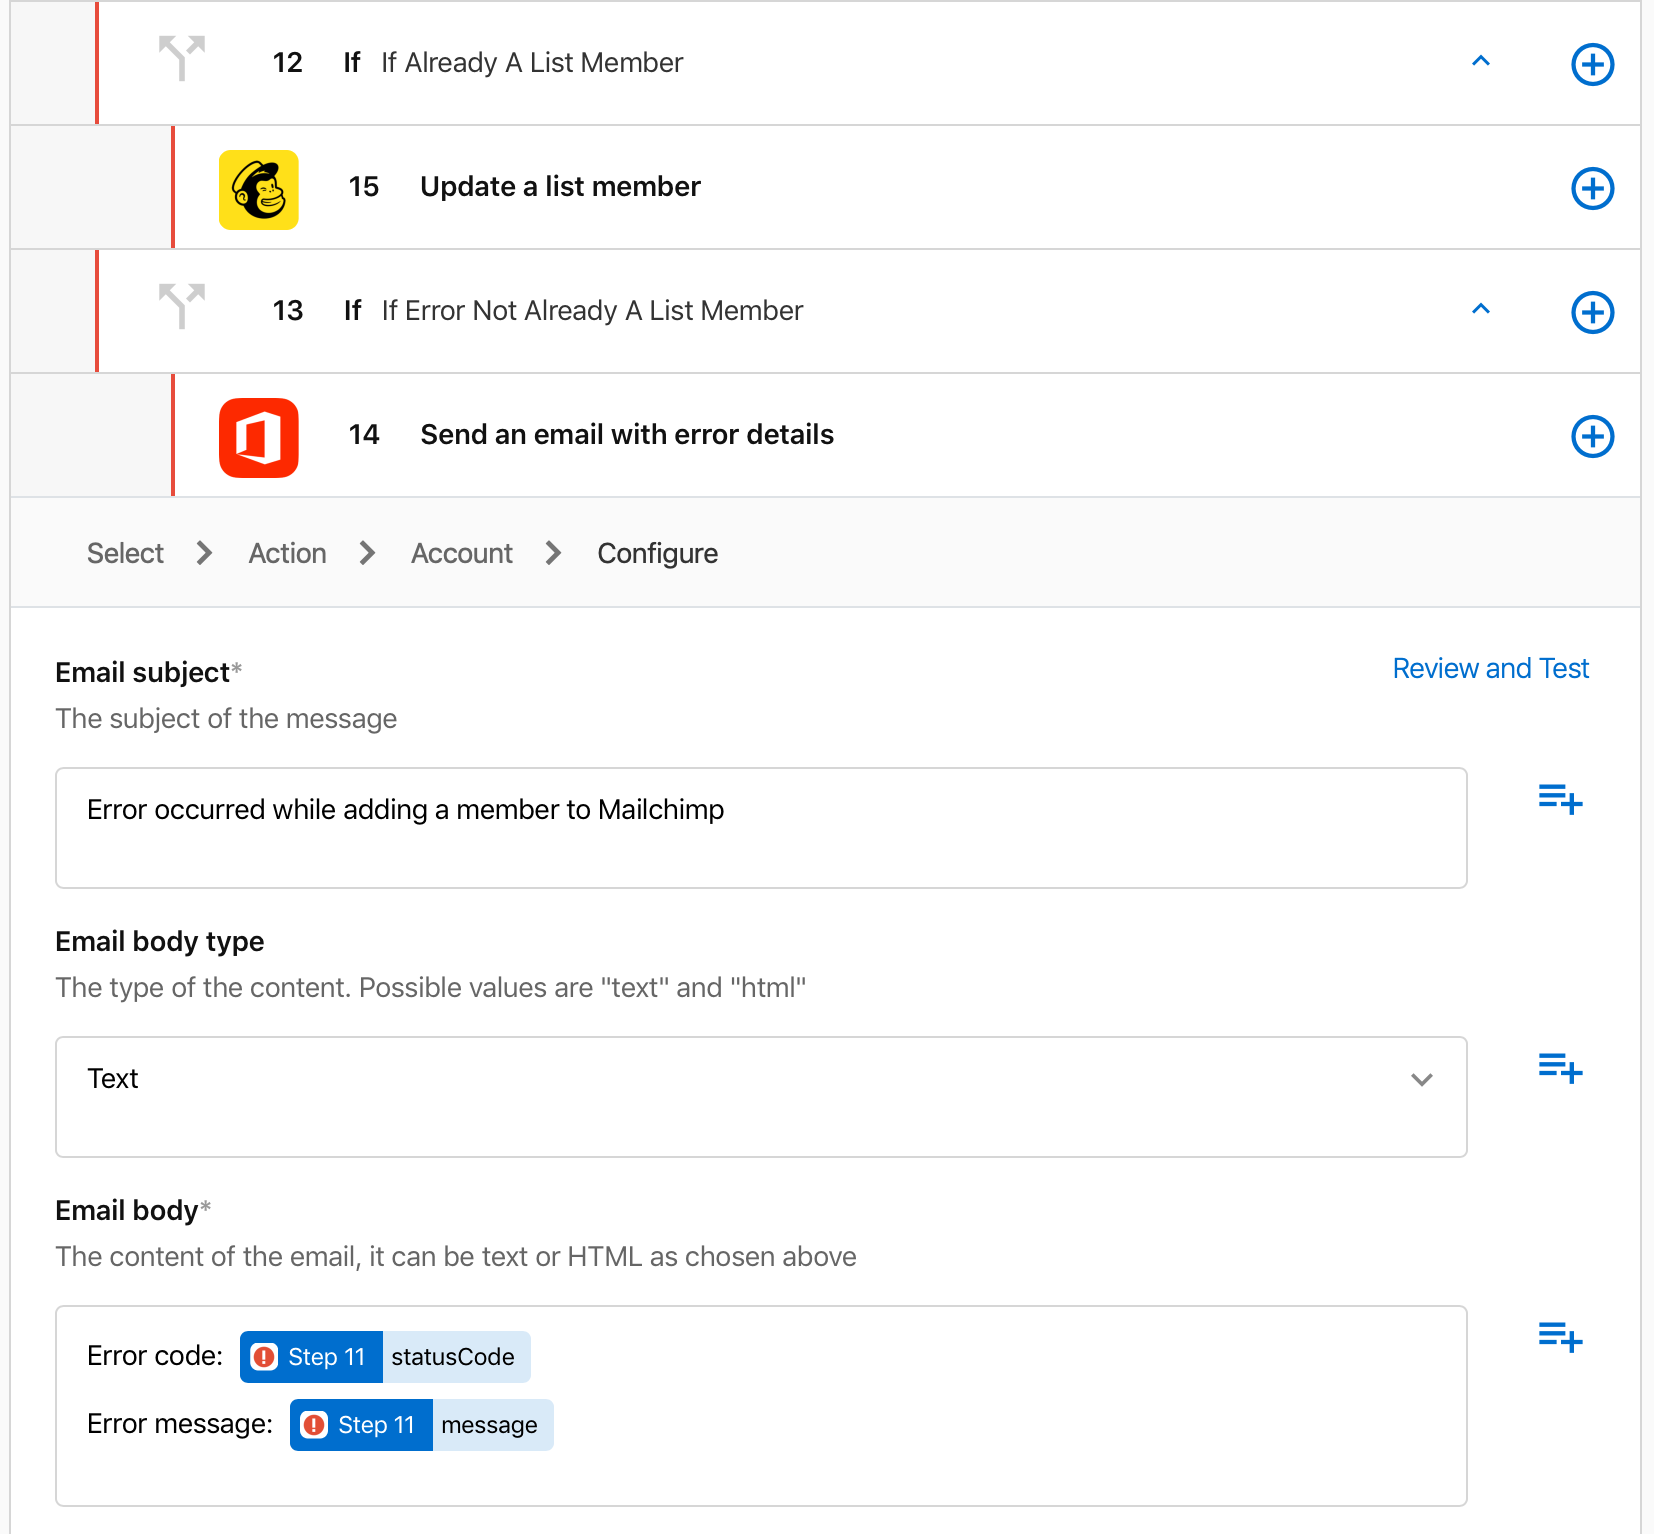
And finally, we add another condition using "Text: Excludes Case-Insensitive" and "is already a list member" and add an email step which includes in the message body the details of the error. This will trigger whenever we encounter an error that is not that the member is already on the list. If that occurs, we can examine the error and perhaps add more steps to handle that particular situation.
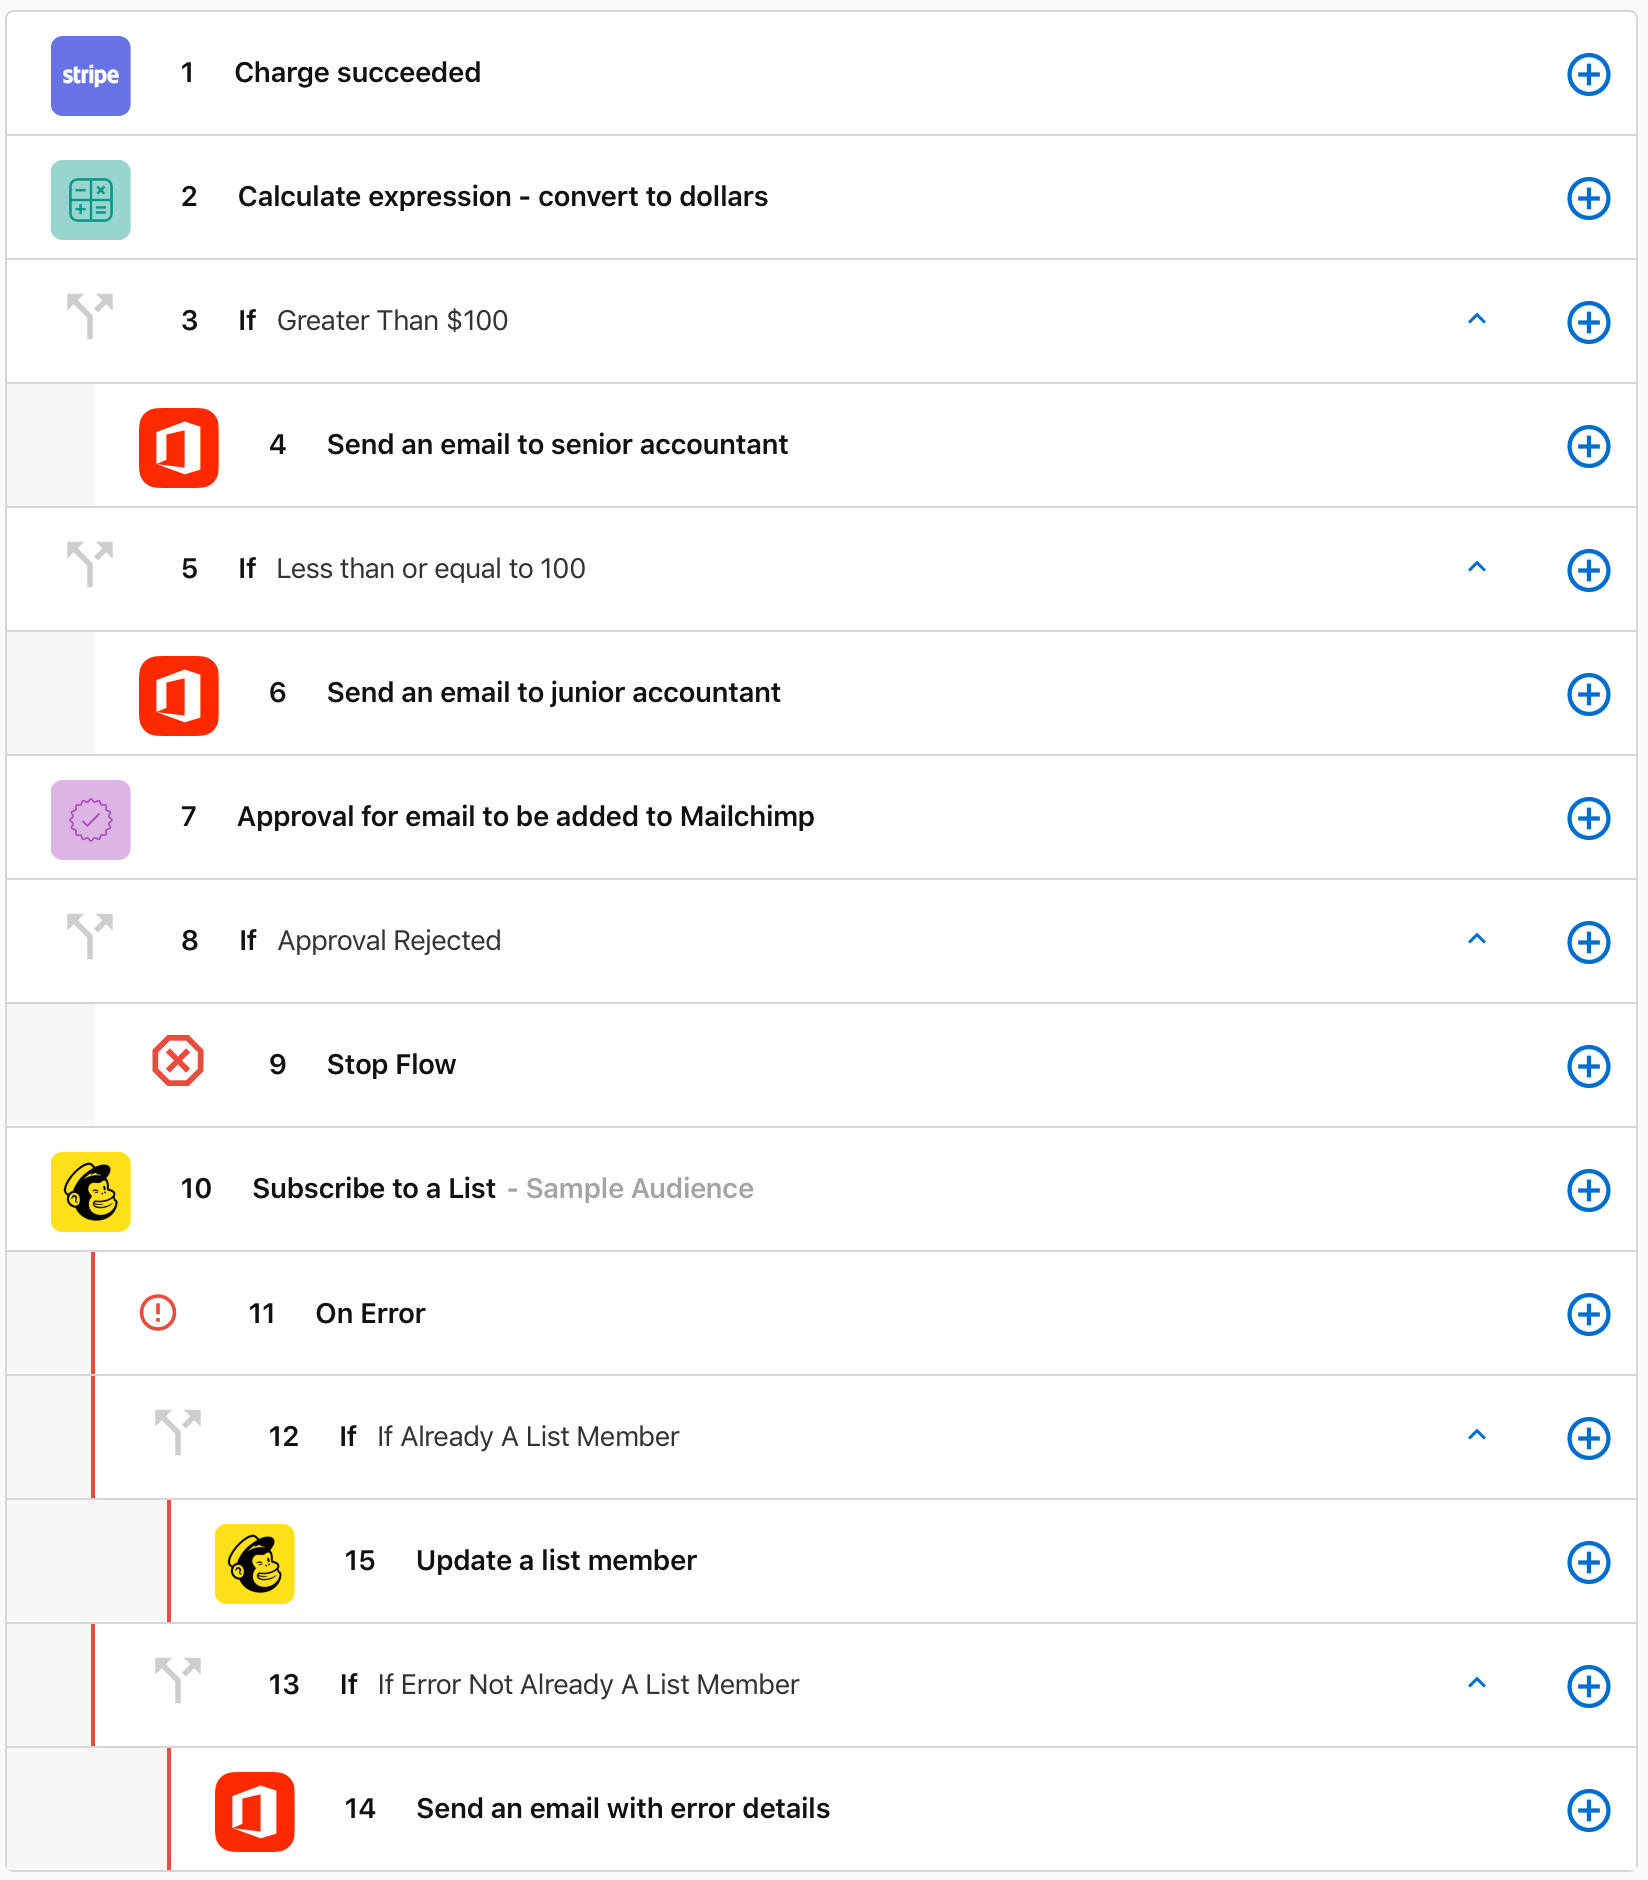
This is what our final flow looks like. You can head over to history again and replay the flow to see what happens.
Conclusion
So that's how we can handle errors that may crop up. By doing so, our flow runs in a way that allows our automated business processes to be more resilient. Check out our other posts on Claris Connect for more walk-throughs and tips.
If you need help with licensing or want to discuss how Claris Connect can help solve issues in your business, contact us and we'd be glad to help.


