
Where's FileMaker?
So you noticed, huh? No mention of FileMaker in our workflow integration plan! Yup, Claris Connect works independently of FileMaker. And while it does integrate with FileMaker very well, we're going to focus on hooking up a few online services first, just to show what's possible using Claris Connect as a standalone tool. (Don't worry, we'll get to the cool stuff we can do with FileMaker and Claris Connect in a later article.)
What is Claris Connect?
Claris Connect is a new tool from Claris (the company that makes FileMaker) that lets you gather all the apps you use in one place to create automated workflows, thereby streamlining your business. It's as simple as pointing and clicking to pick the apps you want to connect, selecting triggers and actions, and voilà! Now your apps are working for you. It's automation in minutes, rather than days.
Setting Up A Project & Flow
We're going to dive straight in as we have much to get through. First thing's first: while Claris Connect does work independently from FileMaker, at the moment you need a FileMaker ID to access and ultize it. Don't worry, though. If you don't have one already, you can get a FileMaker ID and opt in to a free 15-day trial. If you already have a license, the same FileMaker ID works here, too. (If you need help with licensing, contact us. We're an approved reseller and can help you figure out what's best for your situation with Claris Connect and FileMaker.)
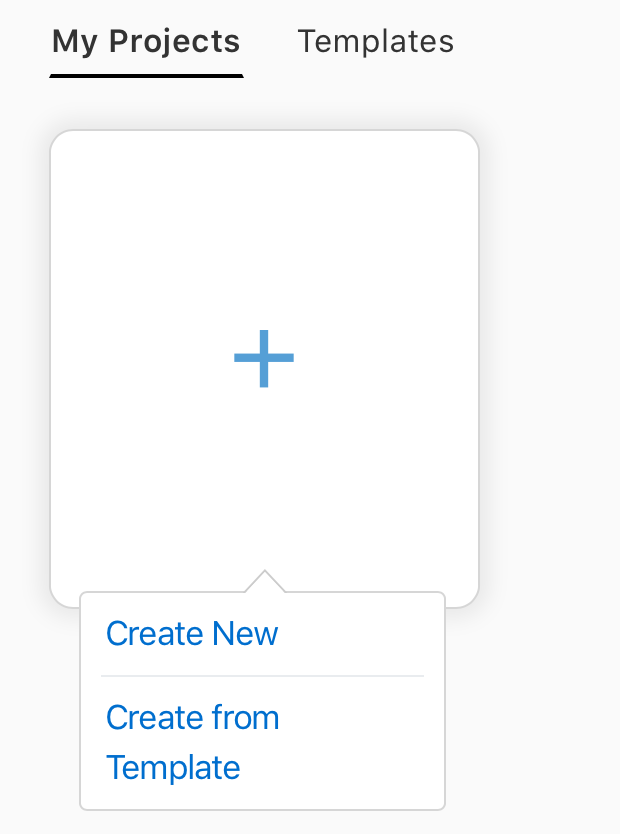
So, head over to Claris Connect at https://connect.claris.com, log in and you should be on the My Projects page. Projects can contain multiple flows so consider how to group your flows before you get started. Hover over the plus button and click that Create New button.
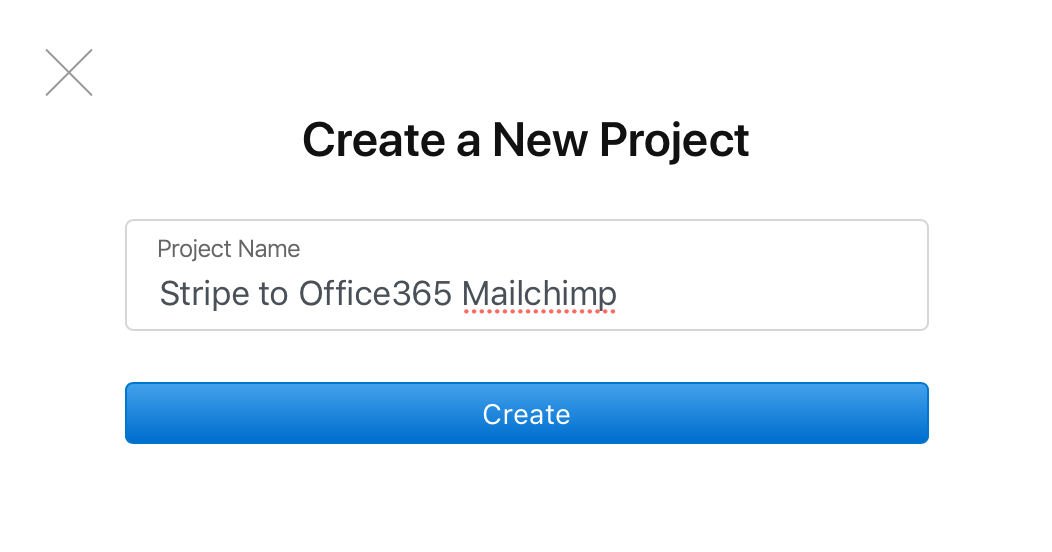
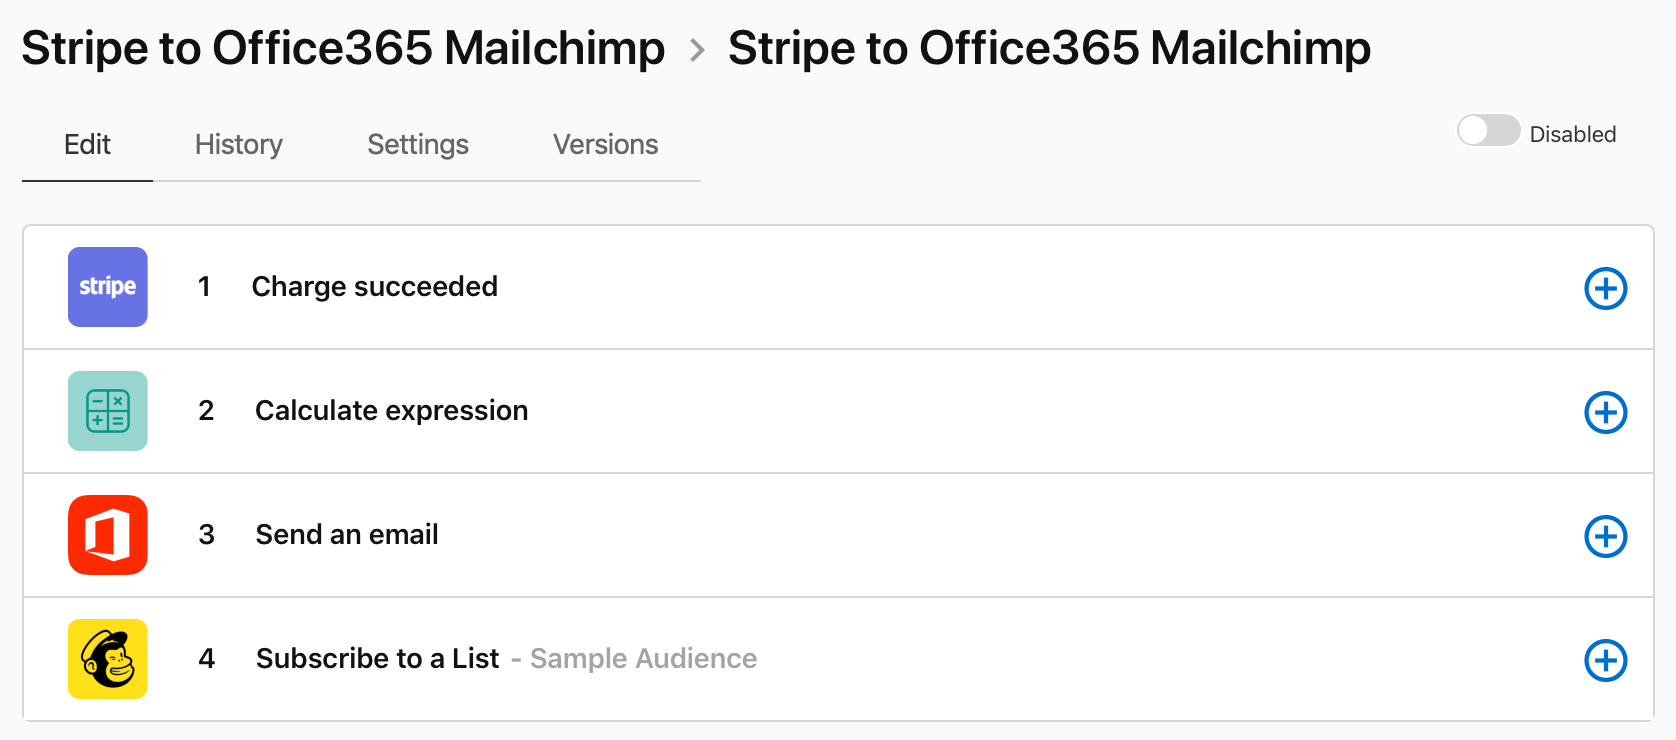
Give your project a name. We've gone with "Stripe to Office365 Mailchimp" so it's easy to identify its function when we come back to it later. Note, though, that you can only use letters, numbers and spaces. Now click that Create button.
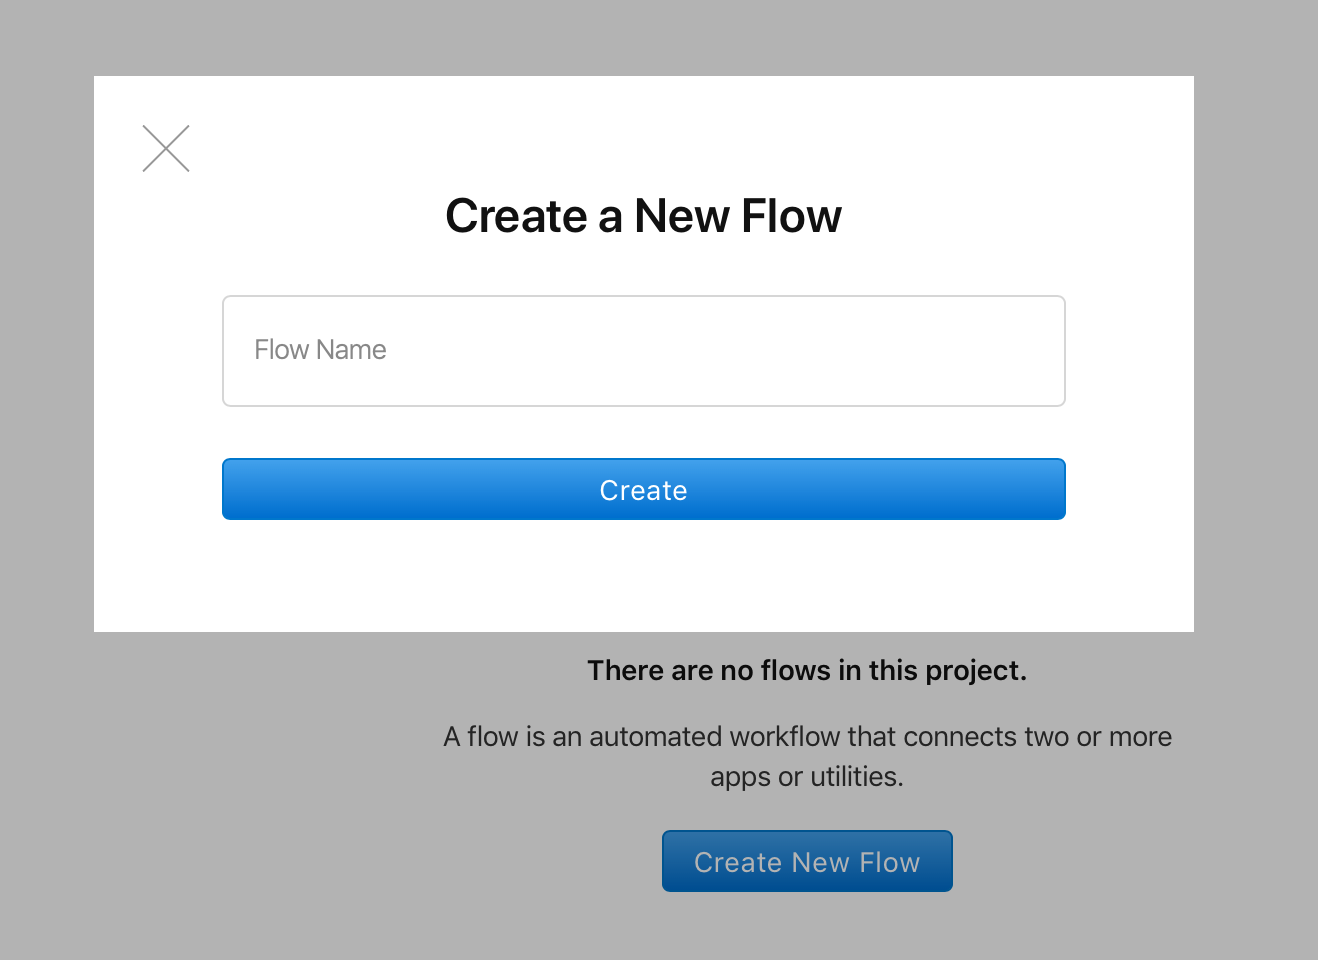
Now that we've created our project, we can add our first flow to it. This is where the steps we wish to perform are going to be defined. Nothing too difficult so far. Just click Create New Flow, fill in the name, and click Create.
Setting Up The Flow Trigger
Awesome, now we're getting somewhere! So, the first step in a flow is a trigger. This is what Claris Connect is waiting for to execute the flow.
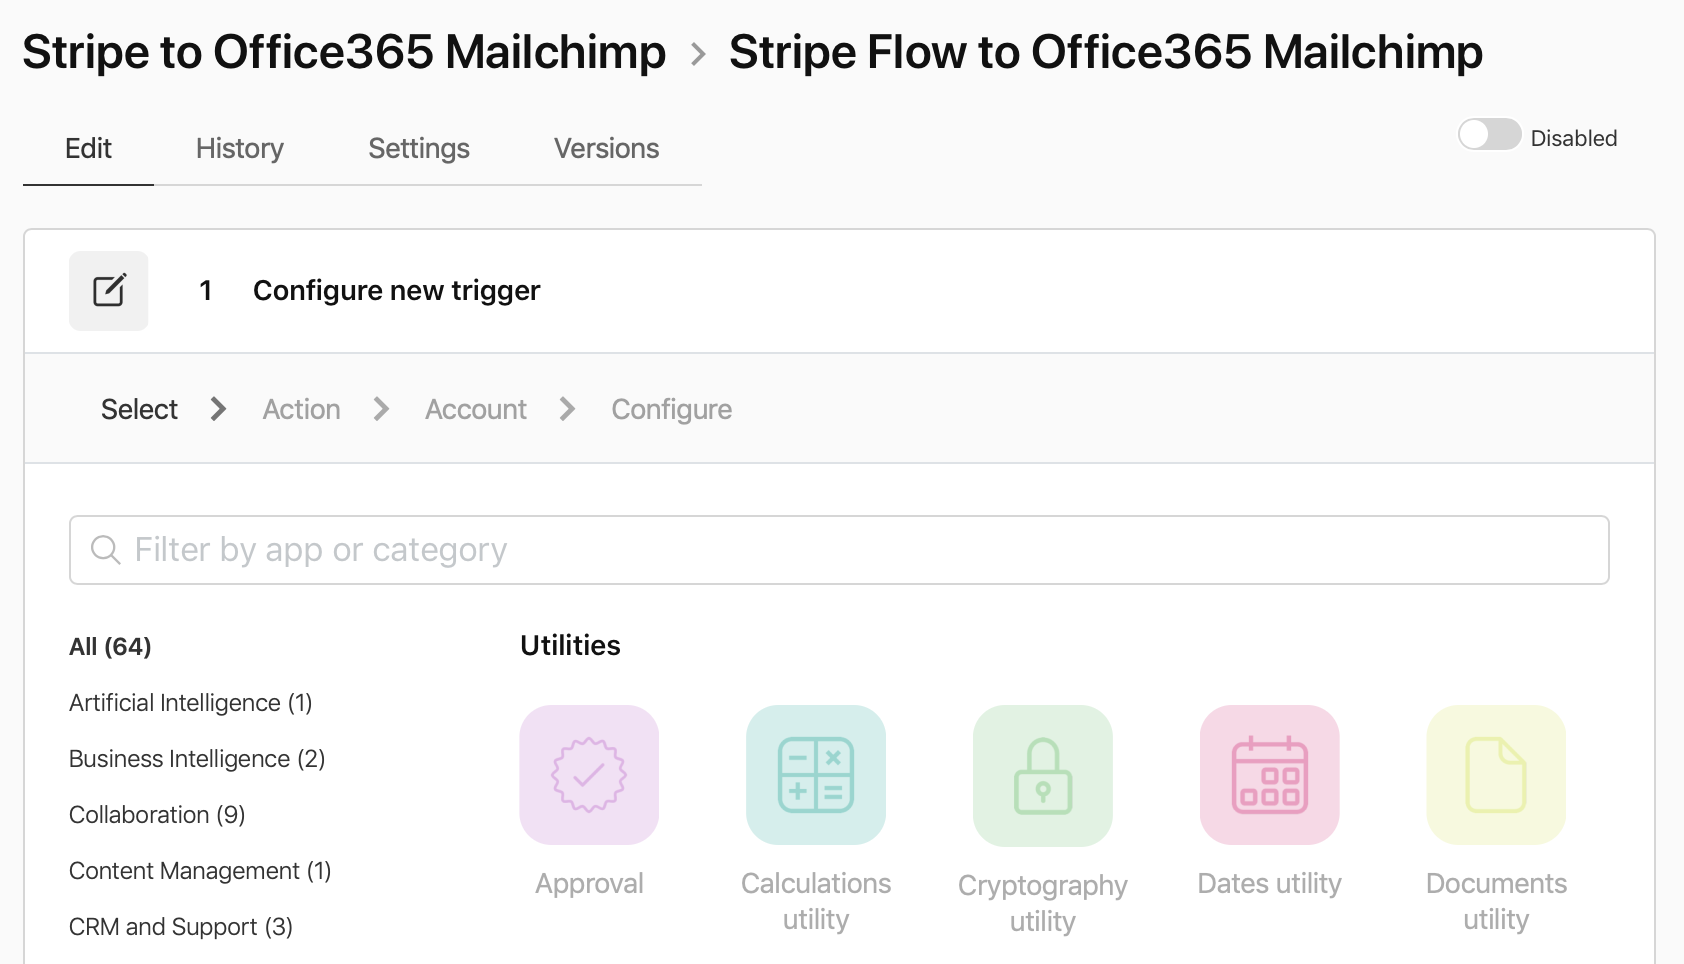
In our case, our trigger is going to be someone paying through Stripe. So scroll down to the Apps section; you'll find the Stripe app near the bottom. Click it and you'll be presented with a whole list of things that Claris Connect can listen for.
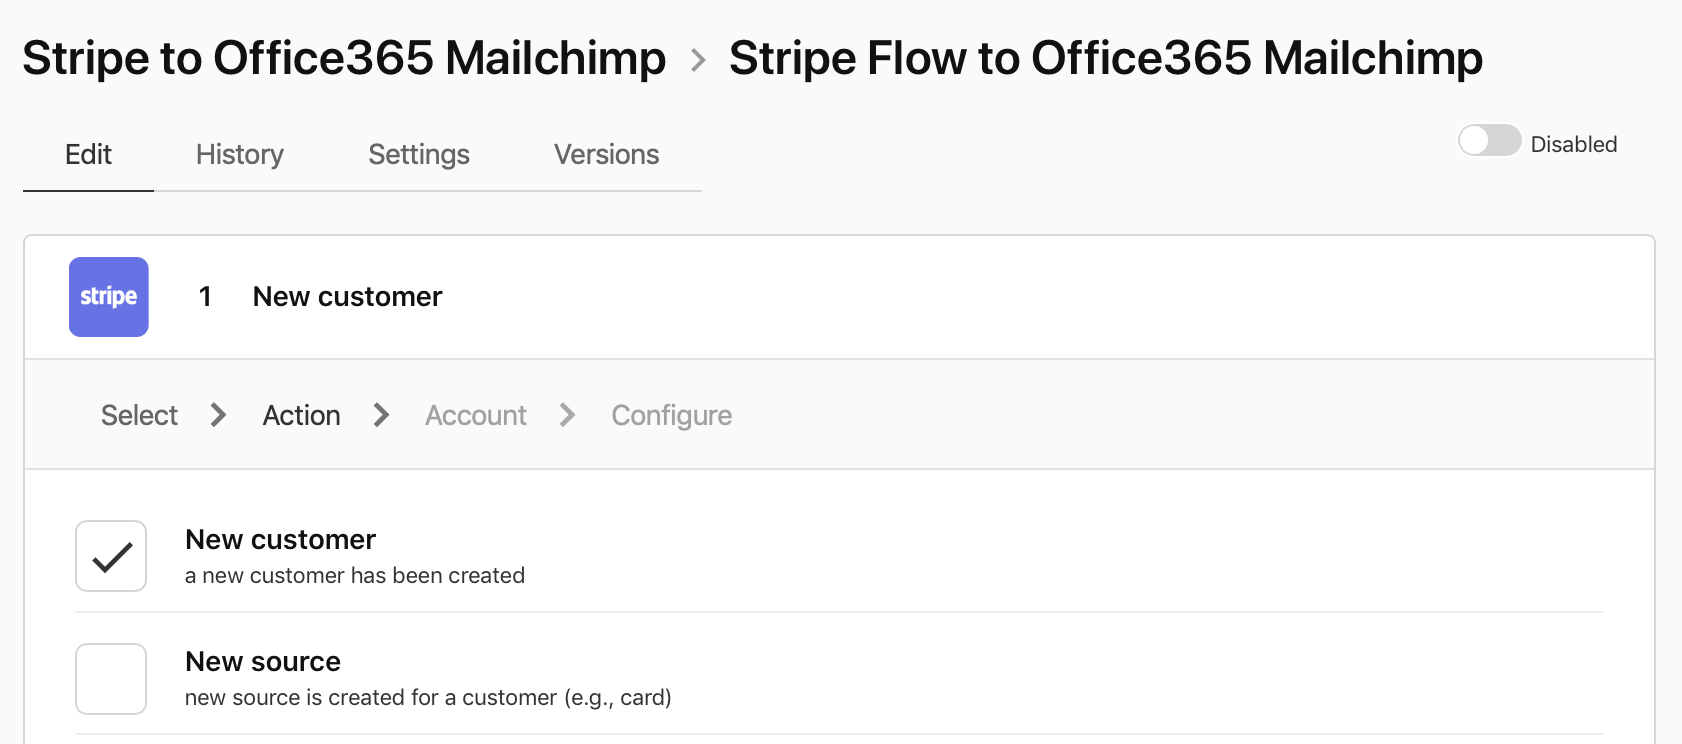
We're looking for someone who paid, so check the one named Charge Succeeded which is near the bottom, and hit Continue. Each time you add a new app in Claris Connect, you'll need to authenticate to your account with the particular service to allow Claris Connect to take actions on your behalf. For whichever app you are connecting, click on Connect New Account and follow the login procedures for that service.
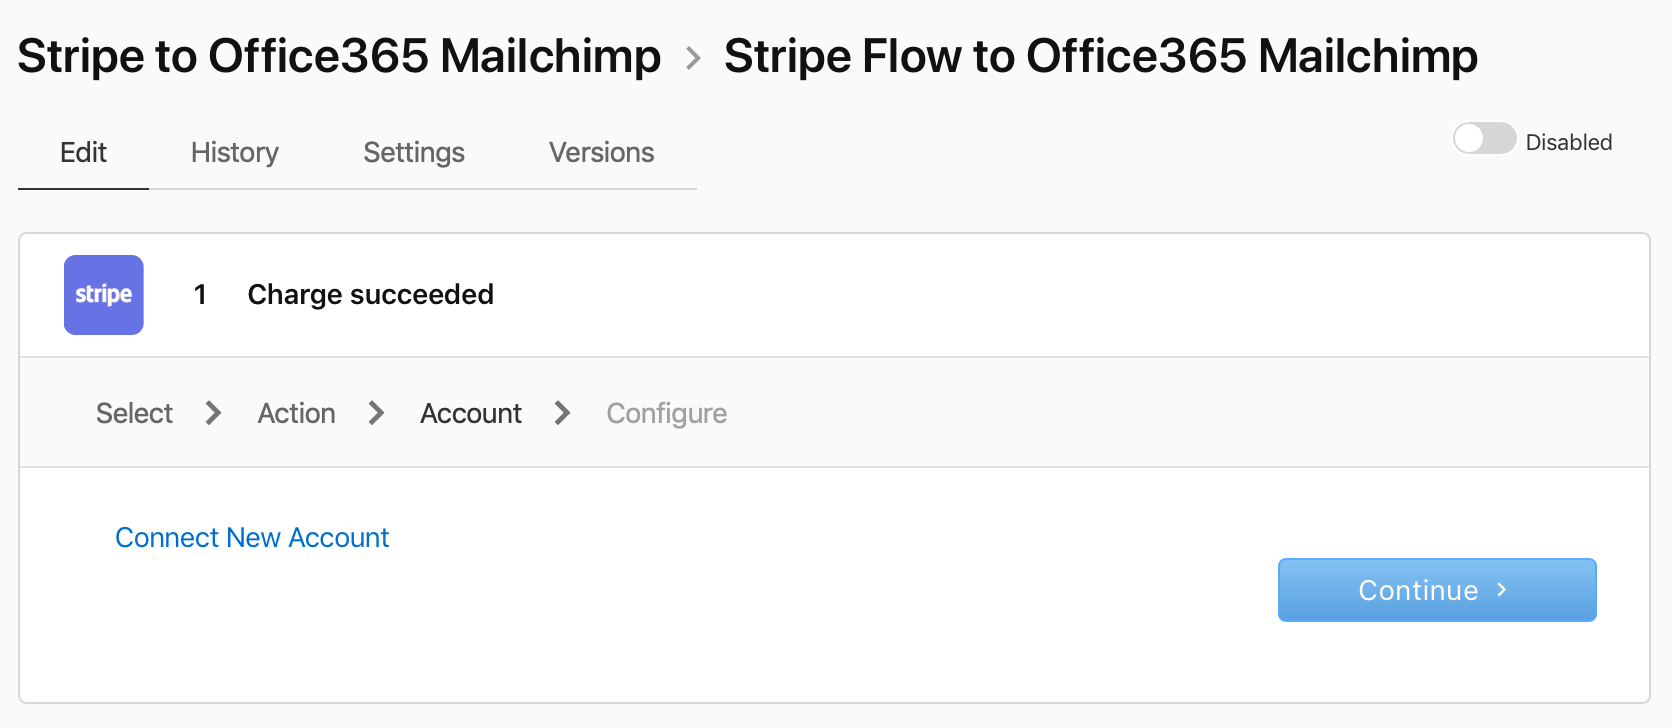
If you were successful you'll see a Success message and a big tick for the account you just added on the lefthand side. Click Continue to move to the next stage.
Ok, now things start getting a little more tricky but stick with us. With what's called a webhook or callback url, when someone pays through Stripe, Stripe will 'ping' Claris Connect on the URL you see in front of you and that will trigger the flow to execute.
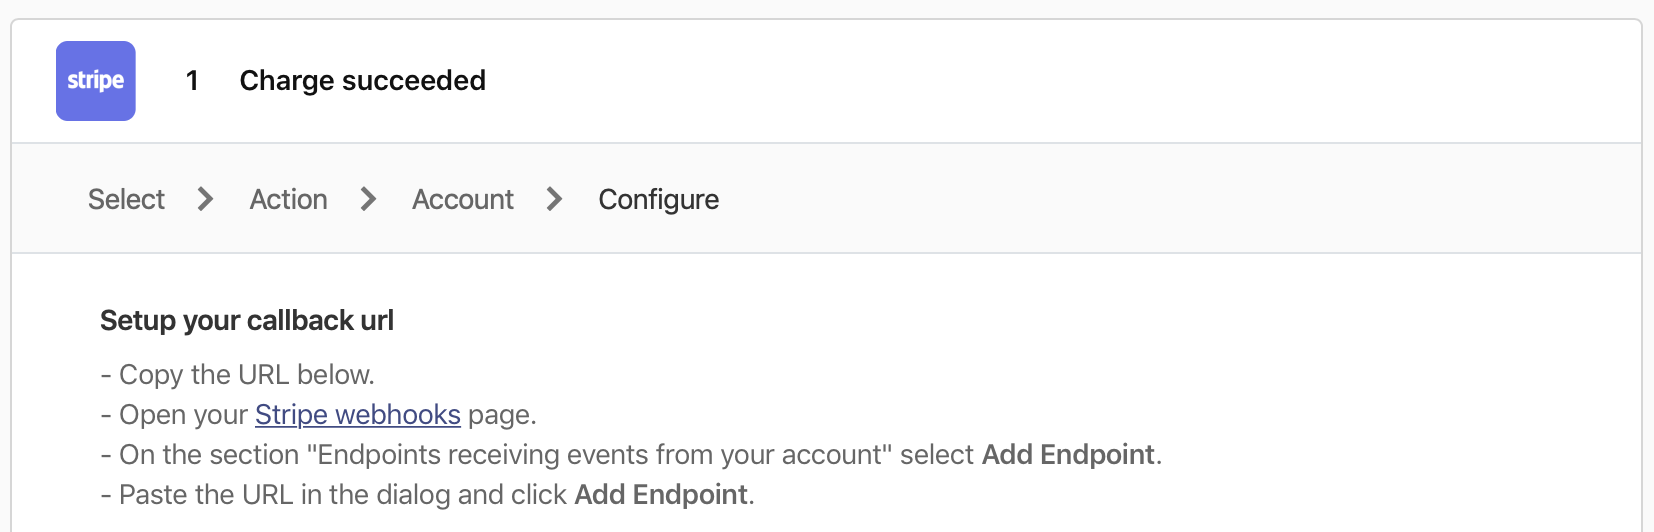
So, what we need to do is take that URL, head over to Stripe and set it up there. Once we've done that, we'll send a test webhook to move past this stage in Claris Connect.
Configuring The Stripe Webhook
Alright, let's do this! Copy the URL, head over to your Stripe account, and log in. We're going to do this in test mode for now, so when you land on the Stripe dashboard, down the bottom of the menu on the left, click the toggle that says View Test Data and it should go orange.
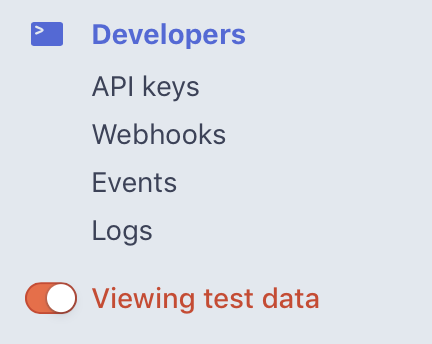
Now, click the Developers menu item and a sub menu will appear. Yup, you guessed it, we need the webhooks one! Your current list of Endpoints (if you have any) will be displayed but just go ahead and click Add Endpoint in the top right.
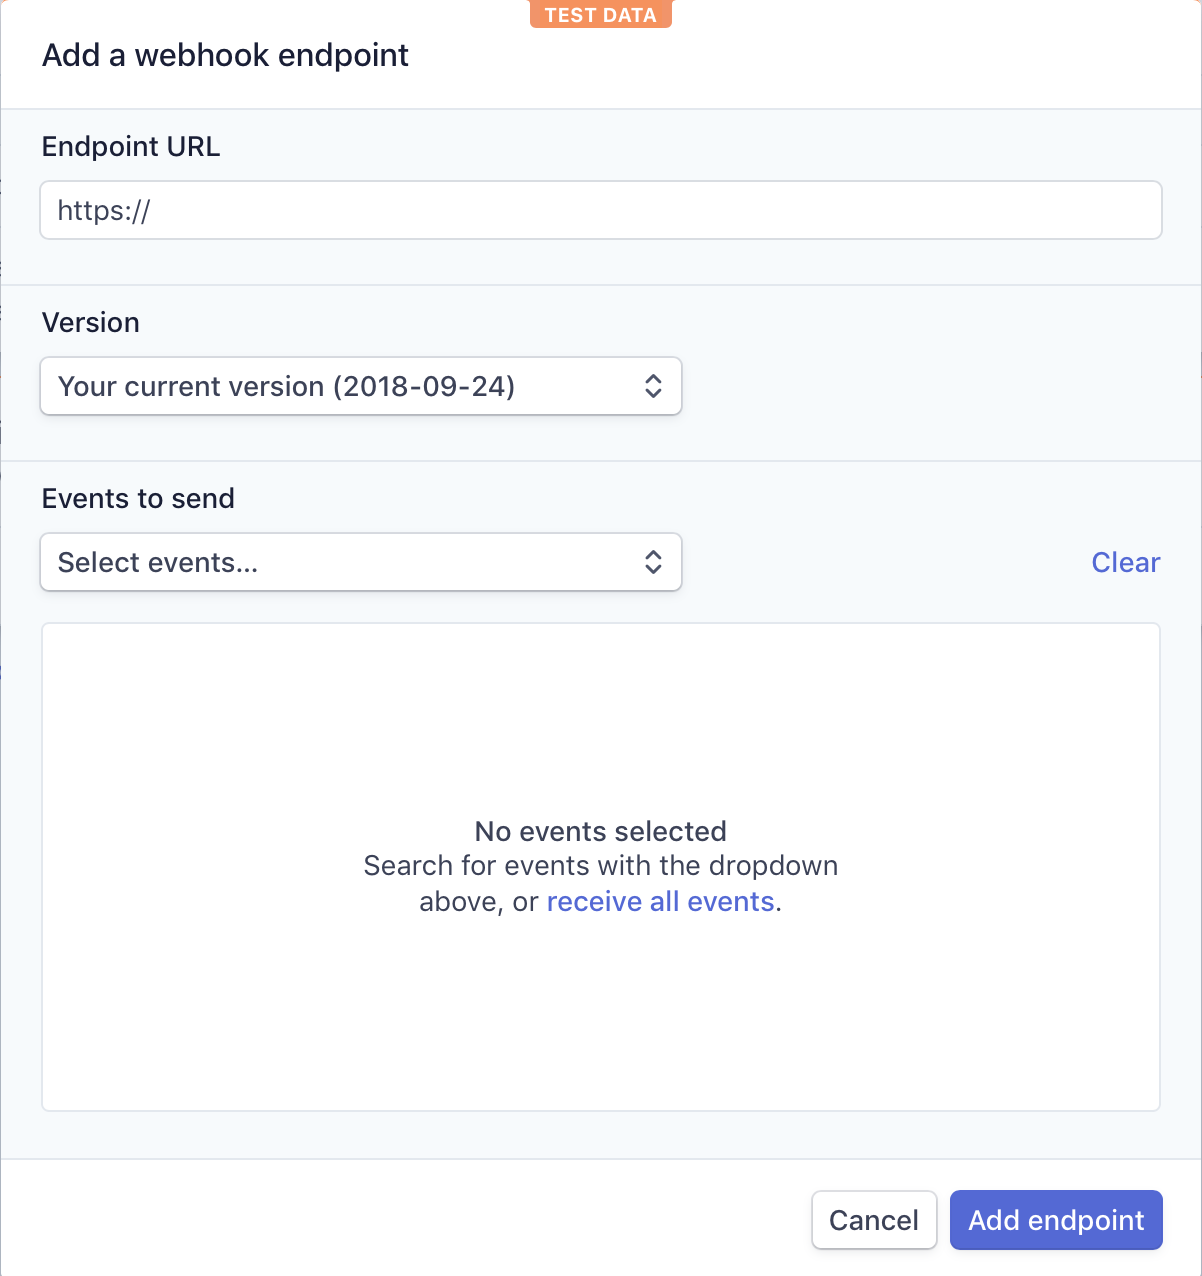
Paste your URL from Claris Connect in the Endpoint URL box at the top. We can ignore the Version option, but we do need to select what event we should be sending. Click the dropdown and select "charge.succeeded". Now click Add Endpoint to save it. After saving, you'll see a button that says "Send test webhook" at the top of the screen. Click this next to get Claris Connect to receive a test event so it knows what to listen for. Click it once and then click again to send the webhook.
It should happen pretty quickly, but if you go over to Claris Connect, you'll see Connection Complete and a nice green tick. Sweet. In Claris Connect, click save to move past the Charge Succeeded set up. You should be here:
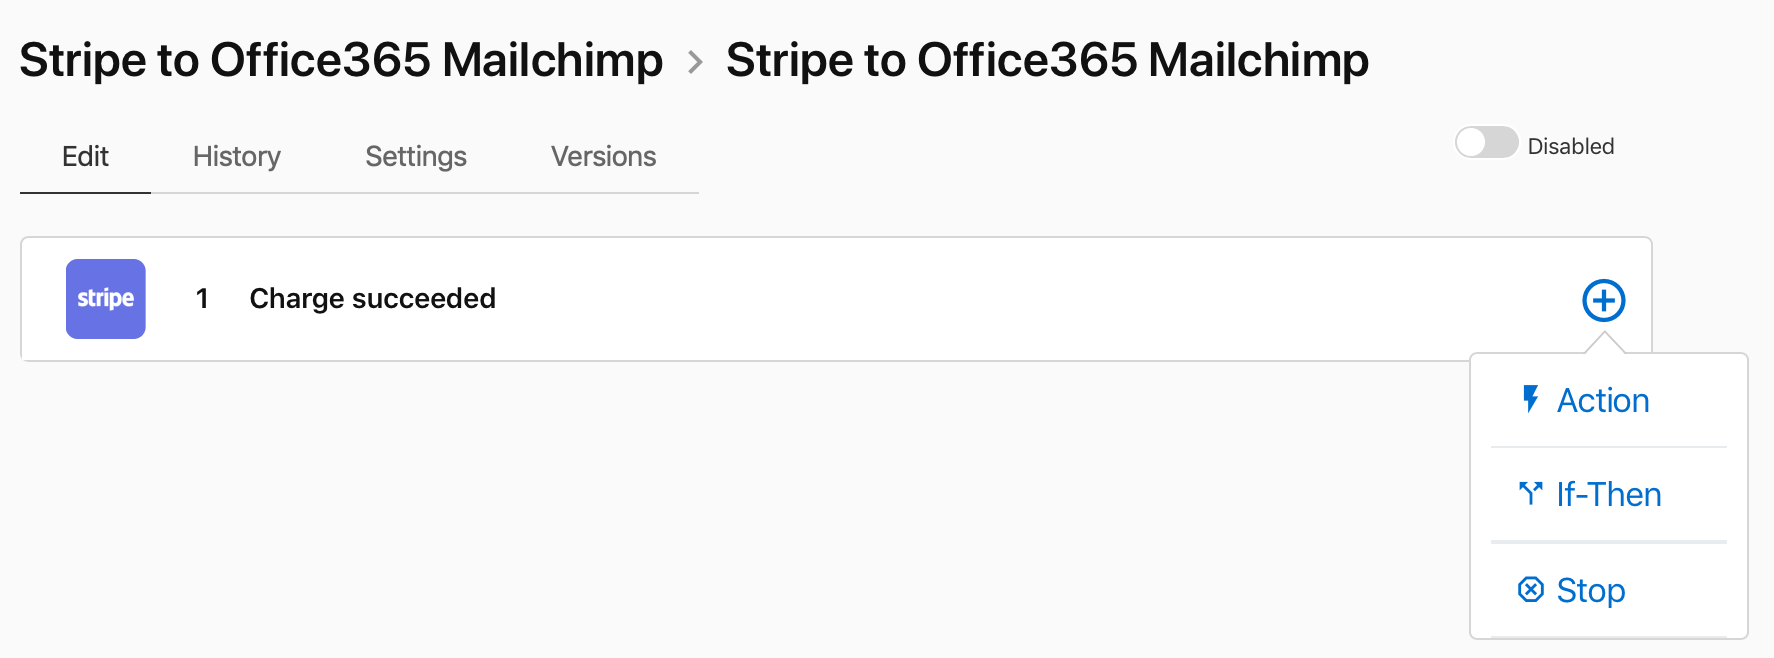
Phew! That's our trigger set up. Now we can set up some actions to occur when this flow executes.
Using A Utility App To Perform A Calculation
The first thing we need to do is use a Utility app to convert some Stripe data for us. Stripe handles transactions in cents but we really want to see them in dollars, so we're going to use a calculation step to do the math for us. Now that we've seen a intro to the interface, we're going to move a little quicker:
- Click the Action button on the end of the Charge Succeeded row.
- Under the Utilities section, click Calculations Utility.
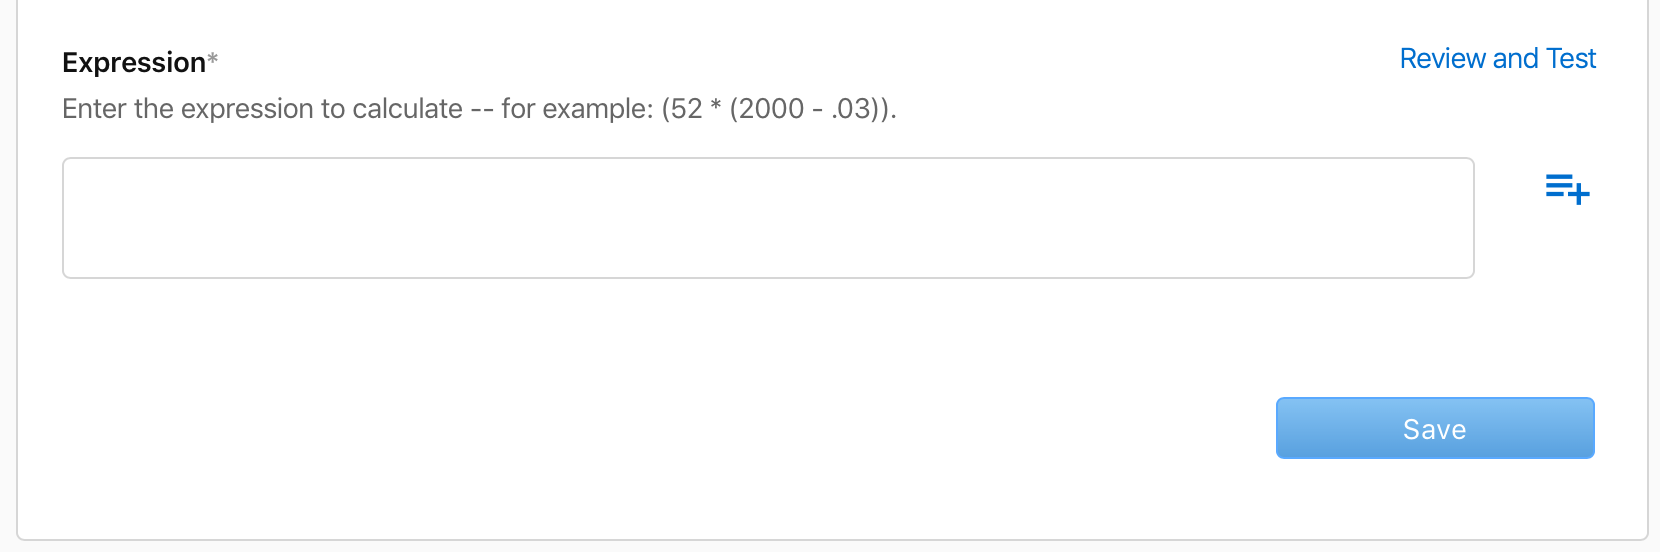
- We're going to use the last one in the list, Calculate Expression. Select that and hit Continue.
Ok, now we're going to use what's called Step Data. When Stripe sent the webhook, it included details about the transaction and we have these saved in our flow. To get to it, you click on the plus symbol on the end of the Expression row as below:
After doing that, click on the Charge Succeeded dropdown that appears and go looking for the "amount" value. When you find it, just click it once and then click away from the list of step data. After the amount, add " / 100" to divide the amount by 100. It should be looking like this:
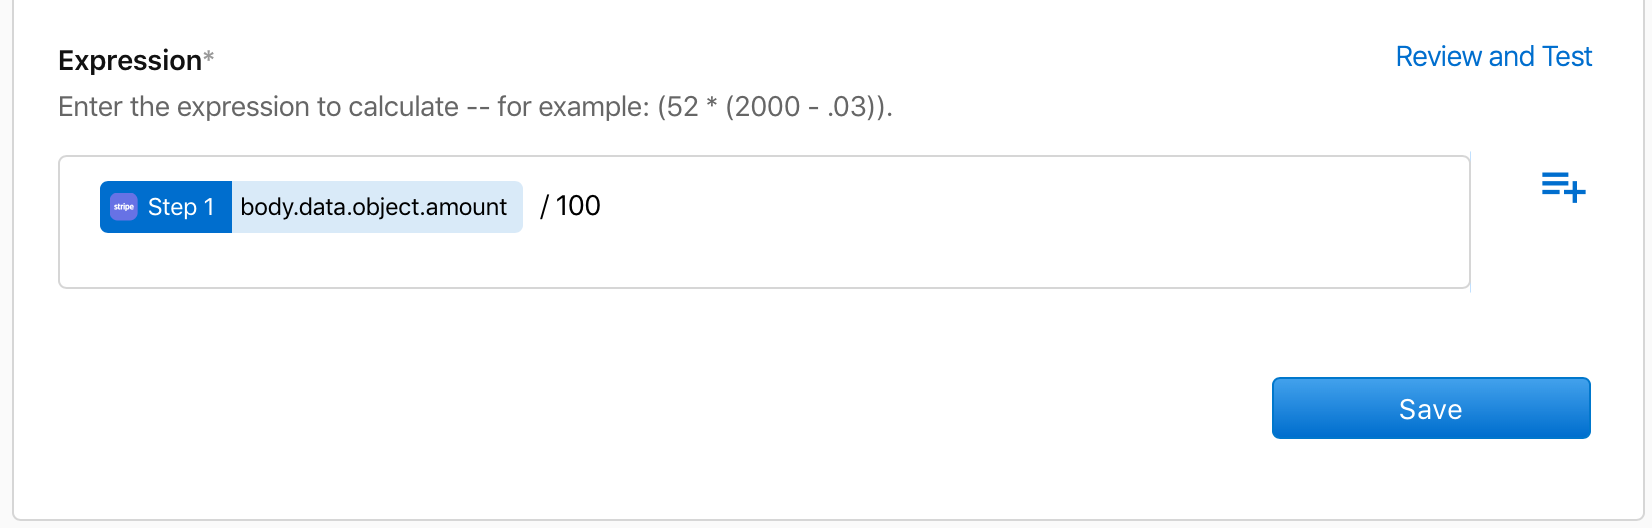
Click Review and Test and then Test Action. This is important because we need the step data to refer to as we build our next steps. Now, whenever we want to refer to the amount of the payment, we'll go back and select the calculated amount rather than what Stripe sent into the flow.
Use Office365 To Send An Email
Right then. Time to do some actual stuff and make things happen. We're going to send an email to accounting with some info about the transaction that just occurred. We'll use Office365 for this:
- Hover over the plus button on the end of the Calculate Expression step and click Action.
- Choose Office365 and you'll see all the possible actions. Choose Send An Email and click Continue.
- Click the Connect New Account and authenticate with your Office365 details just like we did before.
- Once that's successful, you can continue. You'll be presented with all the email options to complete.
- Subject: We're going to keep it simple and put "New payment received".
- Body Type: Select either text or html. Again we're going simple and choose text.
- Email Body: We're going to use step data again here and build the expression "A new payment in the amount of $" [step data: value from calculation, step 2] "was received from " [step data: email address from Stripe, step 1].
- Email recipients: Add the address you want the email to go to.
- Hit Save!
- Go ahead and test this step to ensure it works.
We're done on the email front. Easy, huh? Your Email Body section should look something like this:

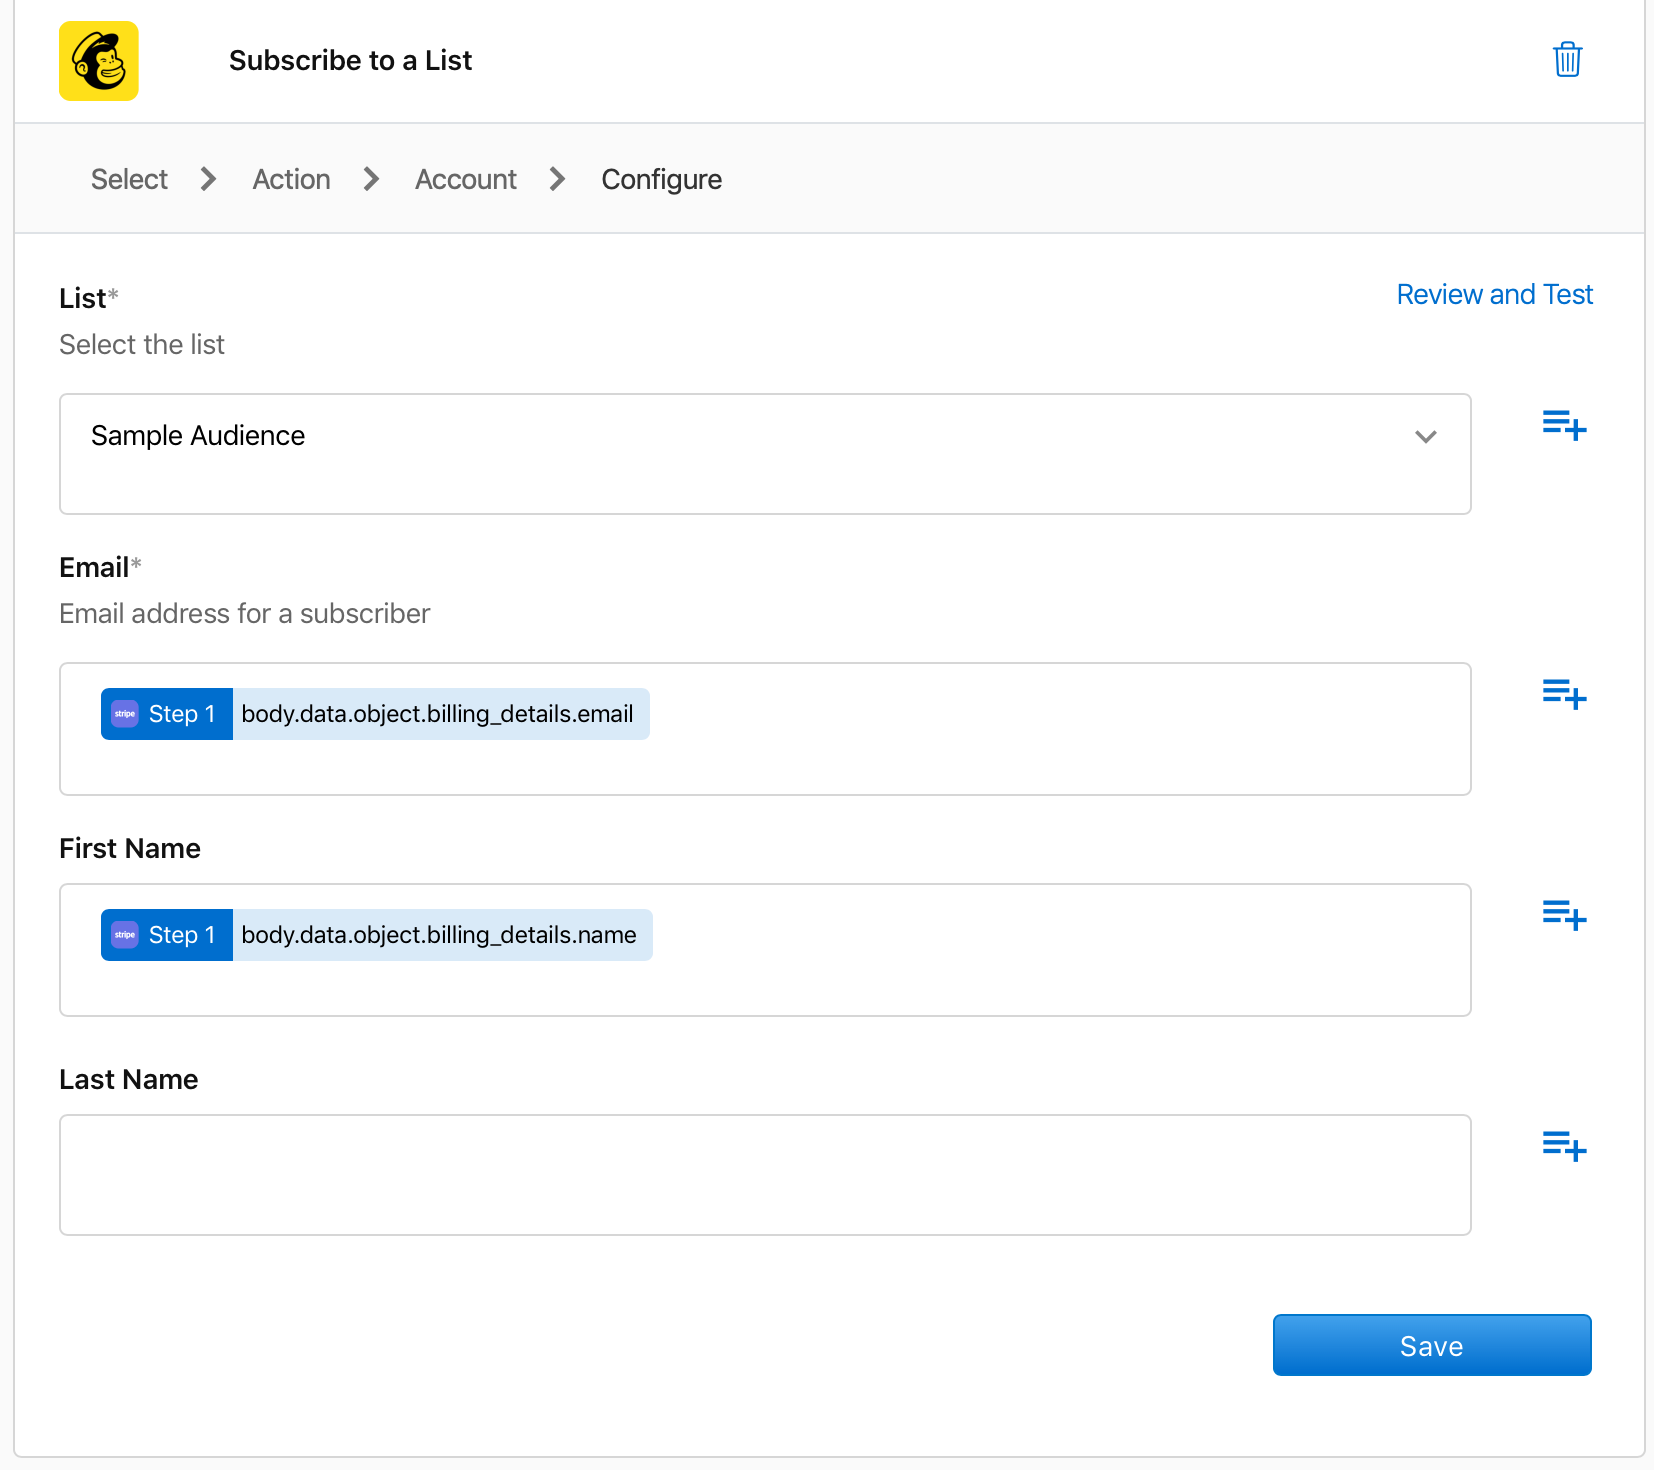
Add An Email Address To A Mailchimp List
We're nearly there... Wouldn't it be great if we could add the email address of the person who just paid to our Mailchimp list without exporting them from Stripe and importing them into Mailchimp? Oh wait, we can in this flow!
- Add a new action just like before.
- Choose Mailchimp and then in the possible actions choose Subscribe To A List.
- Connect a new account as we did previously.
- Choose the list you want to add the address to.
- For the email, again use step data from Stripe Step 1.
- And if you got their first and last name during the Stripe transaction, add those with step data, too.
Your Mailchimp step should look something like this:
And that's it. We're done building our flow. Hit Save. You could go on and on adding more steps, doing whatever you need to do based on your workflow and business needs. You can add conditional branches. Maybe accounting only gets the email if the payment is over a certain value. Maybe you post the payment to QuickBooks or add an event to Google Calendar. Maybe you even send something to your FileMaker database, because you've got one of those, right?
Enabling The Flow
Once you are done with building your steps, there's one last thing you need to do: enable the flow. See the tiny "Disabled" toggle in the top right below? Switch that on and wait for magic to happen!
Conclusion
Everything we have done here has literally taken a few minutes. You'll probably spend longer looking for the credentials to the various services you want to hook together than actually creating the flows and improving your business processes. That said, there are some caveats in terms of trapping for errors as you move through each step so this isn't the whole story, but to have coded this directly with the APIs of the services would have taken days and days.
Claris Connect is stunningly easy to use and we hope this post, while long, has inspired you to check out the free trial and give it a whirl. If you need help with licensing or want to discuss your business workflows and how Claris Connect can dovetail into them, contact us. We'd be glad to help you embrace the API economy with ease.


