

Intro to Claris Connect Part 2: Creating A Conditional Flow
Using the power of conditional logic to create more complex flows
In part one of our introduction to Claris Connect, the new IPaaS solution (Integration Platform as a Service) from FileMaker parent company Claris, we took a look at creating projects and flows. Sometimes, though, business workflow and logic isn't as straightforward as the examples we used in that article. Many complex business rules require different outcomes based on certain conditions. Well, Claris Connect has you covered! Unlike some other IPaaS solutions, Claris Connect has the ability to create conditional logic and dictate the route of a flow as needed. Let's check it out.
Assumptions
We're going to make some basic assumptions before we move on. If you haven't covered some of these steps yet, we've provided links to assist you in getting them sorted out. Then you can come back here and pick up right where you left off.
- You have a FileMaker ID and have signed up for the Claris Connect trial or a paid package.
- You're logged into Claris Connect
- You understand what a Project, Flow, Steps and Step Data are.
If you're unsure about any of the above, check out our previous blog article Intro to Claris Connect Part 1: Creating A Project & Flow and that should introduce all these concepts to you and get you on the right track.
The Conditional Flow
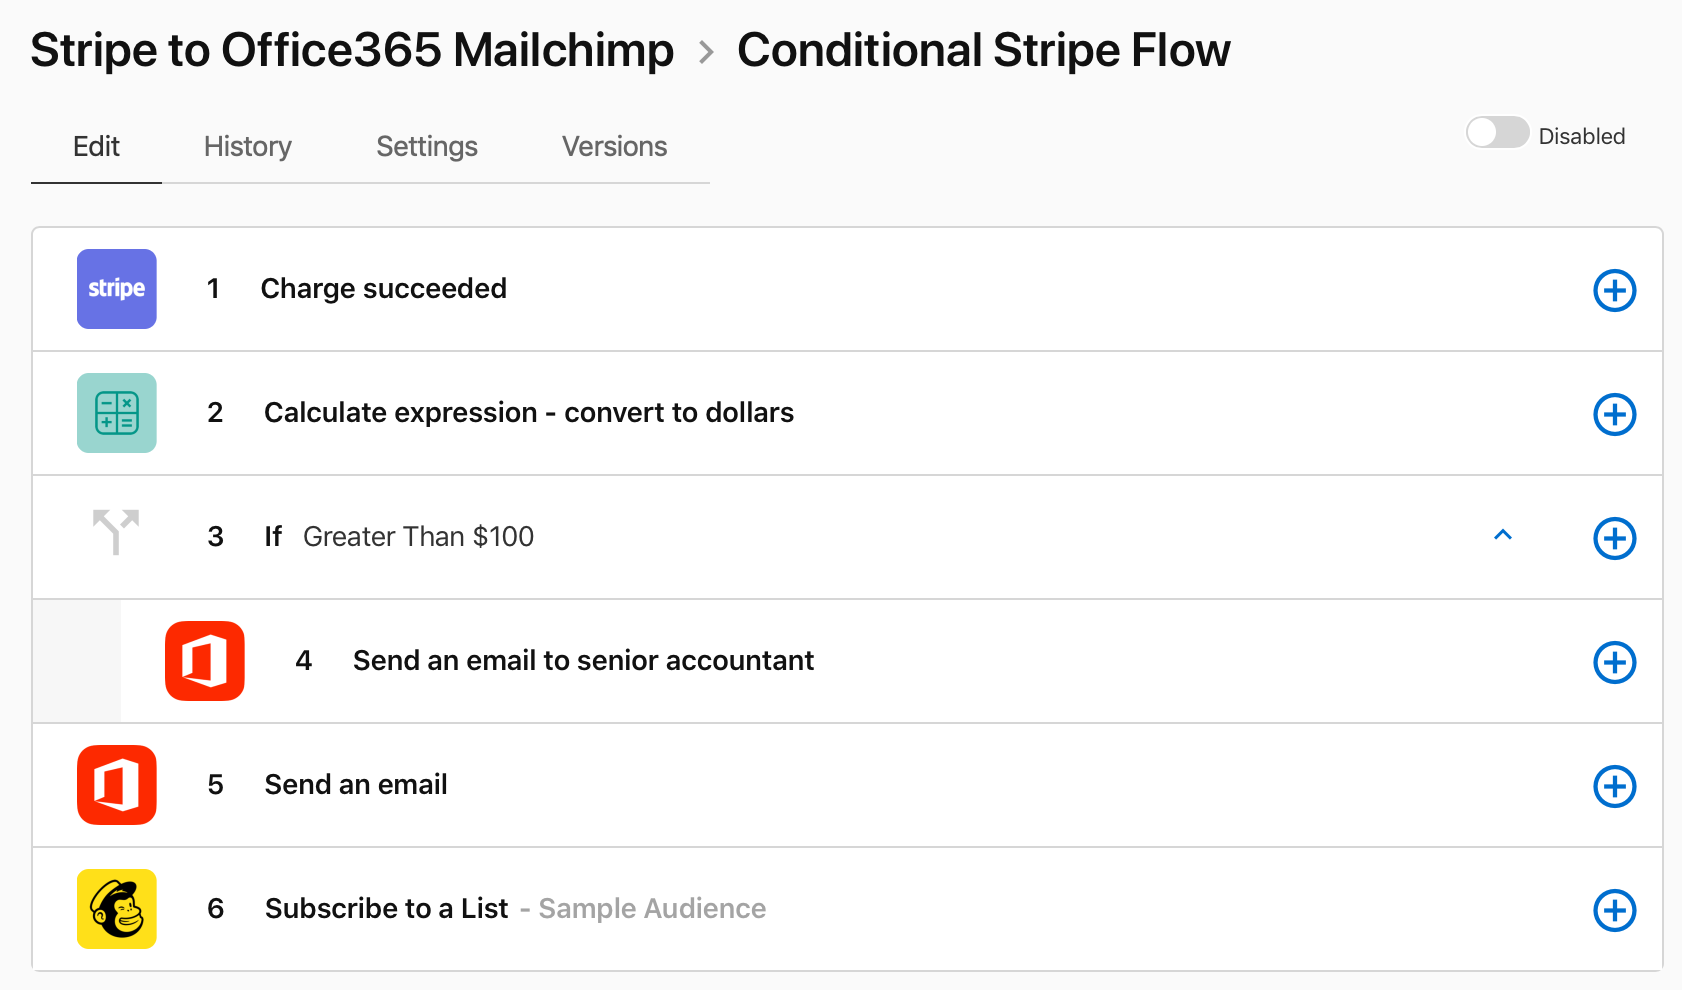
We're going to base our conditional flow on the last flow we built, as it'll make it simpler to demonstrate. Generally, though, the principle behind any conditional flow will be the same no matter what apps you're integrating.
So, in summary, we're going to:
- Use a Stripe payment as the trigger.
- We'll convert the value to dollars.
- If the value is more than $100, we're going to send an email to the senior accountant.
- If the value is less than $100, we'll send one to the junior accountant.
- Then we'll add the email address to our Mailchimp list as before.
Step 1: Duplicate The Previous Flow
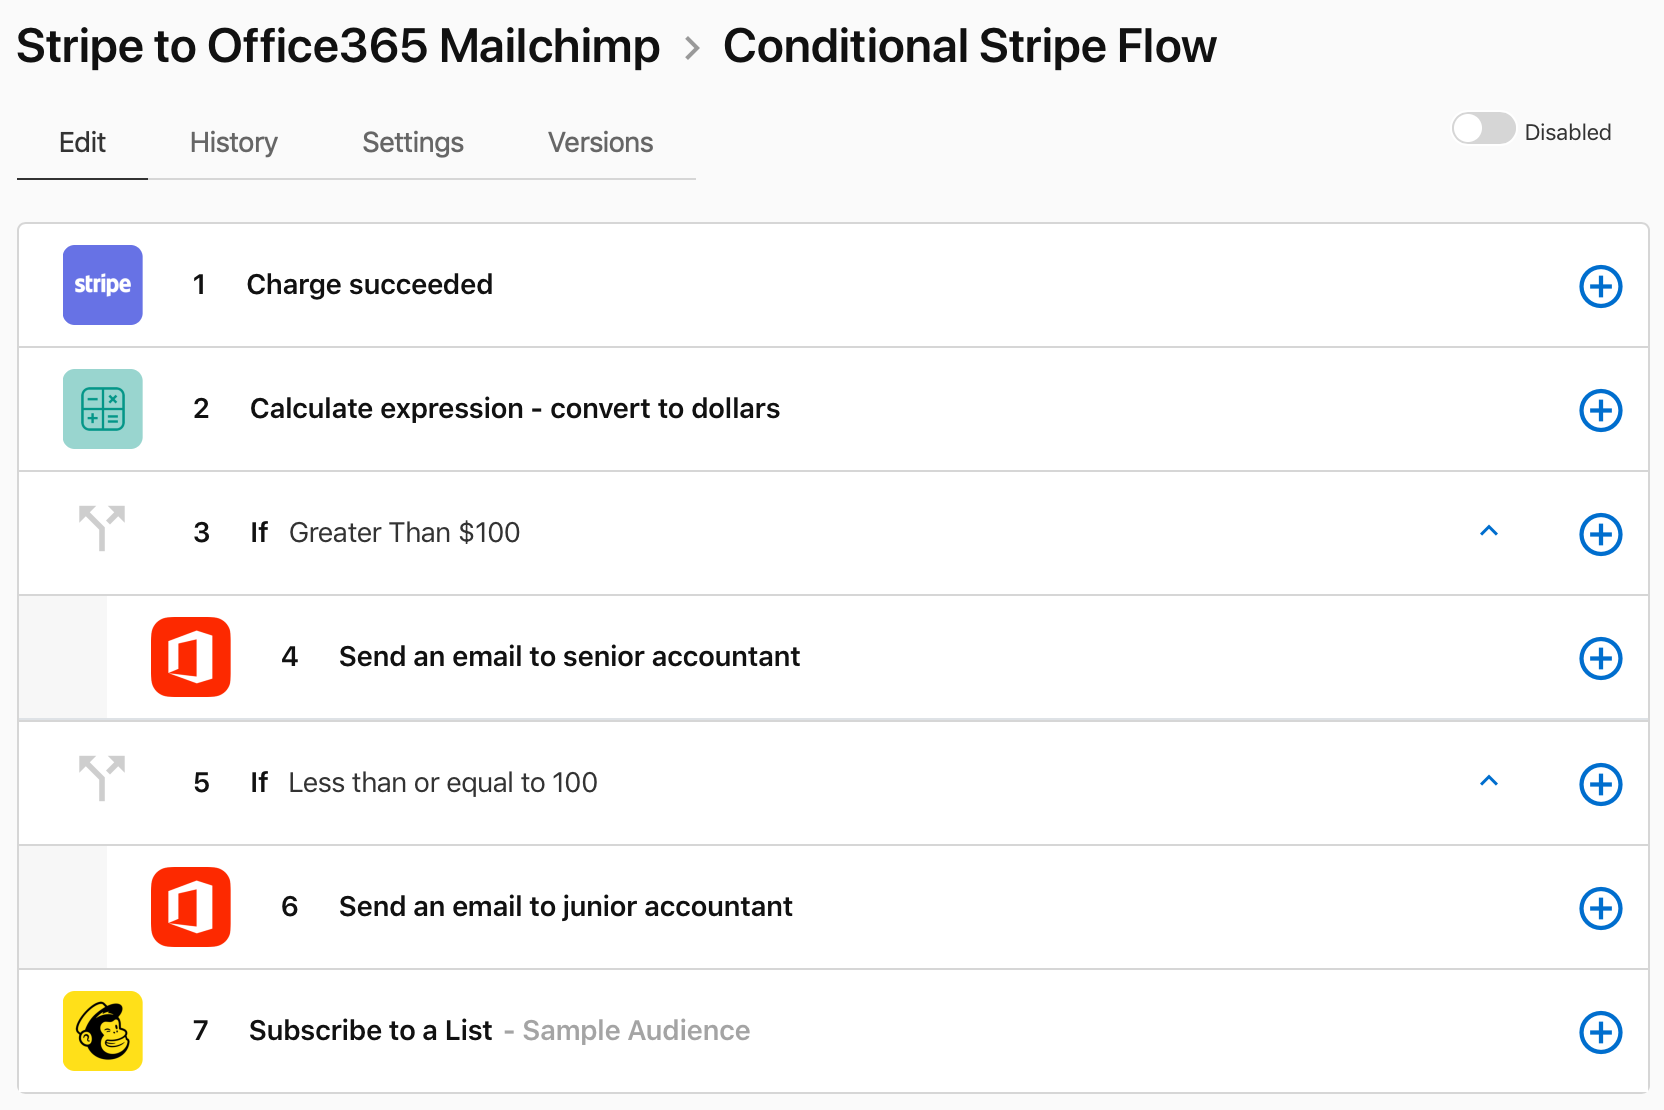
To save time, we're going to duplicate the flow we built previously. But before we do, let's disable the previous flow so we don't have both running. Click the blue toggle button to do this. Then hover over the three dots on the end of the row and choose Duplicate.
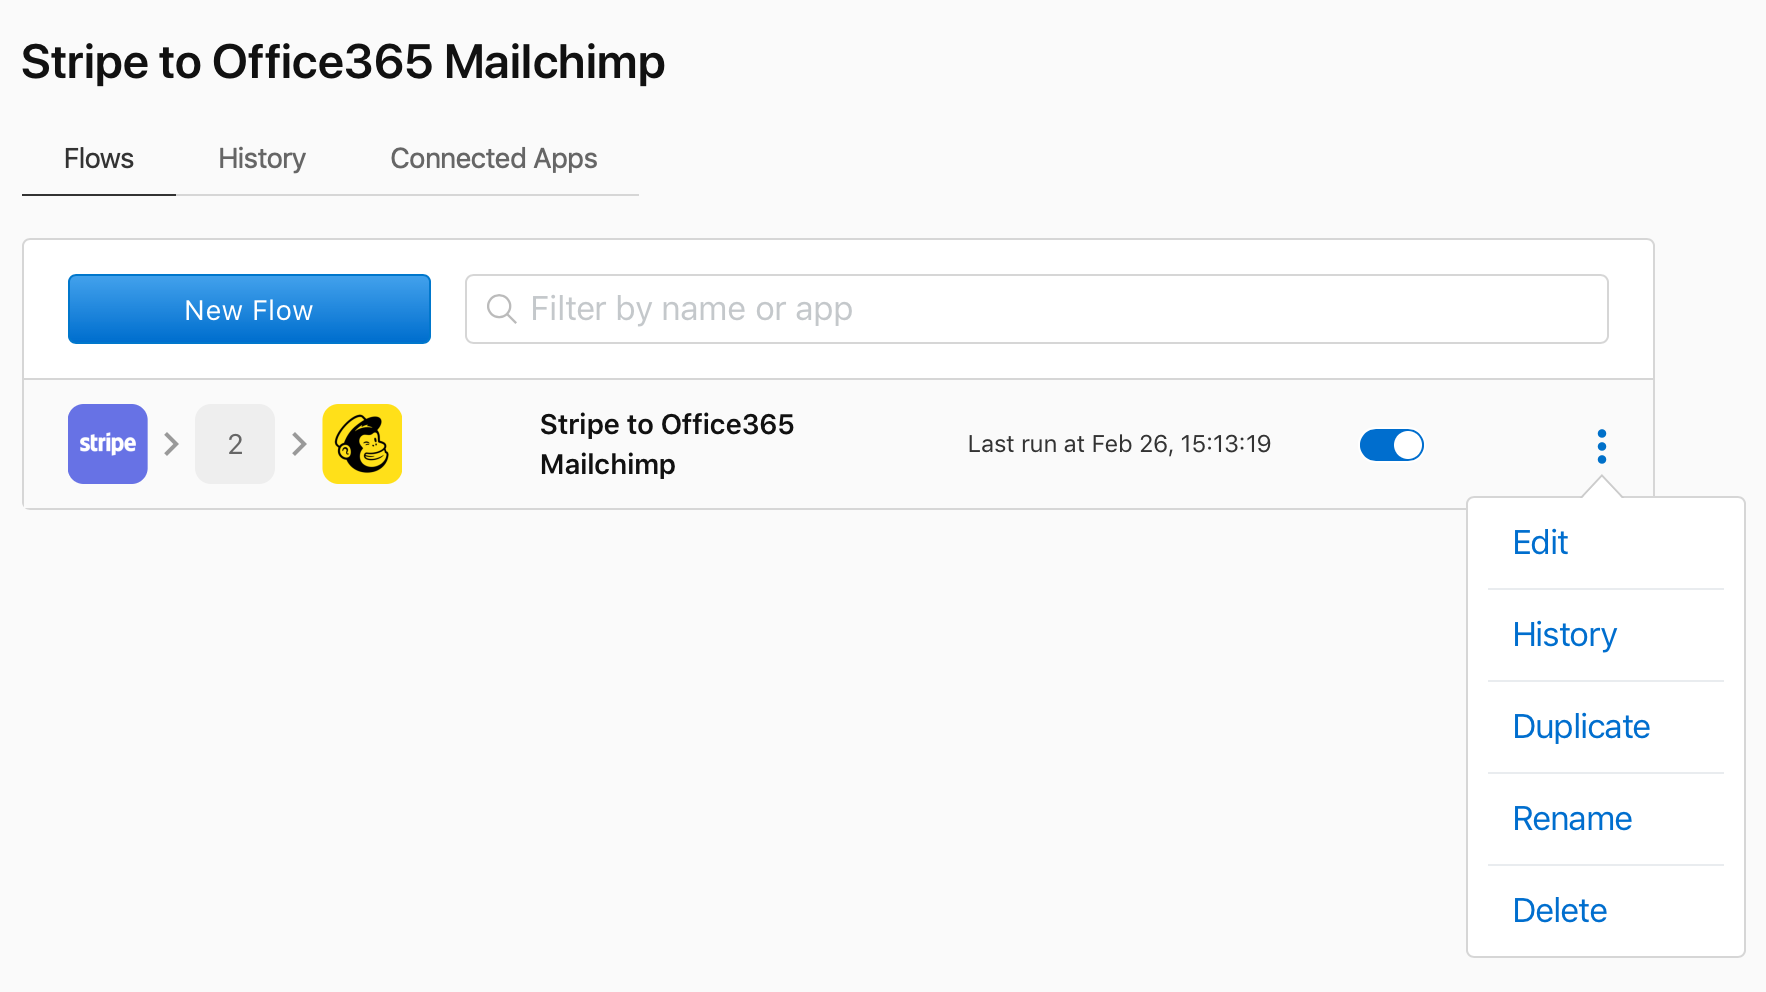
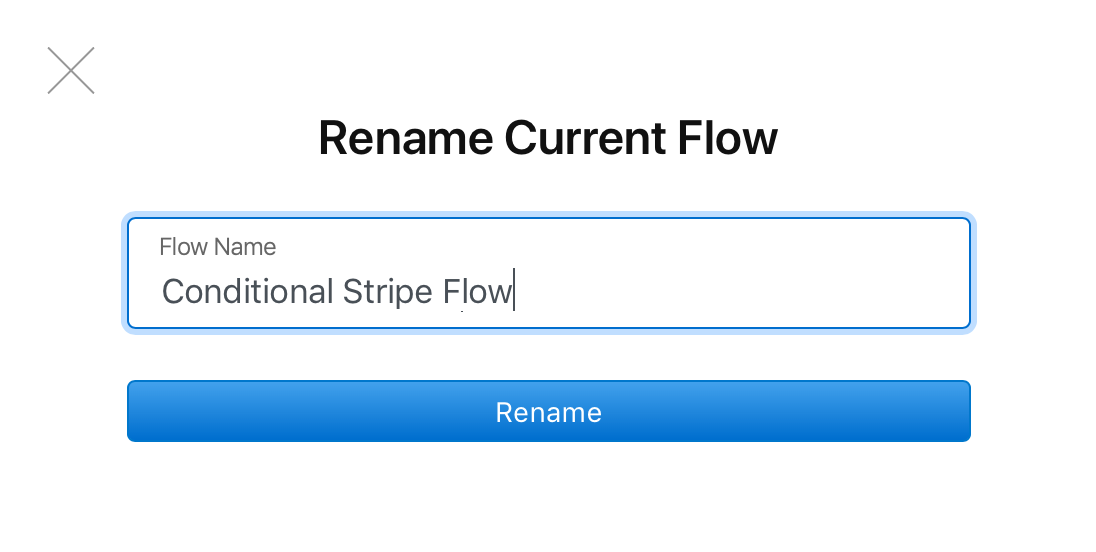
Let's go ahead and rename our flow by again hovering over those dots and choosing Rename.
Step 2: Create The First Conditional Step
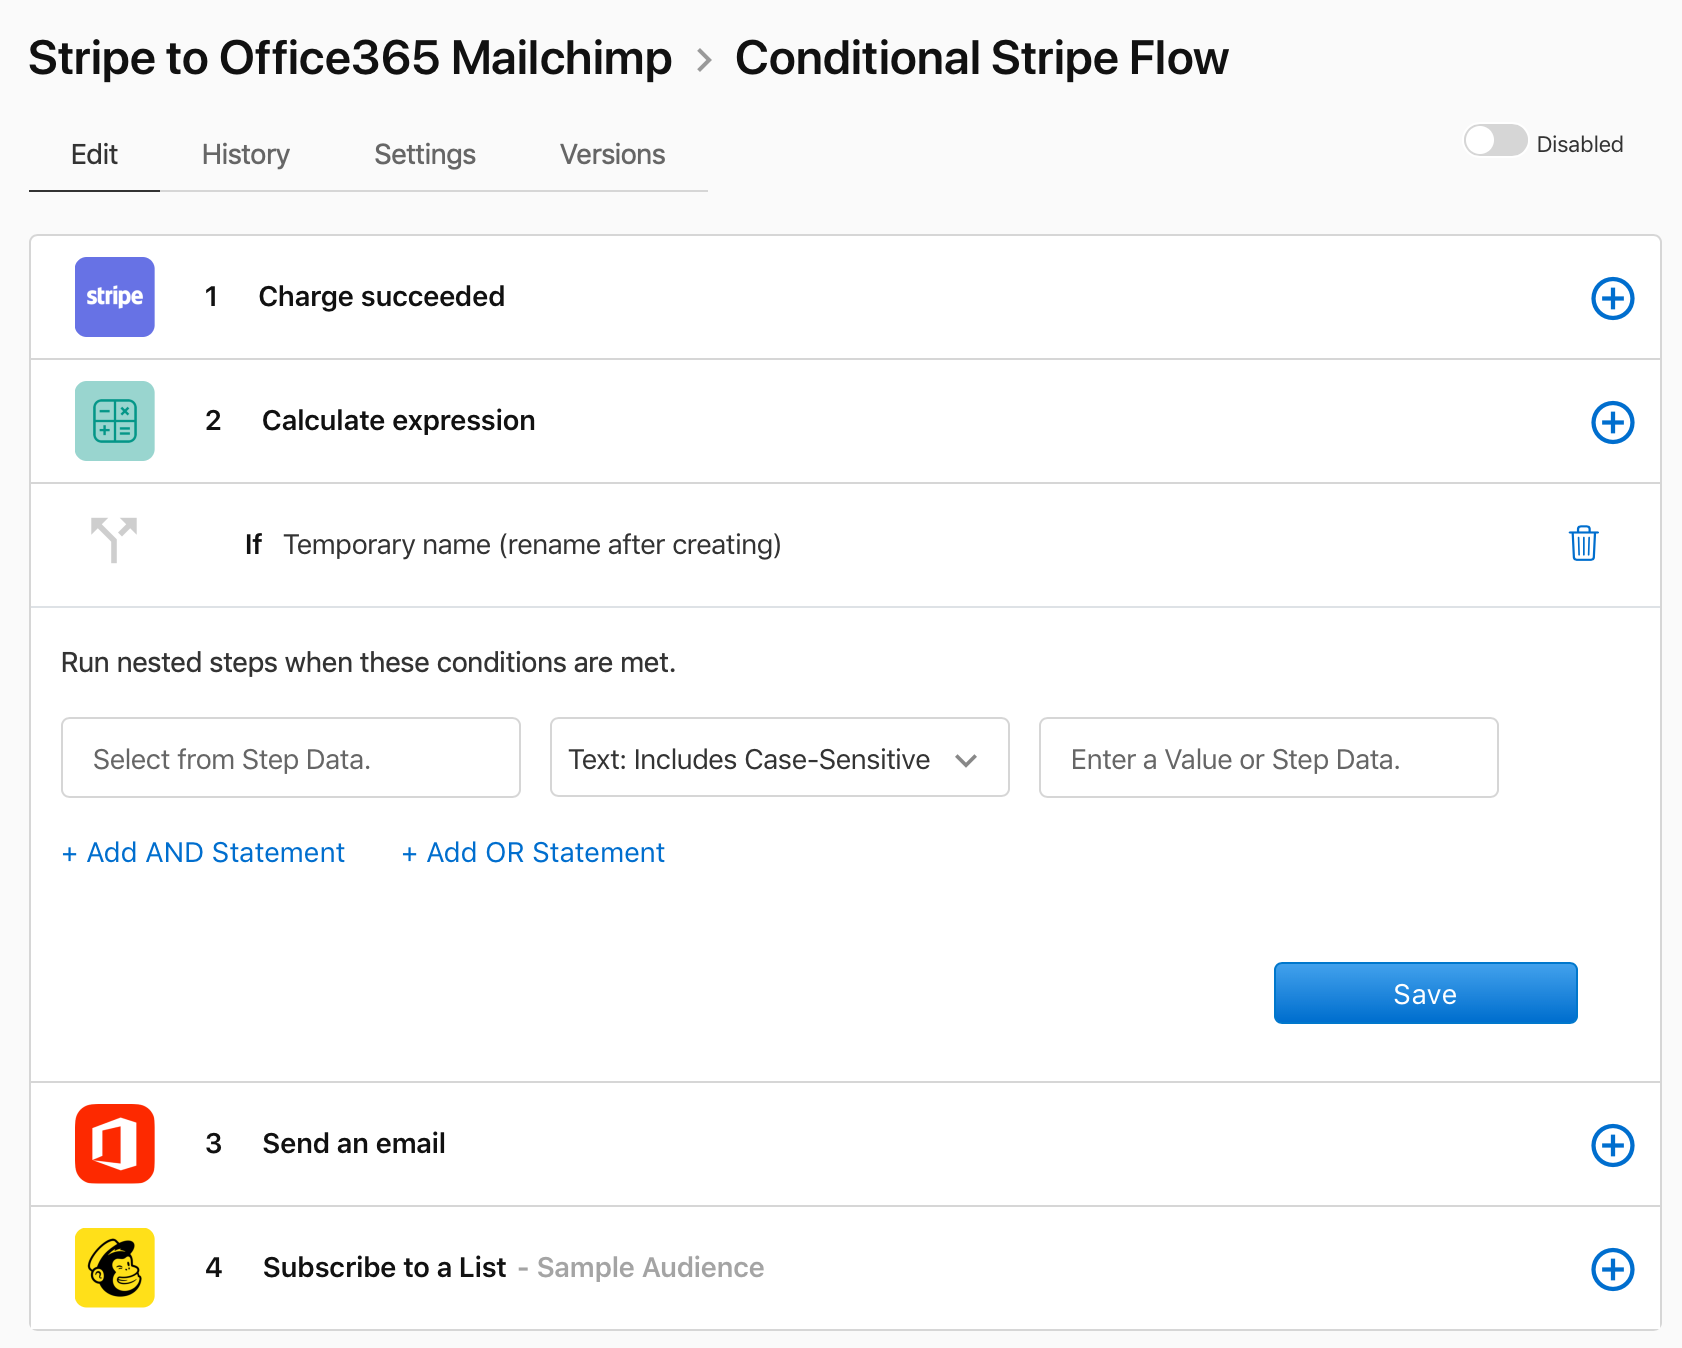
We'll leave the flow disabled for now. Click on the renamed flow to view the steps within it. Next, we're going to insert our conditional logic right after our calculation in Step 2. Hover over the plus sign on the end of Step 2 and click If-Then.
In the box labeled "Select from Step Data", we're going to choose our calculated result from Step 2. This converted the Stripe cents value to dollars. So, click into the box, click the row and then click the word "result".
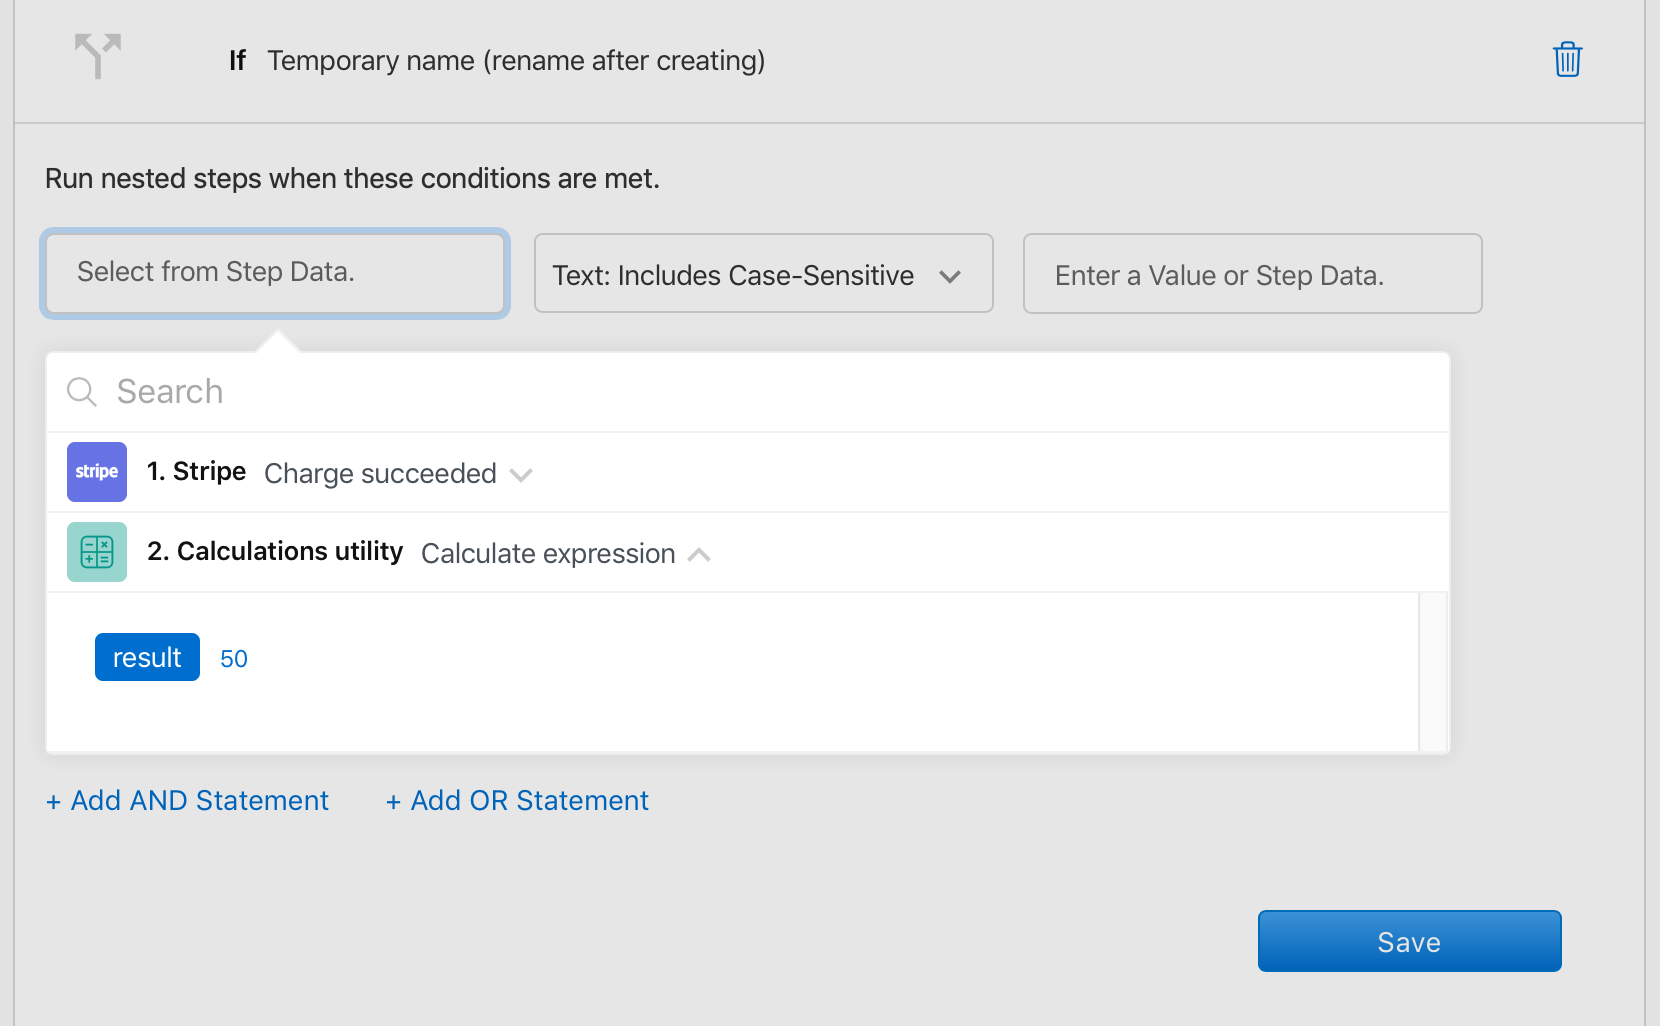
In the second box, it probably says "Text: Includes Case-Sensitive" which is just the default condition when the step is created. We want to know when our Stripe value from the calculation step is greater than 100, so click the drop down and scroll until you find "Number: Greater Than". As a quick tip, once you get used to these values, you can start typing in the box to filter the list.
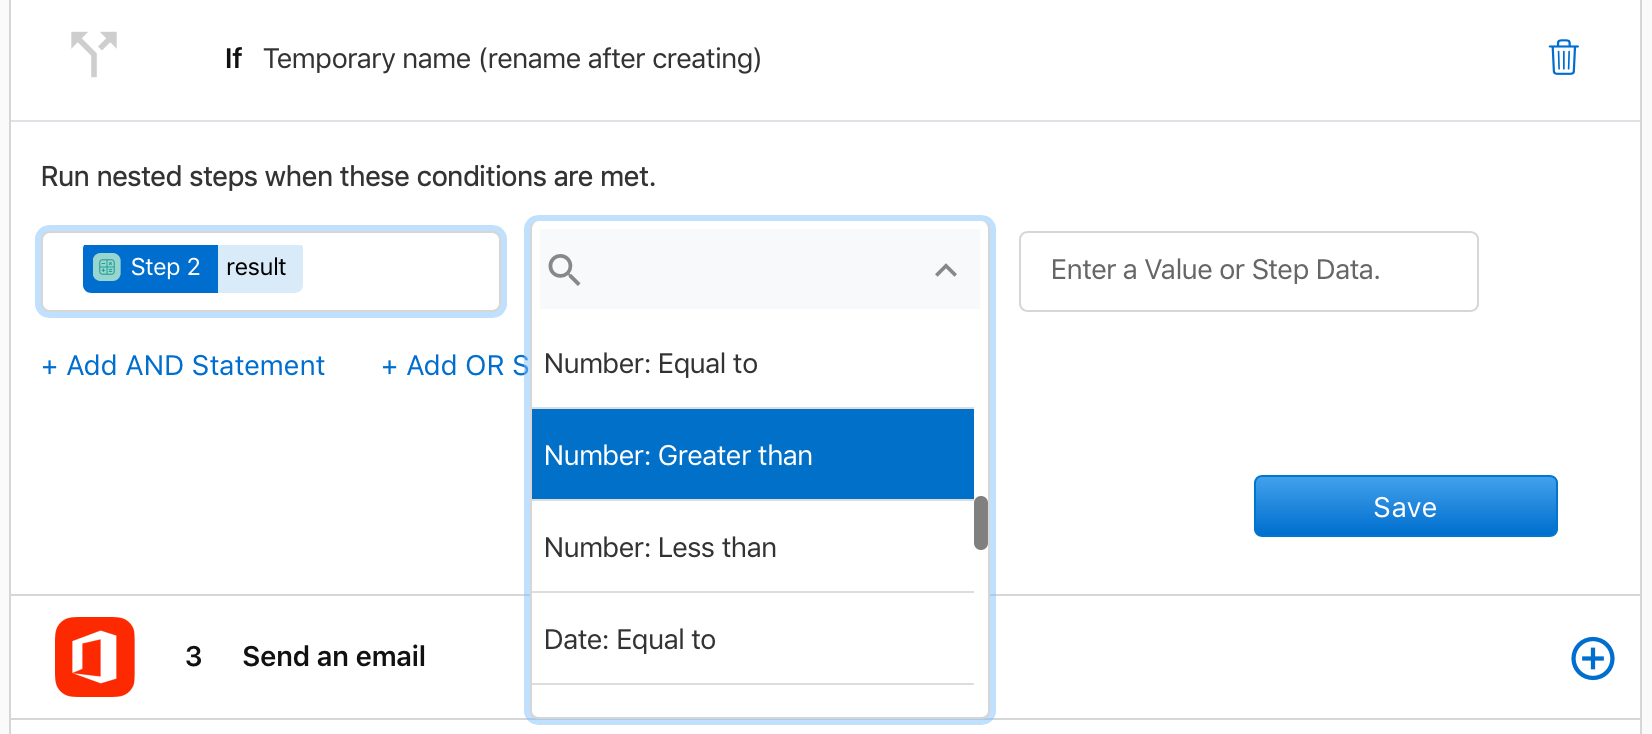
Our final box is the value we want for the condition to be met. In our example it's 100. Type that in the box and hit Save. Note that it is possible to use Step Data here, too, so if you had a more complex flow you could create the If-Then step to be "[Step Data] is greater than [other Step Data]". And you can create multiple conditions of either an AND nature or an OR nature, so the conditions can be as complex as you need them to be.
Step 3: Create The Nested Step
Now if you click the plus sign on the end of the If step we just created, and choose Action, you'll see a nested placeholder step for an action to be taken when the condition is met.
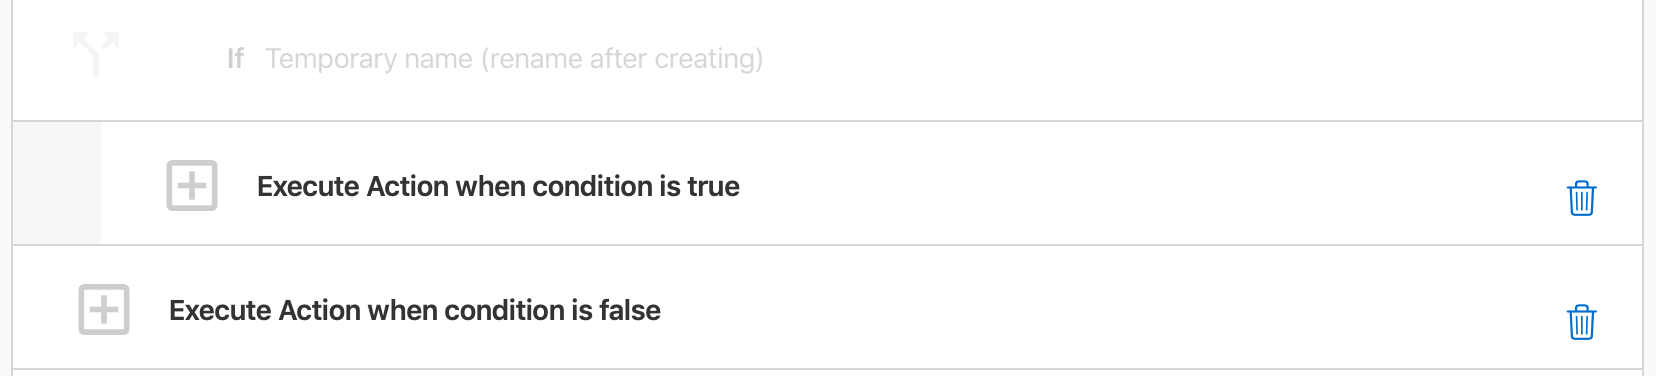
Go ahead and click on the Execute Action When Condition Is True and then you can configure the action to take. In our case, it will be to send an email to the senior accountant. As before, we can use Step Data in the email body to indicate the actual amount and the email address of the person who submitted the payment. And since our flow is getting more complex, let's rename our steps so we know more about what each one is doing. Just hover over the plus button on the end of the rows, choose rename, and add something meaningful.
Step 4: Create The Second Conditional Step
At this point, our flow isn't going to work as it should. If we get a payment of over $100, we will email the senior accountant, but we will then send another email in step 5. We could stop the flow after sending the email to the senior accountant, but then we wouldn't end up adding the email address to our Mailchimp list.
To fix this, we want to have another condition that says the following: if the value is less than or equal to 100 then email the junior accountant. Hover over the plus button on step 3 (our first conditional step) and select If-Then. We want to choose the option "Execute If-Then when condition is false".
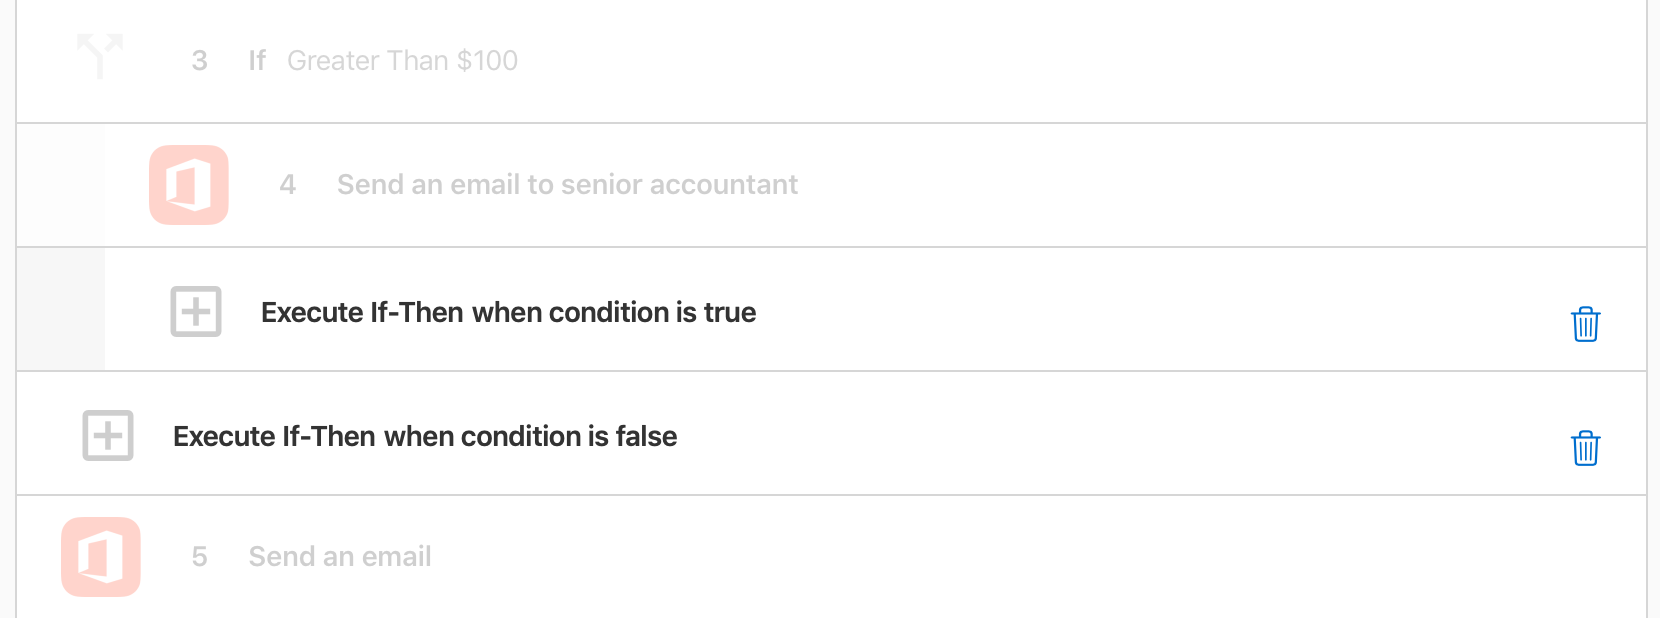
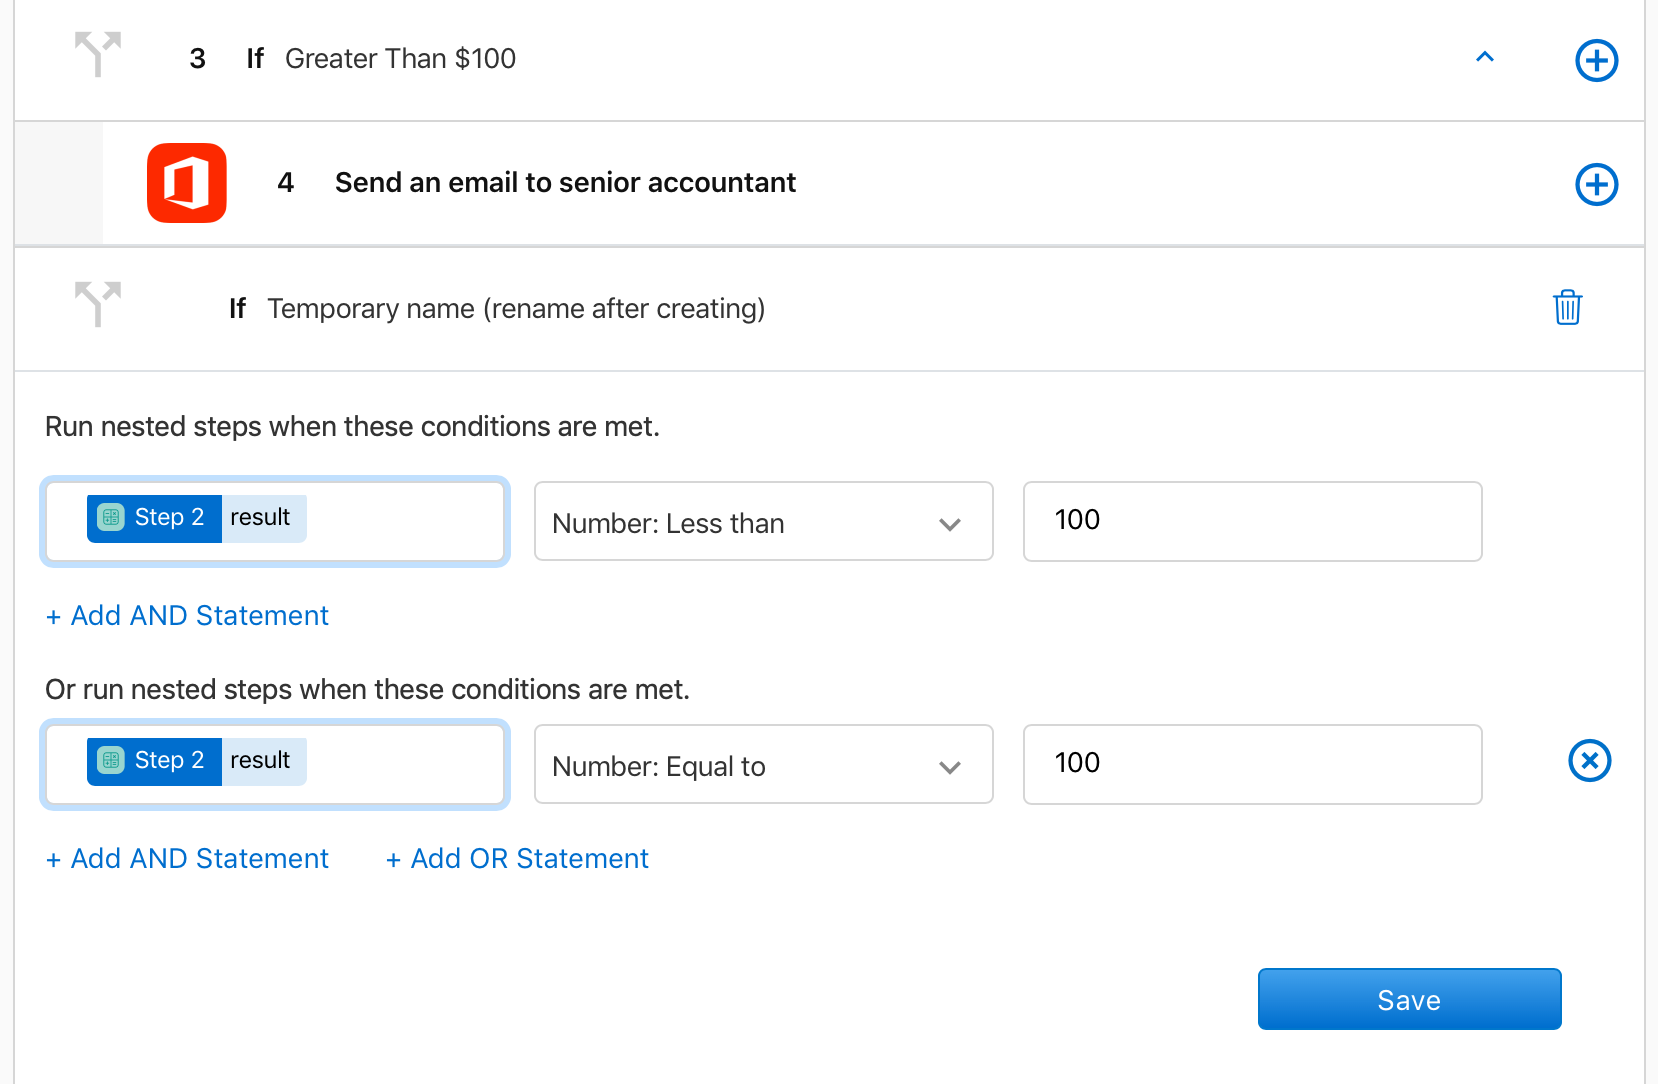
After clicking it, you'll see the same type of formula builder as we had above. Fill this out using the step data from the calculation step. Then choose "Number: Less than" and 100 as the value in the third box.
But wait, what if the amount is exactly 100? Our first condition is greater than 100 and our second is less than 100, so no email will be sent. We can fix this by adding another condition to our same step here. Click the Add OR Statement text and fill this out using "Number: Equal to". Now we have all the possibilities covered.
Hit Save and then rename your steps again. Now that we have another condition set up, we could click on the plus button and add a send email step just like we did before. But we already have our email step defined, it's just not inside the condition. We could delete it and set up a new one or we can just click, hold and drag that step up and slightly to the right. Let go and it'll drop inside the condition and be indented just like our first one! Remember to double-check that email step to make sure it's doing what you want it to. We're done! Don't forget to enable the flow before testing it out.
Conclusion
Once again, it's been very easy to set up our flow, using conditions to make one thing happen under one set of circumstances and another under a different set of circumstances. We've not trapped for errors yet, so keep that in mind. Still, the power and flexibility of Claris Connect shines through in this example. You can create any kind of flow you want in order to automate your business processes across a variety of different platforms.
If you need help with licensing or want to discuss how Claris Connect can help solve issues in your business, contact us and we'd be glad to help.


