

FileMaker Server on Amazon Web Services: Part 2
Launching an Instance and Installing FileMaker Server
The second part of our FileMaker Server (FMS) on Amazon Web Services (AWS) series focuses on launching our server Instance and getting FMS installed and up and running. In our previous blog post, we did all that was necessary on the AWS side to set up groups, users and security prior to being able to launch our server Instance using AWS’ Free Tier option – a free cloud server as long as we stick within the Free Tier guidelines.
So, now that we have all that taken care of, without further ado, let’s launch and connect to our server in the sky…
Step 1: Launch a Windows Instance
To run FMS we need to use a Windows Instance. FMS will not run on Linux or any other offerings from AWS. So, head over to the AWS Console and click on EC2 under the Compute section.
Be sure that your region selected (in the top right of the screen) is the same as the one we used in our previous post to create the key pair and security group. Then click on the big blue button that says Launch Instance.

A plethora of options for our Amazon Machine Image (AMI) awaits us. This essentially boils down to what server operating system do we want – to reduce the list a bit and, because we’re just checking out AWS using their Free Tier option, to ensure we don’t get charged by selecting something by mistake, click the check box on the left that says Free Tier Only.

There’s still quite a number to choose from, but as above we know we’re limited to the Windows Server versions so we can ignore the rest. And FMS is going to narrow down the field further for us.
As of the date of this post, the official line is that FileMaker Server 13 is supported on Windows Server 2012 Standard Edition (64-bit) and Windows Server 2008 (Standard & Enterprise) R2 SP1 (64-bit). So, we’re going to opt for Windows Server 2012 Standard Edition (64-bit) – note not the R2 version.
After selecting our server operating system, we’re presented with a list of Instance Types – essentially how powerful a server do you want to run. We’ll be selecting the only Free Tier option, which is the t2.micro Instance.
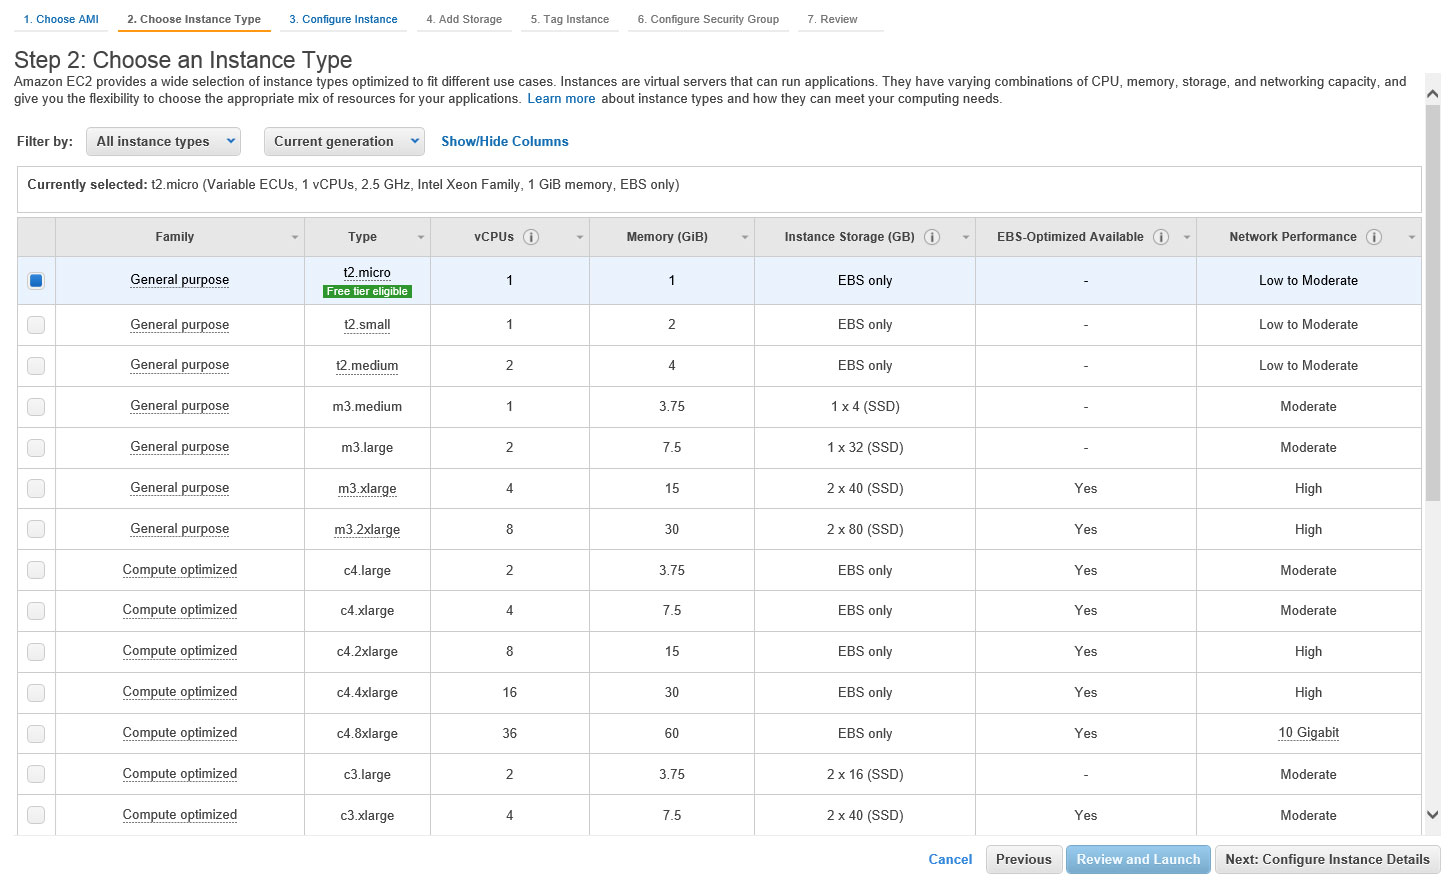
Click Next: Configure Instance Details – we chose to leave these settings at the default values. Note some options will result in a charge.
Click Next: Add Storage – Free Tier accounts get 30GB included and it should default to this value. Sounds like a reasonable amount, but the Windows Server 2012 Standard Edition (64-bit) operating system is going to consume more than 20GB of that. Still, for our testing purposes 30GB is sufficient.
Click Next: Tag Instance – we’re not going to concern ourselves with this for now.
Click Next: Configure Security Group – we’ll be selecting the existing security group we created in step 5 of the previous blog post.
Now click Launch and select the key pair you made in Step 3 of the previous blog post. Your Instance will now be created and start launching. Click the blue View Instances button to check on the status. Ours was up and running pretty much straightaway.

Step 2: Connecting to your Instance
Awesome, so our Instance (or virtual server) is now up and running. But wait, where is it, how do you see it, aren’t we supposed to install FMS? Administering your Instance is done via Remote Desktop. Windows machines come with an RDP client installed. We’ll be using a PC for our demo but Mac users can download the Remote Desktop application from here.
Amazon advises that if you’re a Mac user and have trouble with that download, try the one from the App Store instead.
If you’re not already looking at your Instance, then in the EC2 dashboard click Instances in the vertical menu. If the newly created Instance is marked as running then ensure it’s selected and click Connect.
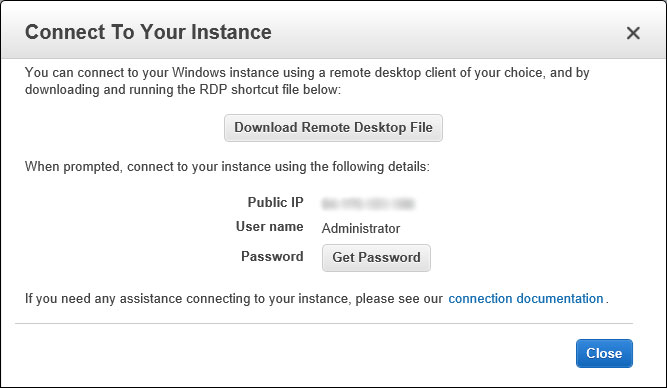
In the window that appears you can download the RDP settings – it’s worthwhile doing this as it will save having to enter all the required information into a blank RDP file.
Now we have to get the password for this RDP connection using the key pair file we downloaded in step 3 of the previous blog post. Click Get Password and locate the key pair file. We decided to open the key pair file using Notepad, copy the contents and paste into the empty box.
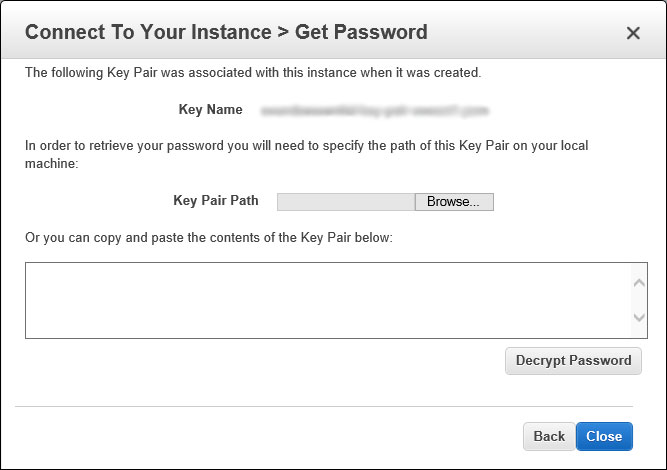
Then click Decrypt Password and Close. Your password will be displayed – take note of this!
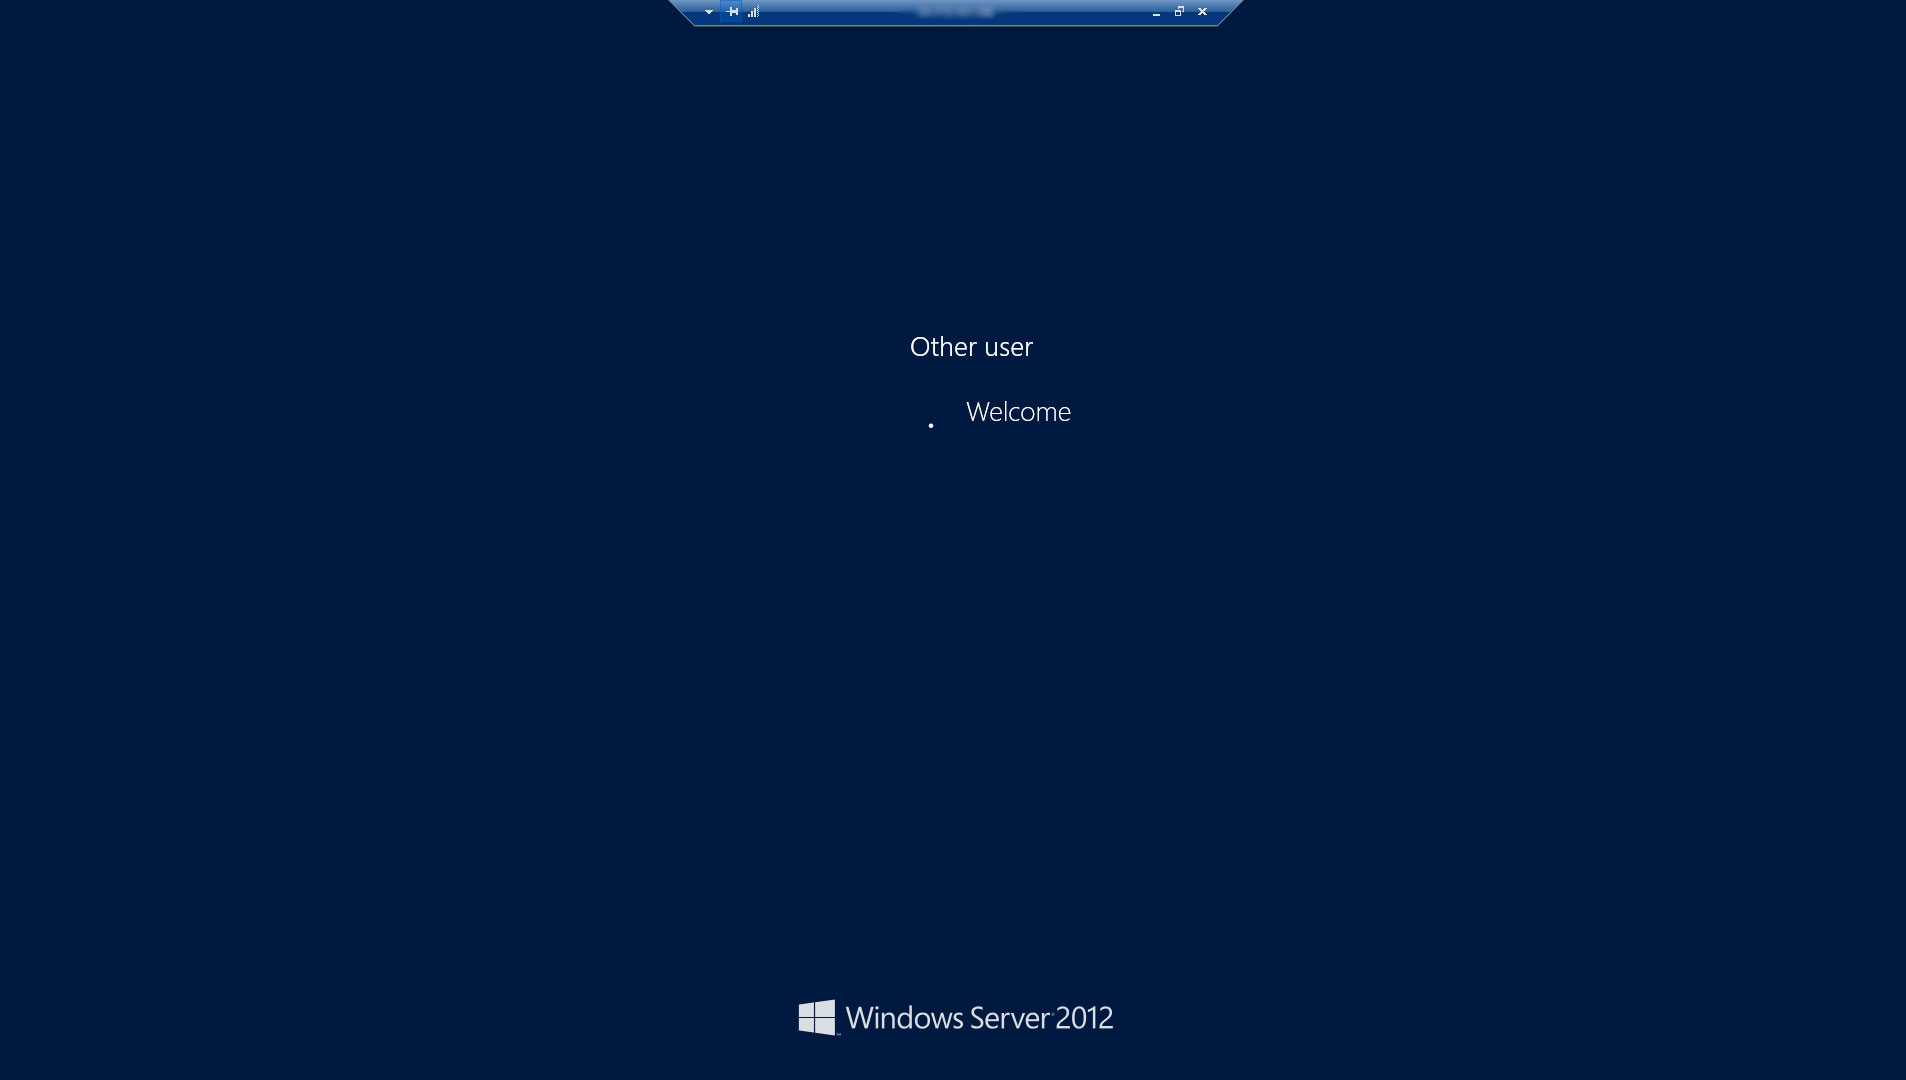
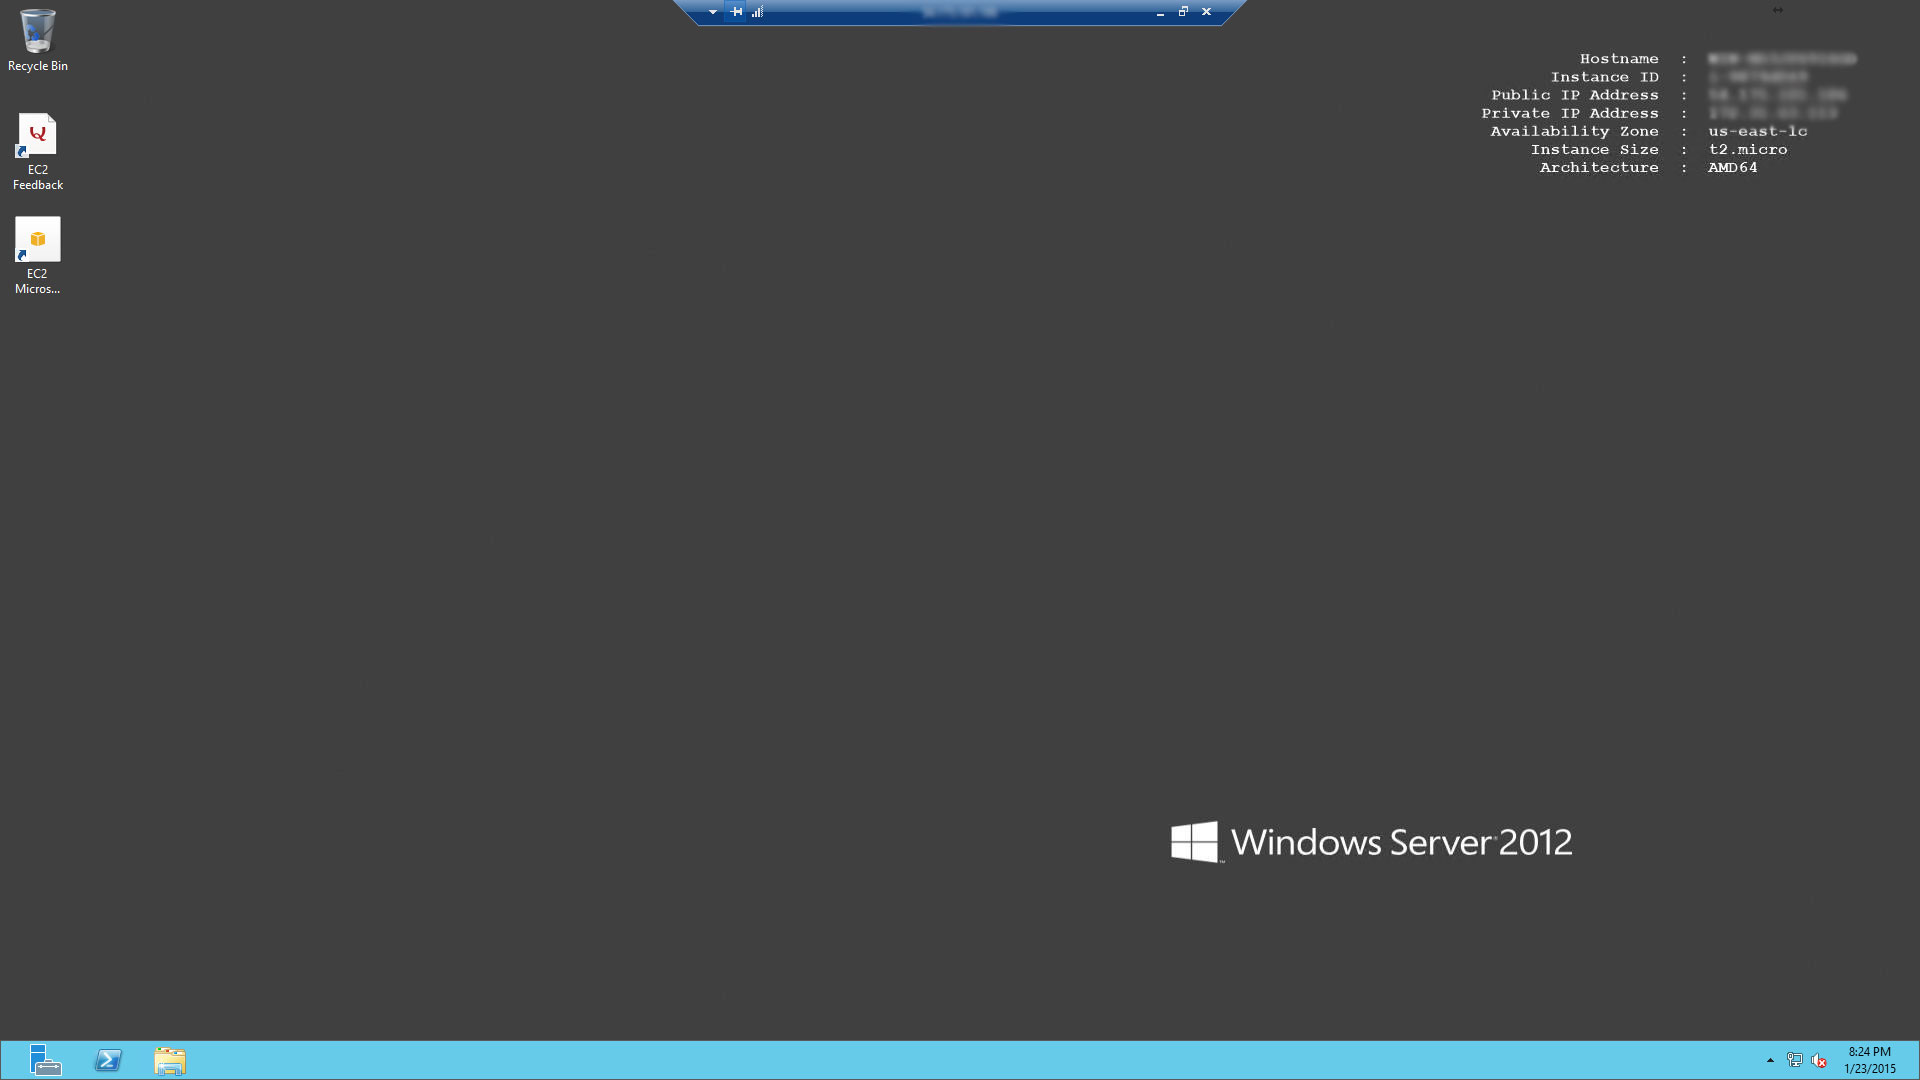
Open the RDP file you downloaded, enter your password as above and… Finally! Our server in the cloud starts its initial boot up. Within a minute or so you’ll be looking at your brand new Windows Server 2012…
Step 3: Installing FileMaker Server
This post is not a full tutorial on installing and configuring FileMaker Server, but we do need to get our install file on to our new server so we can proceed with the installation. There’s a more than couple of ways of doing this but we’ll cover two:
Using a download link:
If you have a download link for the software then you can use this. However, Internet Explorer (the default browser on the server) is fairly locked down and will prompt you numerous times to ask if what you’re trying to do is safe, and you may need to add the site you’re downloading from to the Trusted Sites list. In addition, in setting up the Security Group in step 5 in the previous post, we did not enable web traffic (port 80) so you will need to go back and do this if you want to download the install file. If downloading from an FTP site, you may need to open different ports. If you do, be sure to close the port (remove the rule from the Security Group) when you’ve finished – no point in having open ports if they’re not needed ongoing.
Transferring from your local machine:
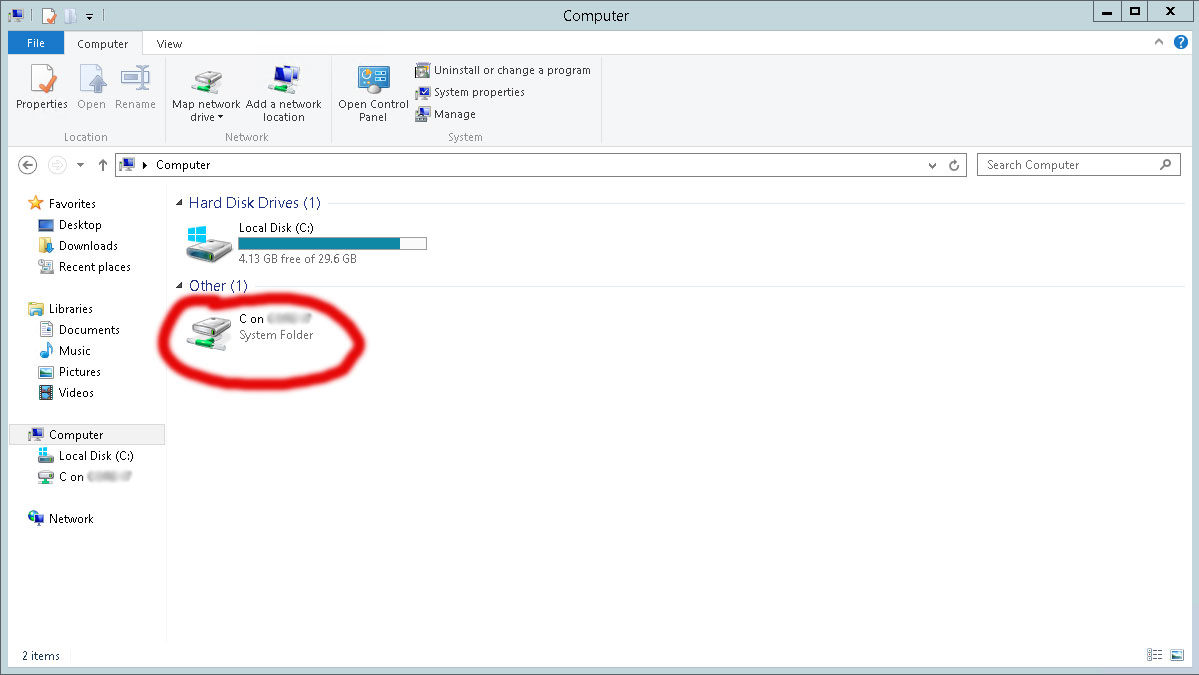
If you have the install software on your local computer, you can adjust a setting in the RDP file to have your local drive(s) show up in the remote session on the server. Right click on the RDP file and choose Edit. Then go to the Local Resources tab, click More and select the drive(s) you wish to browse while on the server.
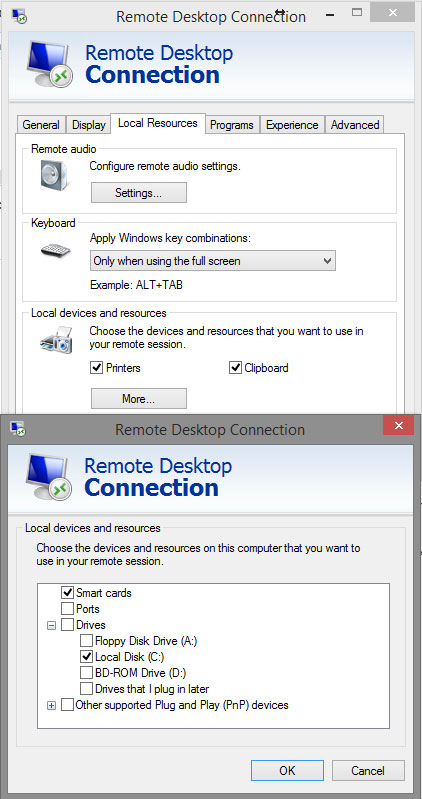
Click OK, go back to the General tab and hit Save. Now reconnect to the Instance using RDP and when you open Windows Explorer on the Instance you will see the drives you selected. You can browse to the file on your computer and copy this to the Instance desktop.
Now that you have your install file on the server, proceed with the FileMaker Server install process. After that has completed, work through the FMS Deployment procedures, being sure to select Single Machine configuration when needed.
Congratulations, FMS is now up and running on your server in the cloud. But, there are a couple more things we need to take care of.
Step 4: Final configuration for FileMaker Server connectivity
It’s been quite a process up to now but we’re nearly there. The light is at the end of the tunnel. With the default installation of FMS, we have a sample database hosted, open and ready to connect to. But what are our connection settings?
They’re fairly straight forward. Open FileMaker Pro, click File and Open Remote. In the drop down in the top left, ensure Favorite Hosts is selected and choose Add from the bottom left. The following dialog appears:
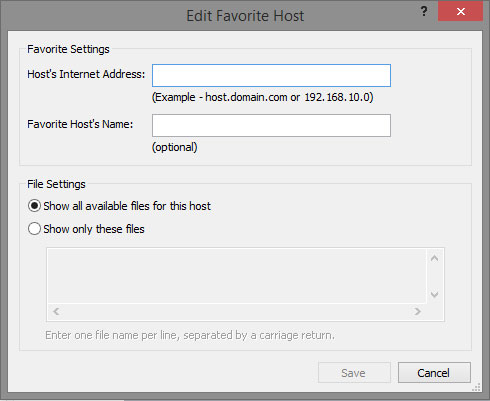
The value for the first box is the IP address for your Instance. This can be found in a multitude of places, but perhaps the easiest is in the top right corner of your Instance desktop. In the second box, name the server appropriately.
However, if you try to connect to the server now, nothing happens. What the heck? All this and it’s still not working? Well, one more thing to take care of. In the AWS interface we set up a Security Group that restricted access to our server – you could think of this as the external firewall. But Windows Server 2012 also has a firewall and we’ve not opened any ports for FileMaker on that – so our traffic to the server is being blocked and our hosted files aren’t showing up as a result.
To fix this, log onto the Instance with RDP. Click the button in the bottom left.

The Server Manager application opens. Click Local Server from the list on the left.
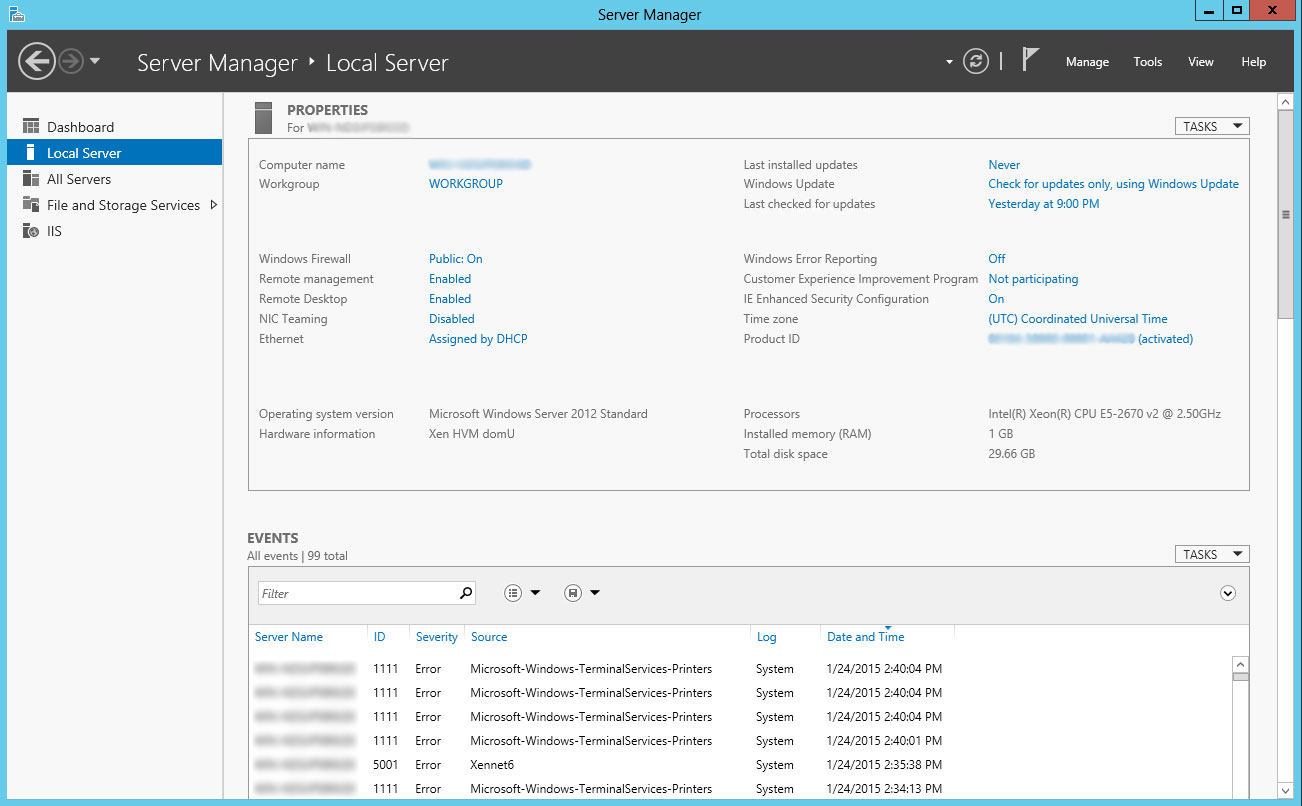
Next click on Public: On next to the Windows Firewall entry. This launches the Windows firewall status window. We’ll need to go into Advanced Settings from the list on the left and then click Inbound Rules from the list on the left.
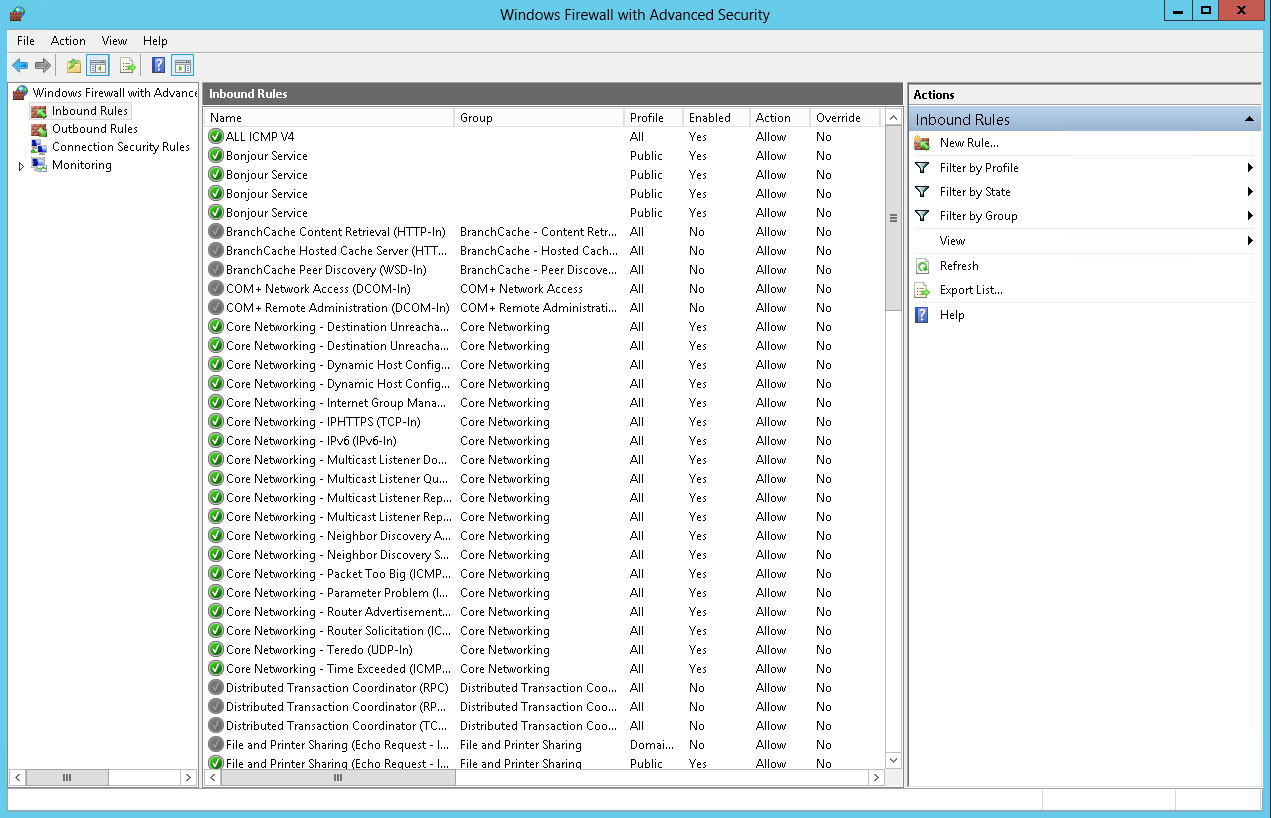
In a similar way to Security Groups, we’ll need to open at least port 5003 inbound to allow traffic, so click New Rule from the menu on the right. Select Port and click Next. Choose TCP and enter 5003 in the Specific Local Ports box underneath.
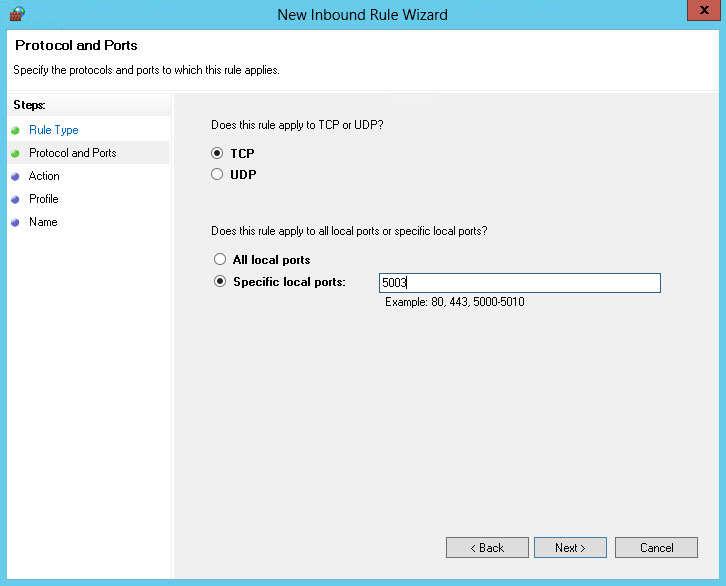
Click Next and ensure Allow The Connection is selected. Click Next and leave all three options checked. Click Next and name the rule something appropriate and descriptive. Click Finish.
Now if you return to FileMaker Pro and select the Favorite Server you set up above, you should see the sample database and be able to open it.
One last thing… If with the FMS admin console you have set up email notifications to be dispatched (for backups, errors etc), be sure to open whichever port you are sending out on in the AWS Security Group outbound rules, or FMS won’t be able to dispatch the emails.
So, that’s our FileMaker Server set up and running on a Free Tier Instance using Amazon Web Services’ EC2 Compute. It’s pretty awesome and especially as it’s free (for 12 months at least). This post doesn’t cover all of the possible issues and options that AWS brings, so please take the time to investigate the services more, including backup strategies, CloudWatch and Elastic IPs. Do be careful about what you sign up for – not every service qualifies for the Free Tier package. There are plenty of resources out there to find out more, including best practices, tips and tricks – one source is CloudEndure.
We hope that this has been a useful introduction to the possibilities that Amazon Web Services can offer. If you do wish to run FMS on AWS on a more permanent basis, consider upping which Amazon Machine Image you select – we chose the Free Tier most basic option just for demo purposes but its technical specs are low and depending on the size and complexity of the database(s) that you will be hosting, they may fall well short. Do however become familiar with the pricing structure and what an upgraded Amazon Machine Image will cost before launching a new Instance. As a rough guideline, an Instance that would be more suited to hosting FMS, say a m3.xlarge Instance with 4 vCPU, 13 ECU, 15GB RAM and 2 x 40GB SSD is in the region of $400 a month – a significant outlay.
But this brings us to ask, what’s the performance like compared to other options we touched on at the beginning of the previous post? Well, next time we’ll look at that and do some comparisons.


