Installing Dependencies And Other Set Up
Keycloak requires Java, so first thing we'll do is get that installed. We're assuming that your Ubuntu virtual machine is up and running and you've logged in either directly or via SSH. At the command prompt, type the following and hit enter:
sudo apt install openjdk-8-jdk
You may need to enter your password, confirm yes at the prompt to install and wait for this to complete. Next, you should have Wget installed already, used for downloading content and files from web servers, which you can check with the first command and install with the second if you don't have it:
wget -V
sudo apt install wget
Now, install the zip package so we can unzip our Keycloak software after we download it. Enter the command:
sudo apt install zip
And, as the last part of our dependencies and utilities, check if you have a text editor called Nano as we'll need it to update some text files, and if not then install it:
nano -V
sudo apt install nano
Downloading And Installing Keycloak
Next up, we'll create the directory for Keycloak to live in:
sudo mkdir -p /opt/keycloak
Finally! Now we get to download Keycloak and get it installed. We're using the version current at the time of writing, so you will need to check the URL used below and adjust accordingly. Head over to the Keycloak Downloads page and check the URL for the zip file for "Keycloak - Distribution powered by WildFly". If you are using a different version, be sure to update the version number in all the commands below where it is used.
First we'll download Keycloak from the URL above, using the Wget package, and save it to the directory we just created:
sudo wget https://github.com/keycloak/keycloak/releases/download/12.0.2/keycloak-12.0.2.zip -P /opt/keycloak
That shouldn't take long, and now we can unzip the file we downloaded:
sudo unzip /opt/keycloak/keycloak-12.0.2.zip -d /opt/keycloak
After hitting enter on the above command, the screen will look a bit like The Matrix for a while with lots of scrolling commands executing. Give it some time to complete.
To keep things clean along the way, let's delete the zip file as we're done with that now:
sudo rm /opt/keycloak/keycloak-12.0.2.zip
Next we'll execute a few commands to assign permissions and more. The below will create a symbolic link to the Keycloak installation to allow for easier updates:
sudo ln -s /opt/keycloak/keycloak-12.0.2 /opt/keycloak/current
For security reasons, we shouldn't run Keycloak with the root user, so we'll create a new user and group. Enter the first command below, hit enter and then enter the second one:
sudo groupadd -r keycloak
sudo useradd -r -g keycloak -d /opt/keycloak -s /sbin/nologin keycloak
Next, navigate to the opt directory, change the ownership of the keycloak directory to the user and group we created earlier and give the bin directory executable permissions:
cd /opt
sudo chown -R keycloak: keycloak
sudo chmod o+x /opt/keycloak/current/bin/
Now we have to create a systemd service file for Keycloak, so run through the commands below:
cd /etc/
sudo mkdir keycloak
sudo cp /opt/keycloak/current/docs/contrib/scripts/systemd/wildfly.conf /etc/keycloak/keycloak.conf
sudo cp /opt/keycloak/current/docs/contrib/scripts/systemd/launch.sh /opt/keycloak/current/bin/
sudo chown keycloak: /opt/keycloak/current/bin/launch.sh
Still with us? Great, now modify that launch.sh file we just copied with the text editor we installed at the beginning:
sudo nano /opt/keycloak/current/bin/launch.sh
You need to adjust the third line of text to match the below. Note when you're using Nano, you can scroll down with the mouse wheel or use the arrow keys to get the cursor where you need it:
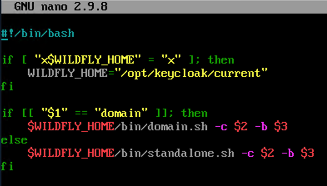
Hit Ctrl-O and then hit Enter to save the file and then hit Ctrl-X to exit the text editor. We're nearly there, just one more file to copy and edit:
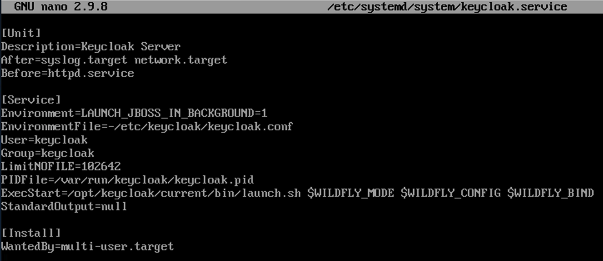
sudo cp /opt/keycloak/current/docs/contrib/scripts/systemd/wildfly.service /etc/systemd/system/keycloak.service
sudo nano /etc/systemd/system/keycloak.service
Update the text file so it matches the below, and again hit Ctrl-O and Enter to save and then Ctrl-X to exit the text editor.
We're done on the editing, the last few steps are opening a some firewall ports, getting Keycloak started and then creating our admin user.
Configuring The Firewall
We're not going to get into the weeds with the firewall settings but, if you've been following along, execute these commands. The first will allow us to continue using SSH to administer the server and the second are the ports we need open for Keycloak to work:
sudo ufw allow ssh
sudo ufw allow from any to any proto tcp port 443,8080,8443
As of FileMaker Server 19.2.1, the techniques we'll be employing later on in this tutorial will require us to use port 443 rather than the default Keycloak SSL port of 8443, so we're going to add a port forward to handle that for us by editing a file:
sudo nano /etc/ufw/before.rules
Add the following before the "# Don't delete these required lines" section, right at the top of the file, then hit Ctrl-O and Enter to save and Ctrl-X to exit.
# Add a port forward from 443 to 8443 for Keycloak
*nat
:PREROUTING ACCEPT [0:0]
-A PREROUTING -p tcp --dport 443 -j REDIRECT --to-port 8443
COMMIT
Finally on the firewall front, let's enable the firewall, confirming yes as we added the SSH port above:
sudo ufw enable
Starting Keycloak
Now let's get Keycloak up and running:
sudo systemctl daemon-reload
sudo systemctl enable keycloak
sudo systemctl start keycloak
Let's check that Keycloak is running ok:
sudo systemctl status keycloak
If all is well you should see something along the lines of:

You can exit that by clicking Ctrl-Z. For good measure, let's do a reboot:
sudo shutdown -r now
Once you've logged back in again and are back at the command line, if you're not sure what the virtual machine IP address is type:
ip addr show
Look for the IP address and make a note of it - it probably begins with 192.168. or 10.0. Now, either on the Windows 10 computer or another computer on your network, open a browser and navigate to http://YOUR_IP_ADDRESS:8080/auth/. If all has gone well, and bear in mind you may need to give it a minute or two for all services to get up and running, you'll see the Keycloak home page as below:
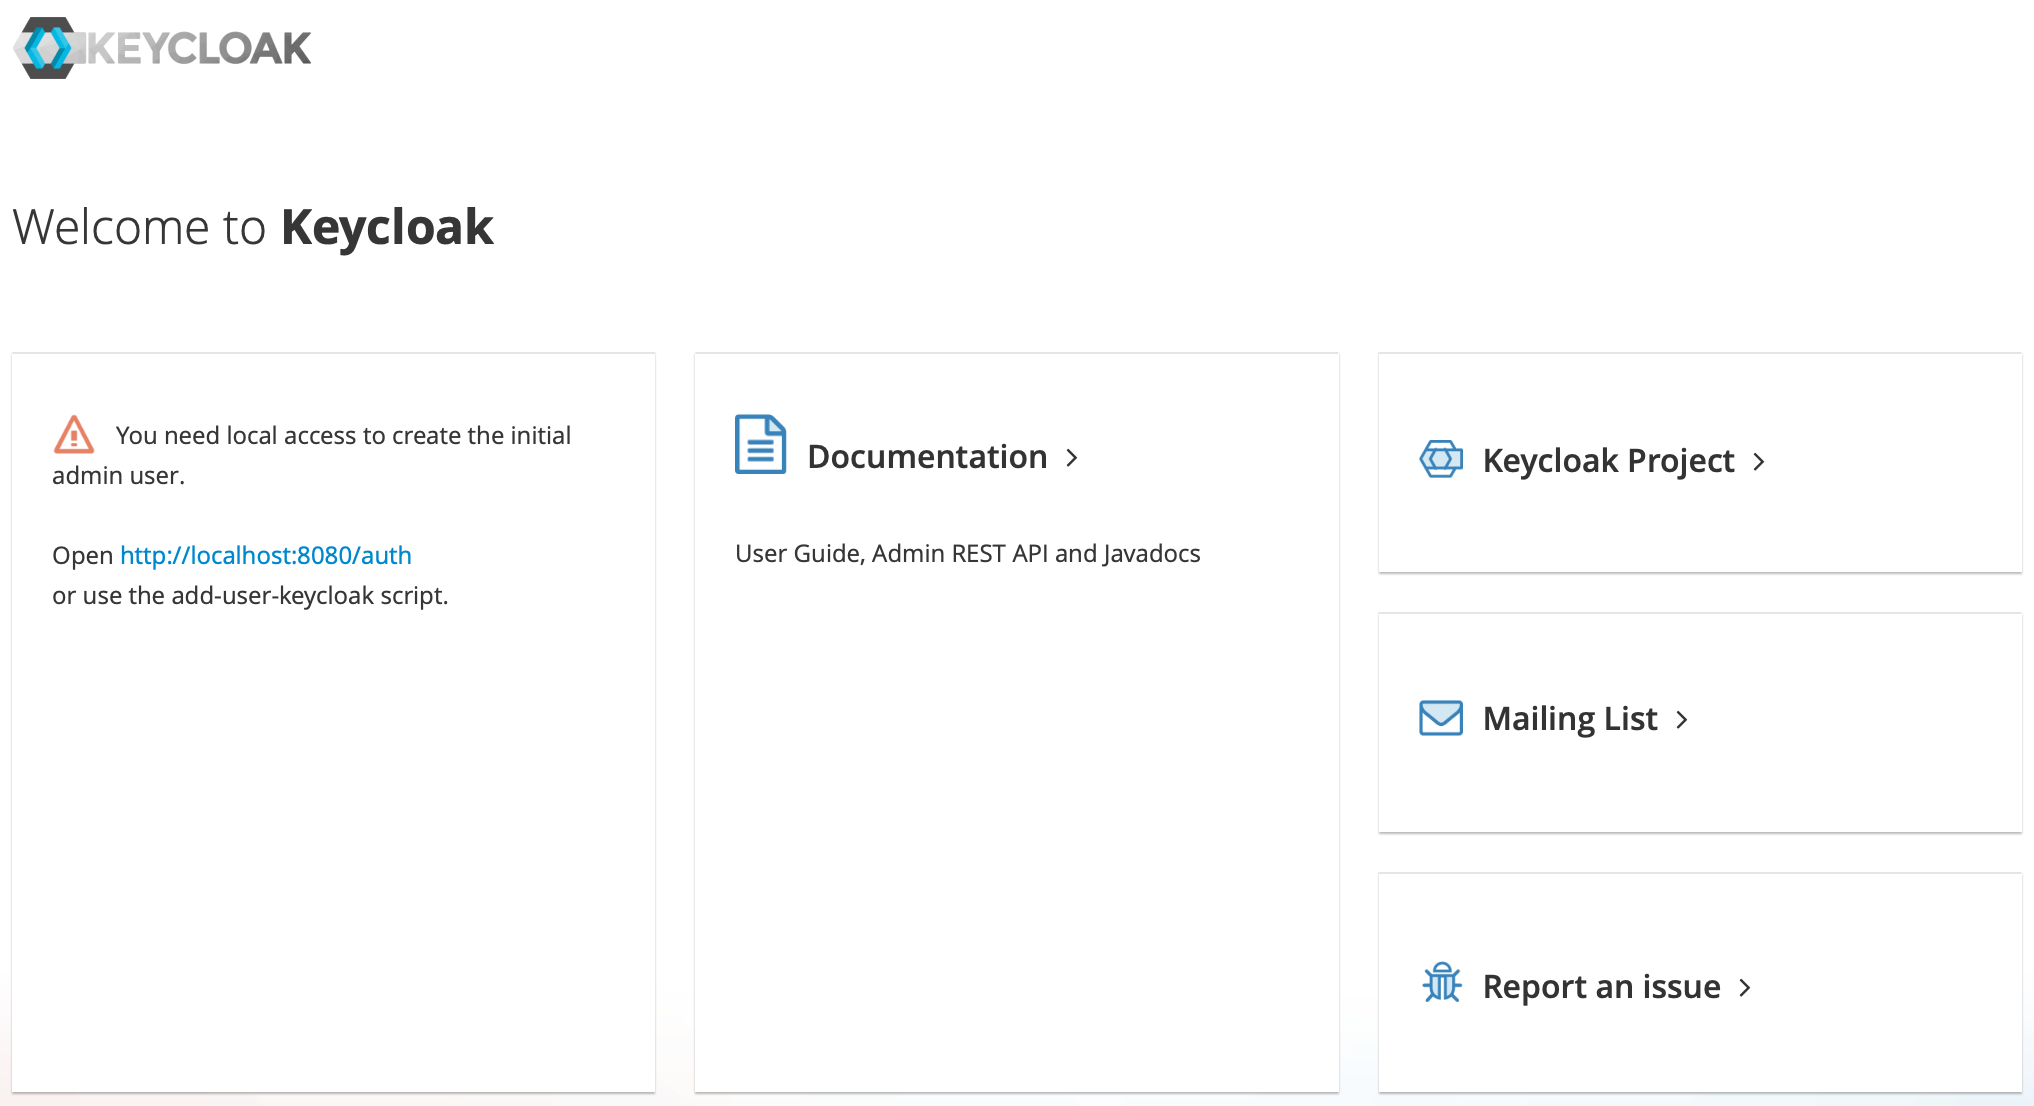
Ugh, we don't have an admin user set up yet. Fear not, easily solved! Head back to the virtual machine and enter the command below, ensuring you set your own username and password, then restart the Keycloak service:
sudo /opt/keycloak/current/bin/add-user-keycloak.sh -r master -u username -p password
sudo systemctl restart keycloak
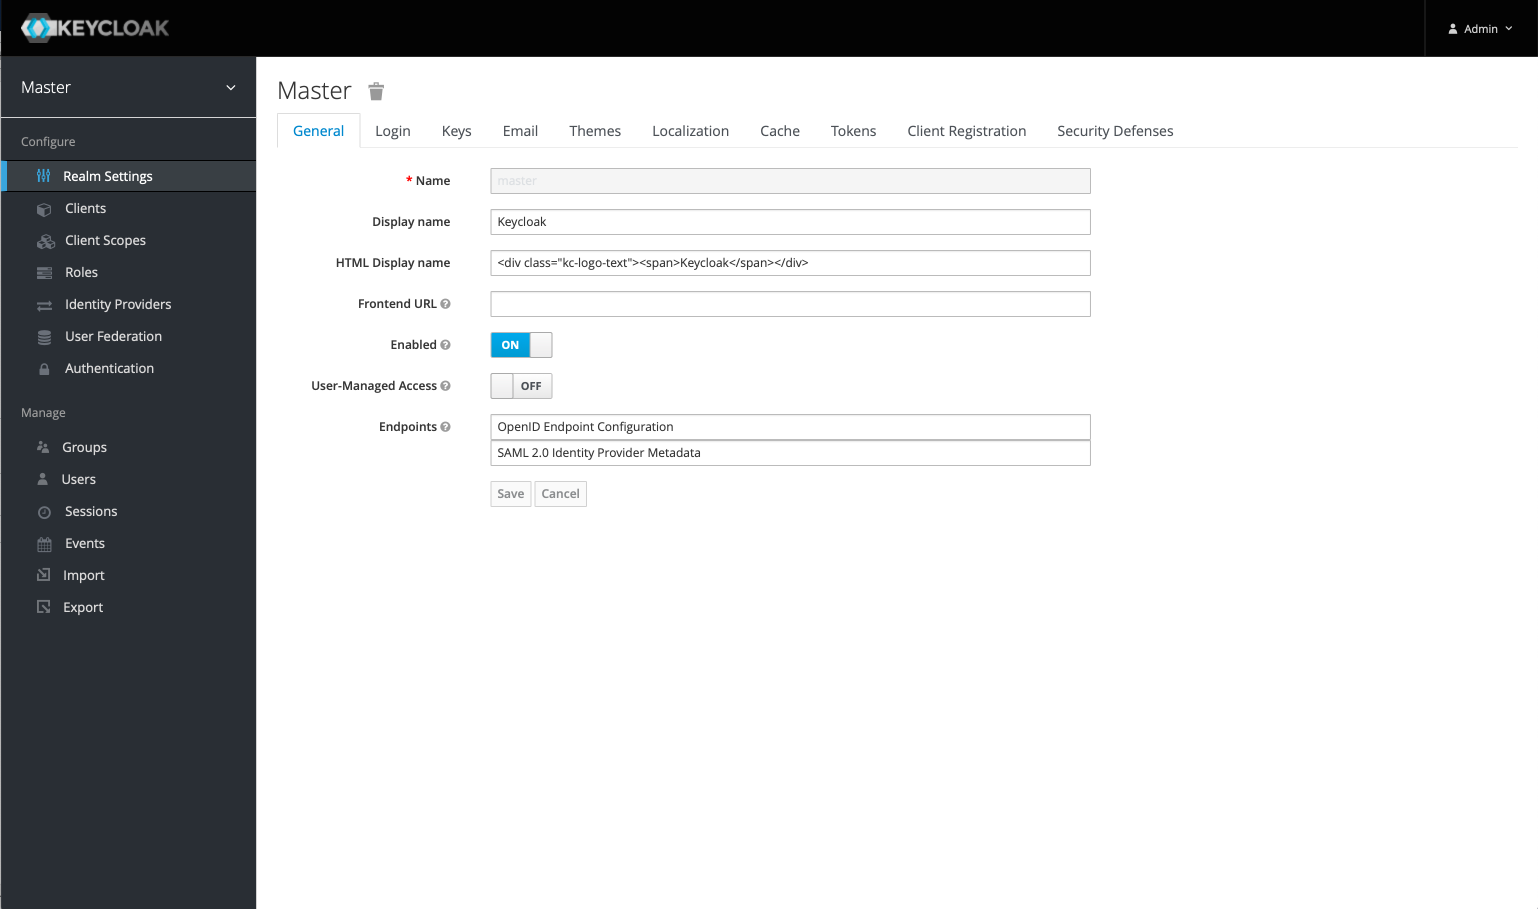
Wait for a couple minutes for Keycloak to get going again and then refresh your browser window and you should now see a link to the Administration Console. If you get a "Can't Connect to Server" message, wait longer. Once it loads, go ahead and click that link, log in with the credentials you just created and we're in!
Summary
Wow, it's been quite the journey so far, but fun huh? So, we've got our virtual machine running Keycloak, and while we can start looking around the software, we've got a couple more important configuration items to take care of which we'll tackle in our next couple of blog posts. For now, take a break, pat yourself on the back and know that you're that much closer to having a more secure FileMaker database! When you're ready, you can move on to part three of our Keycloak series.


