
Why Image A Server?
Of course backing up your data files is important. But your server configuration is also unique to you and your environment. In addition to your own FileMaker Server license key, backup schedules, script schedules, etc., you may also have some HTML, PHP or XML files on your server that are part of your app deployment. If disaster strikes (say, Windows installs an update and your server doesn't restart), what's the plan to get back up and running? You could:
- Freak out and call us;
- Or you could launch a new instance, update Windows, install and configure FileMaker Server, try to remember what all your schedules were, grab your latest backup data file from S3... (In other words, you'll get there but it'll be a while.);
- OR you could launch a new instance from an image taken prior to the disaster that has all your previous configurations already in place.
Wait, what? Wouldn't it be awesome to be back up and running in just a few minutes rather than hours or even days? It's less of your time, sure, but it could also mean fewer lost sales, fewer customer complaints, and fewer headaches overall. (And if your boss learns you're even more awesome than they already suspected? BONUS!)
Manually Imaging A Server
AWS allows you to create an image of your server that you can store for as long as you wish, pretty cheaply. We can create an image manually, and to do so is super easy:
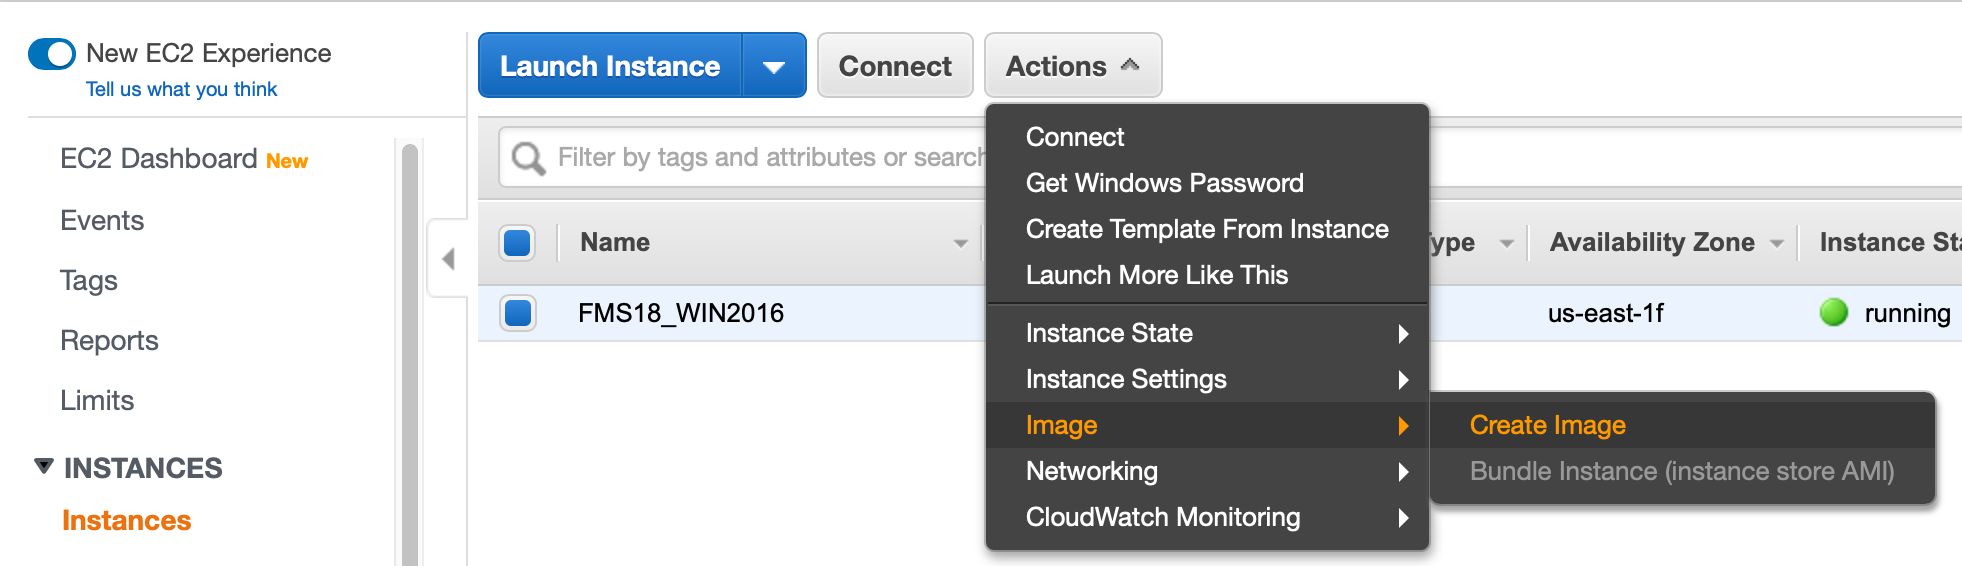
- Select the EC2 instance
- Click the Actions menu
- Choose Image
- Then select Create Image as shown below.
At this point, you'll be presented with a short form to fill out. Enter a meaningful name and description and decide if you want to create the image without rebooting the instance.
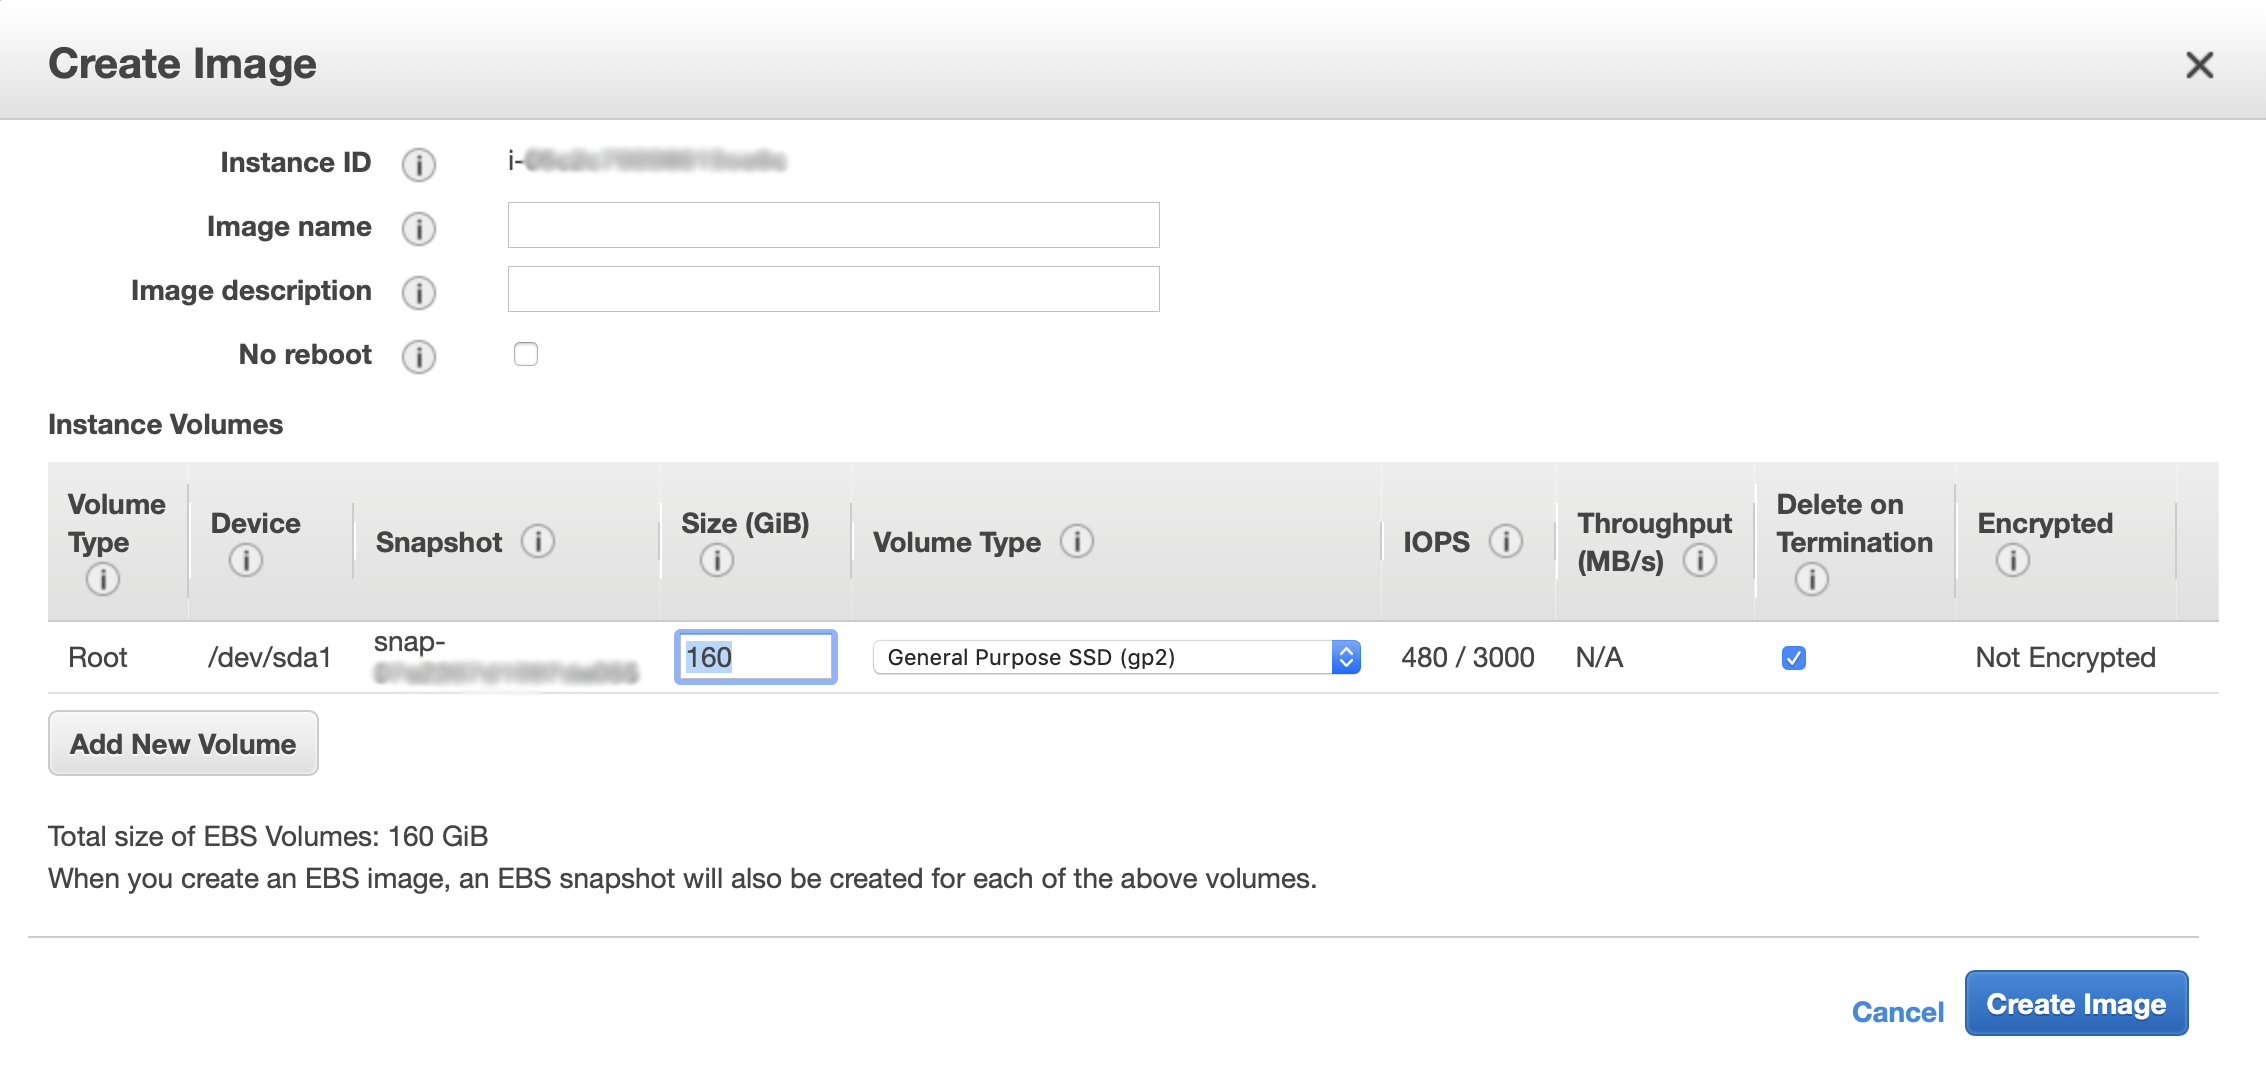
Click Create Image. In a short while, you'll have a complete image from which you can launch an instance. A few things to note at this point:
- You'll end up with a new image under the Images > AMIs menu option. You may wish to add a name to this.
- You'll also end up with a new snapshot for each drive of the instance. You'll find these under Elastic Block Store > Snapshots. Again, adding a name can help find them later.
- Snapshots are stored in S3 storage, which is pretty cheap, but do be careful with how many snapshots you store; they can build up easily and drive up your expenses.
- Manual snapshots can be very useful, especially just before applying a bunch of updates. That said, they're not a reliable form of backing up your server on a schedule because, inevitably, you will forget to do them regularly.
Automating Images With Lifecycle Manager
How can you protect your server by utilizing images but also eliminate the possibility of human error? Well, this is where the Snapshot Lifecycle Manager comes into play. Once we set up a policy, AWS will automatically create new snapshots and remove old snapshots on the schedule we designate. This means the snapshots will always get run, but we'll also control costs by not having more snapshots saved than we need.
To get started, go to the menu on the left in the EC2 console, and under Elastic Block Storage, select Lifecycle Manager. Assuming you don't have any lifecycles set up, you'll see this:
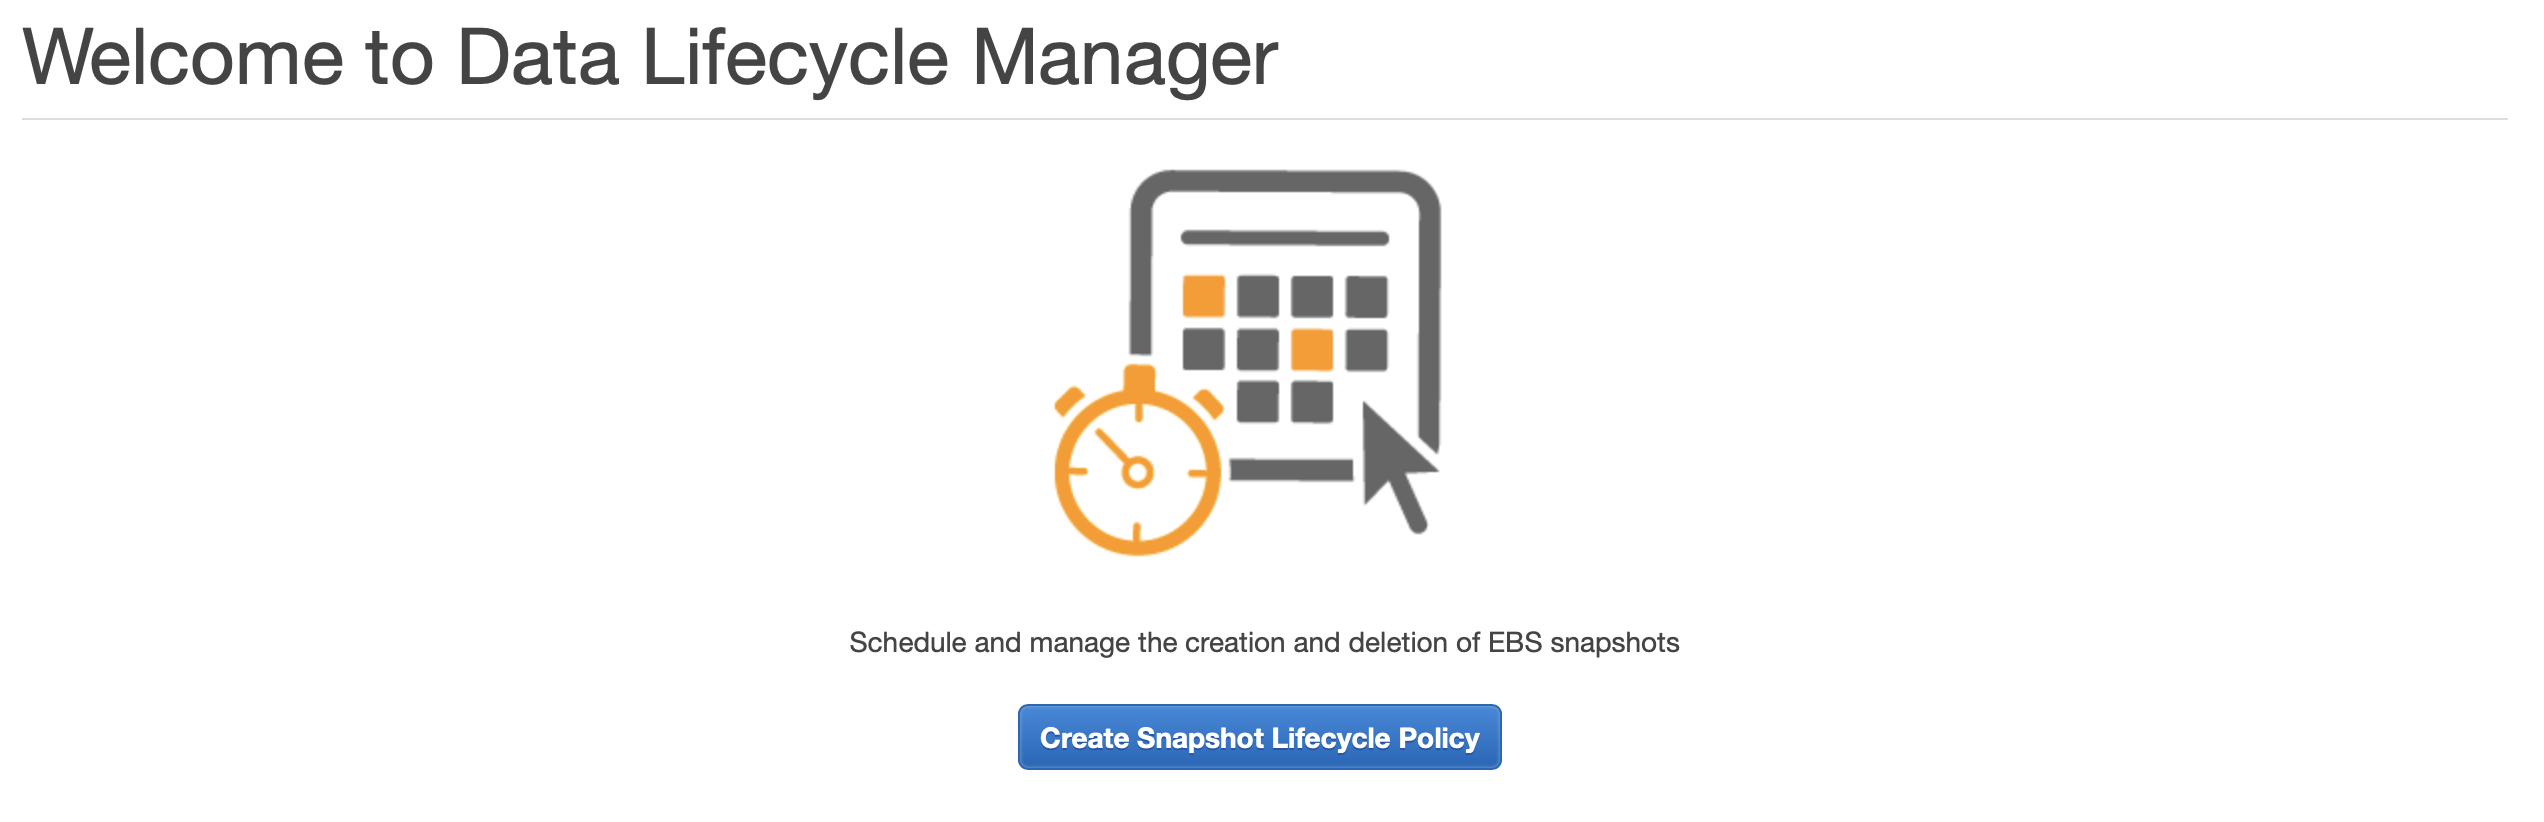
Click that big blue button to create your first Snapshot Lifecycle Policy and another, more involved form will appear. Don't get overwhelmed! We're going to run through each section bit by bit.
Initial Section
- Description: Add a meaningful description.
- Select resource type: If you're familiar with AWS then make your choice here. It's almost always Instance.
- Target with these tags: Lifecycle policies identify which instances (or volumes, if you chose that above) to snapshot based on tags, so you must add tags to your instances and then add the same tags here. Adding tags is pretty easy, but contact us if you need help.
- Lifecycle Policy Tags: If you want to tag this actual policy then add those tags here.
Policy Schedule Section
- Schedule name: Add a name for this schedule, bearing in mind that images created from this policy will be tagged with this name.
- Run policy every: Choose how often you want to image the server. Options run from every 2 hours to every 24 hours and settings in between.
- Starting at: Enter when you want the imaging to take place. This is UTC time and it might be an idea to aim for a time when there's less activity on your server.
- Retention type: Select what basis you wish to retain the images on: Count (always keep, say, five), or Age (keep the image until it is of a certain age). Think about this carefully as it does determine how many images end up being stored. You could end up with hundreds, which is likely not useful!
Tagging Information Section
- Copy Tags from volume: We suggest checking this box so your images end up with the same tags as the instances being backed up.
- Additional tags: If you're all about tagging your AWS assets, then you have the option to add additional tags to the images created.
Other Sections
We only have two other sections we need to concern ourselves with:
- IAM Role: Use the default role here.
- Policy: Enable the policy.
That's it, we're done! Hit the Create Policy button and your instances will start having images made on the schedule you determined above. In the first few days, it's certainly worth keeping an eye on these images to ensure they are being created and removed as you intended. And absolutely keep an eye on your billing, so there's no unexpected increase when your billing cycle closes.
Summary
Utilizing the Lifecyle Manager can add another key element to your disaster recovery strategy. It's quick and easy to set up, and cheap to maintain. It's certainly much cheaper than recovering manually!
If you want to know more about the Lifecycle Manager, check out the AWS documentation here: Automating the Amazon EBS Snapshot Lifecycle.
We hope this has been useful, but if you'd like additional help with any of this, please don't hesitate to contact us.


