
Setting Up A Keycloak Server For Authenticating To FileMaker: Part 6: Configuring FileMaker
Lesson in Brief: Adjusting External Authentication And Setting Up Groups
In our last article we configured Keycloak with a realm, client, users and more, ready for it to act as our authentication server for our FileMaker database. In the final stretch of our epic Keycloak journey, we turn our attention to FileMaker and the items we need to take care of there to bring this all together. We're almost there, let's get stuck in!
Update 2021-11-23:
While we still encourage you to read this article in your Keycloak journey, with the release of FileMaker Server 19.4, editing the xml as detailed below is no longer required. A Custom Identity Provider option is available in the FileMaker Server Admin Consle in 19.4, making the process of setting it up far easier. Some of the information below is still relevant but check out our more recent post on the Custom IdP configuration here.
The Outline Plan
If you want more detail on how and why we're taking the steps below, again check out the white papers by Wim Decorte and Steven Blackwell, a list of which can be found here.
Note that we are using FileMaker 19 in this example, although this technique does work with some other versions - check those white papers for details. As far as FileMaker Server is concerned, the outline plan is:
- Configure and turn on the Microsoft Azure AD external authentication setting
- Stop the database server
- Edit the entry for Microsoft Azure AD in a XML file to include details of our Keycloak server
- Start the database server again
Compared to what we've done up to now, this should be a walk in the park.
Configuring External Authentication
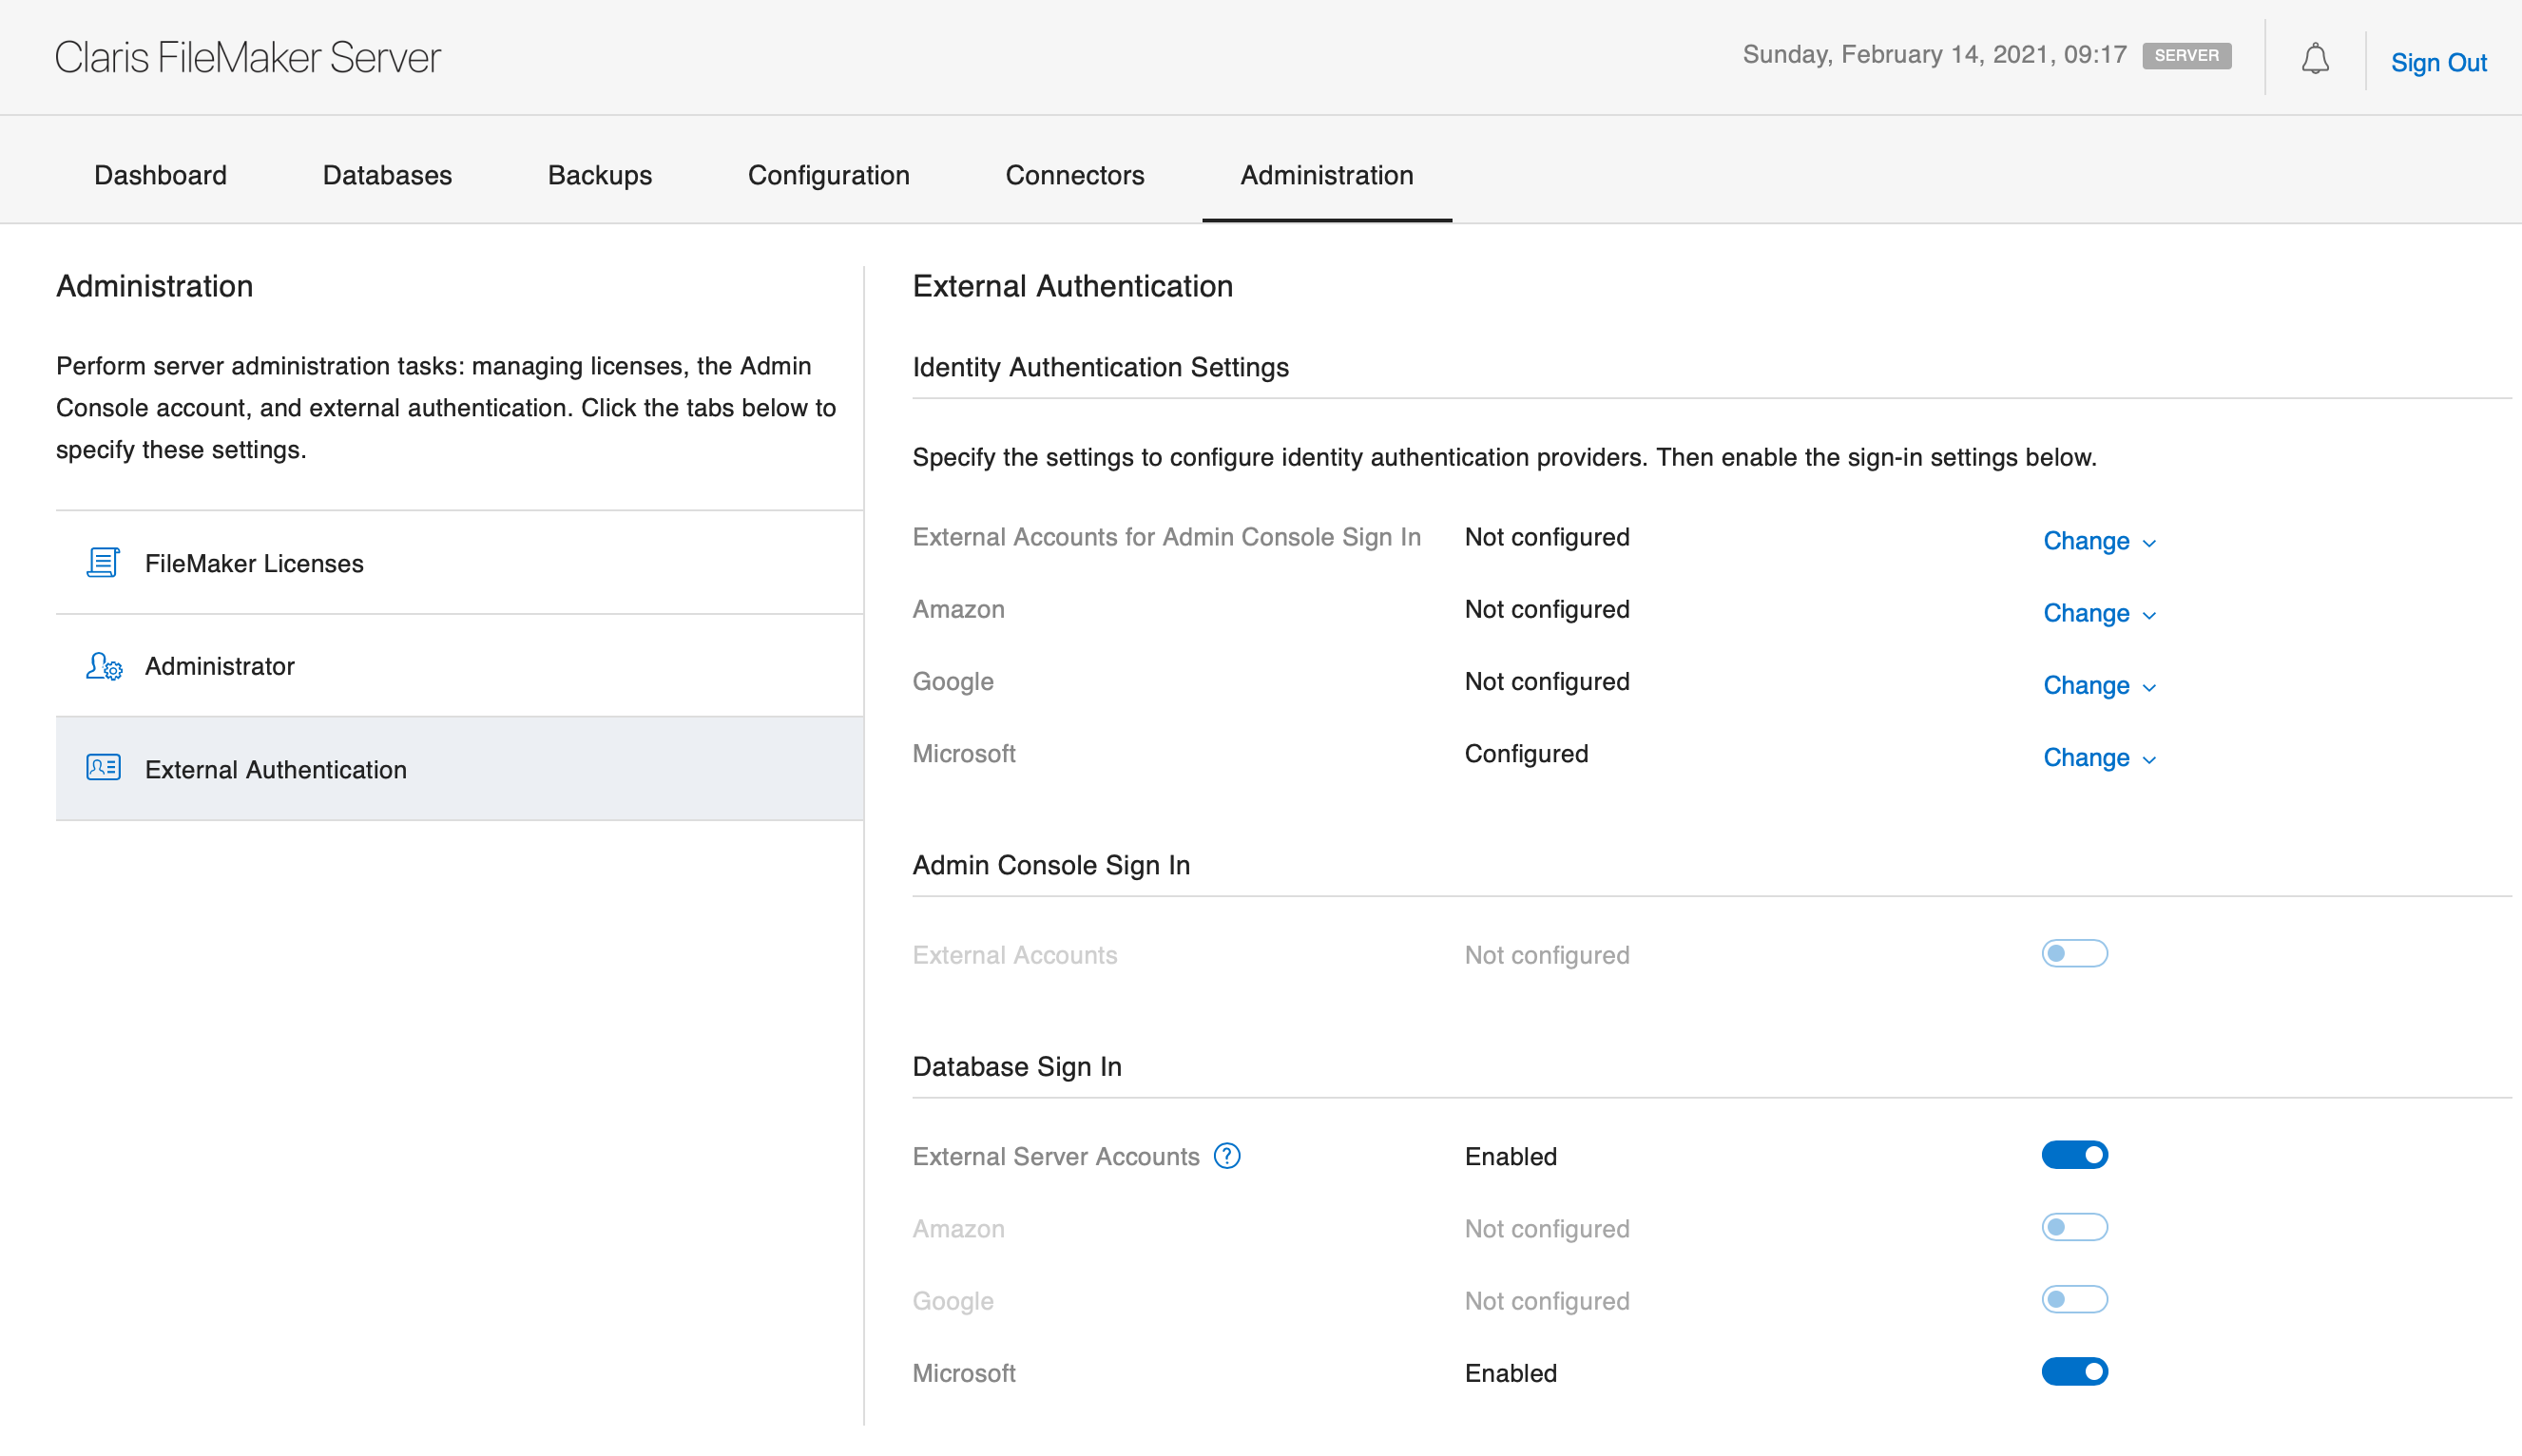
Open the FileMaker Server admin console, click on the Administration menu item along the top and then External Authentication in the menu on the left. Under the Identity Authentication Settings section, click Change for the Microsoft entry - it must be the Microsoft one as this is the only one that supports groups. In the three fields, add some text - it doesn't matter what as we'll be adjusting this later - and then hit Save Authentication Settings.
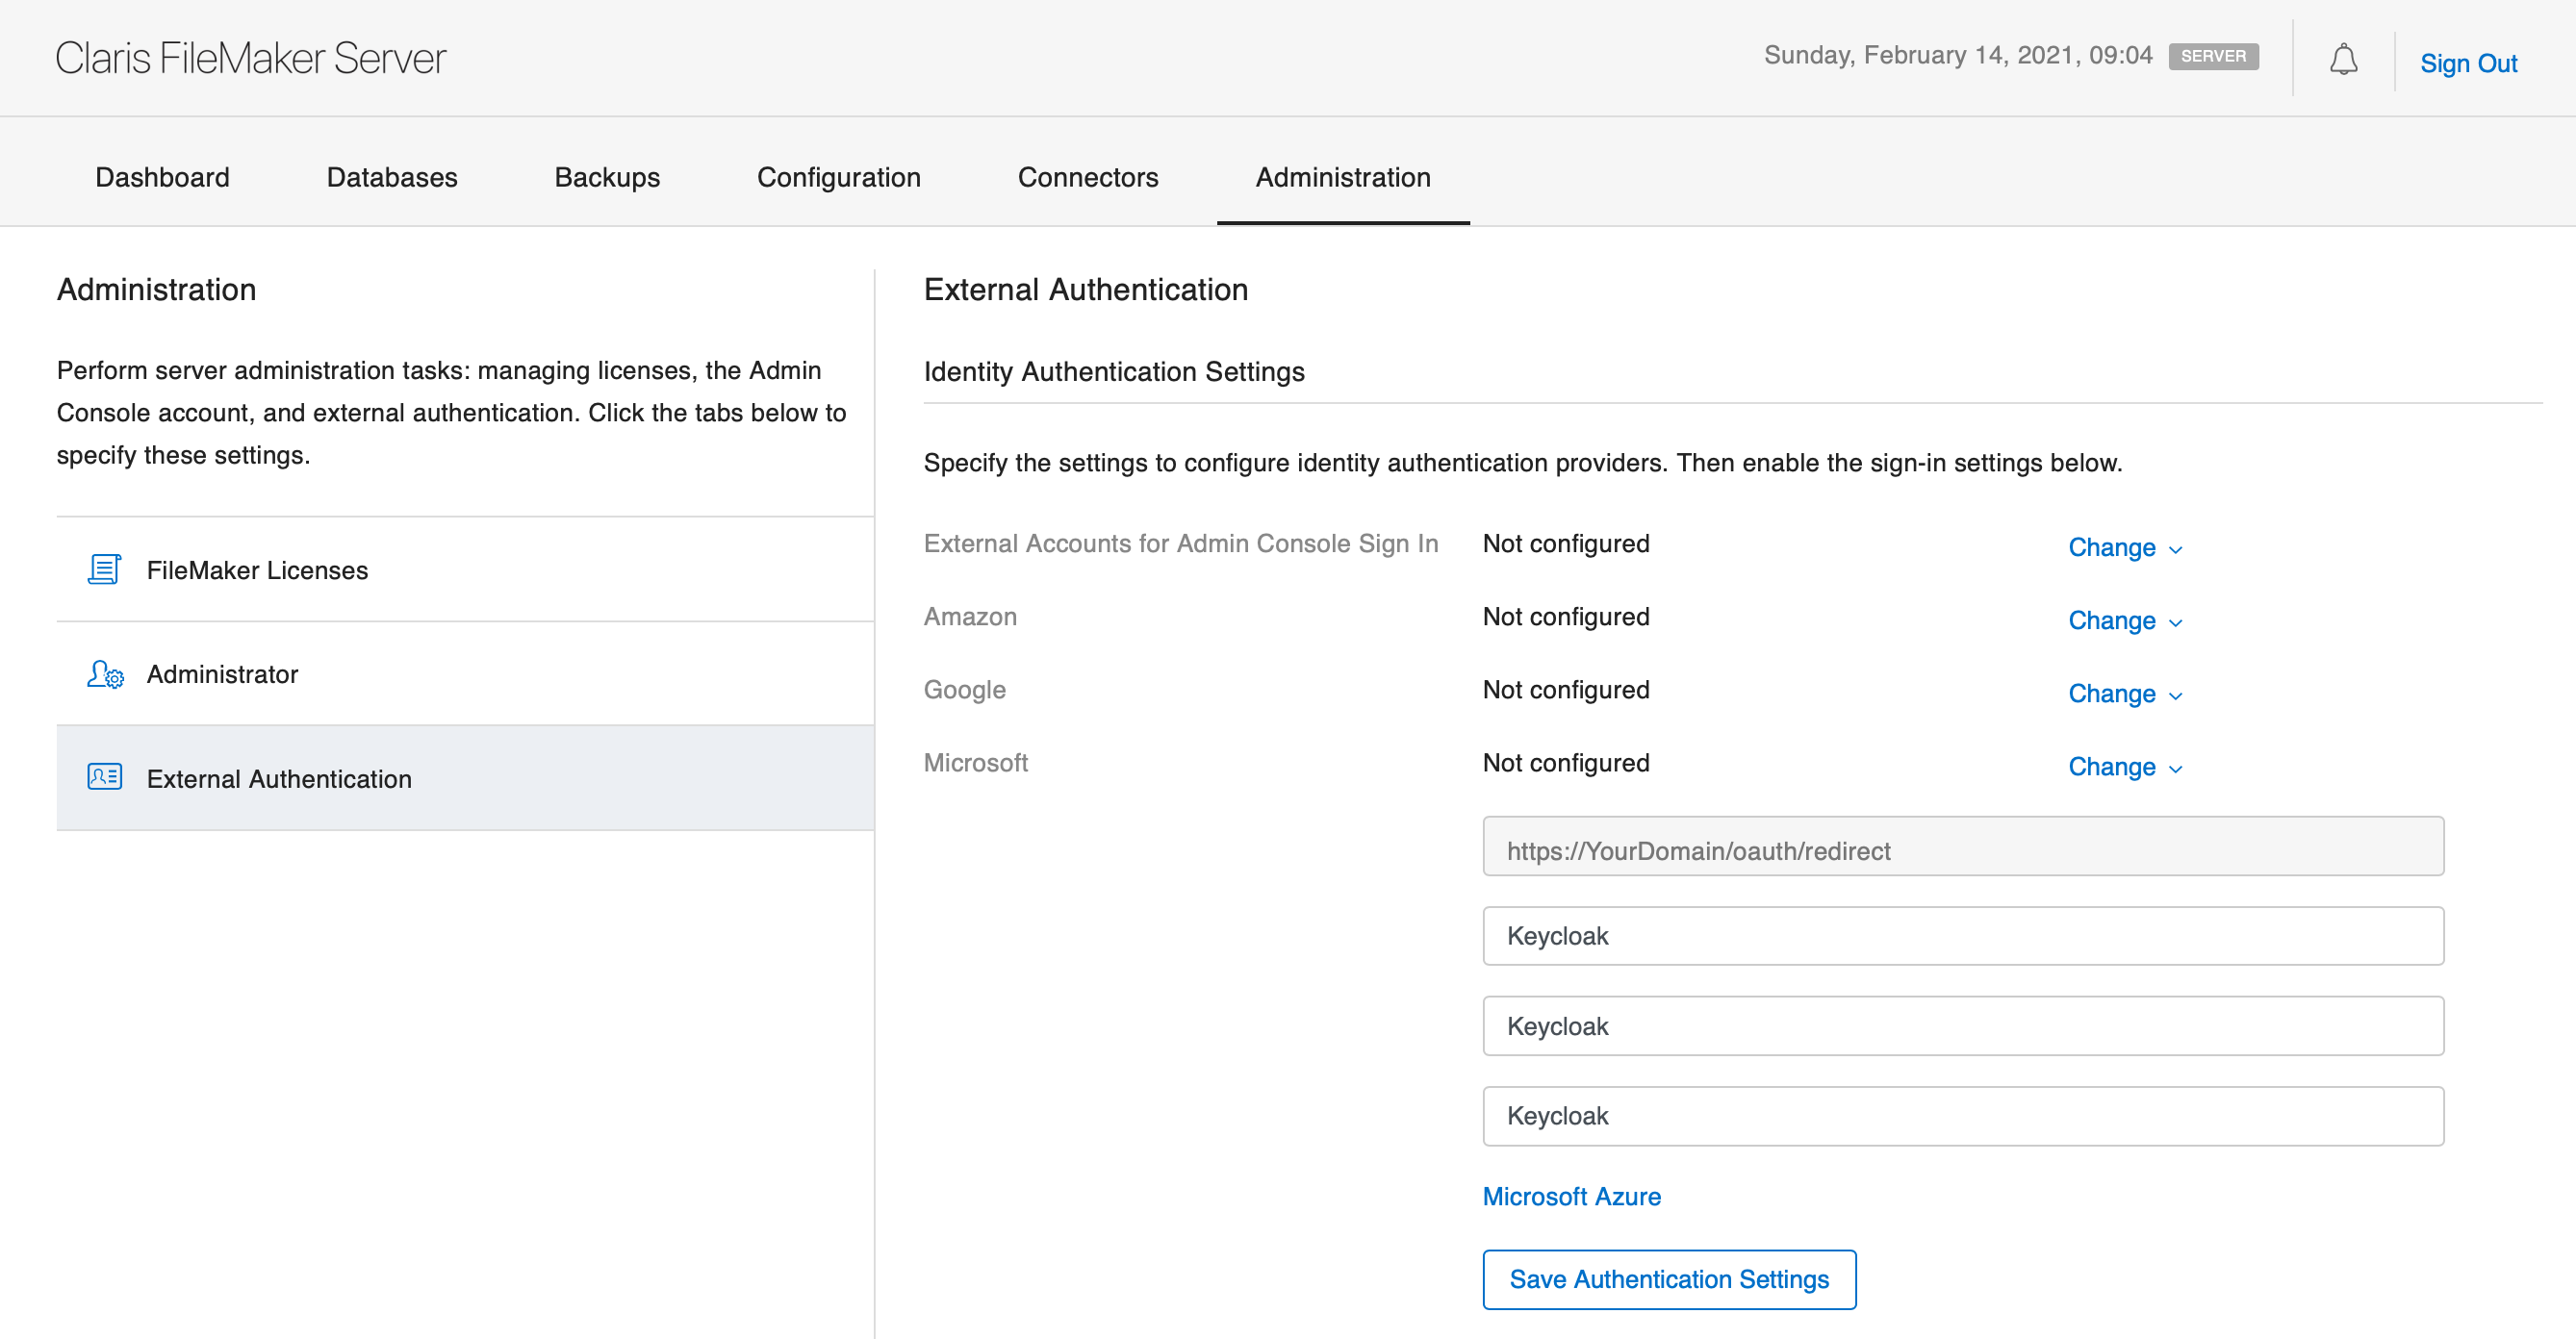
Next, on that same page, scroll down as needed and under the Database Sign In section, enable External Server Accounts and then enable the Microsoft entry.
Adjusting The XML File
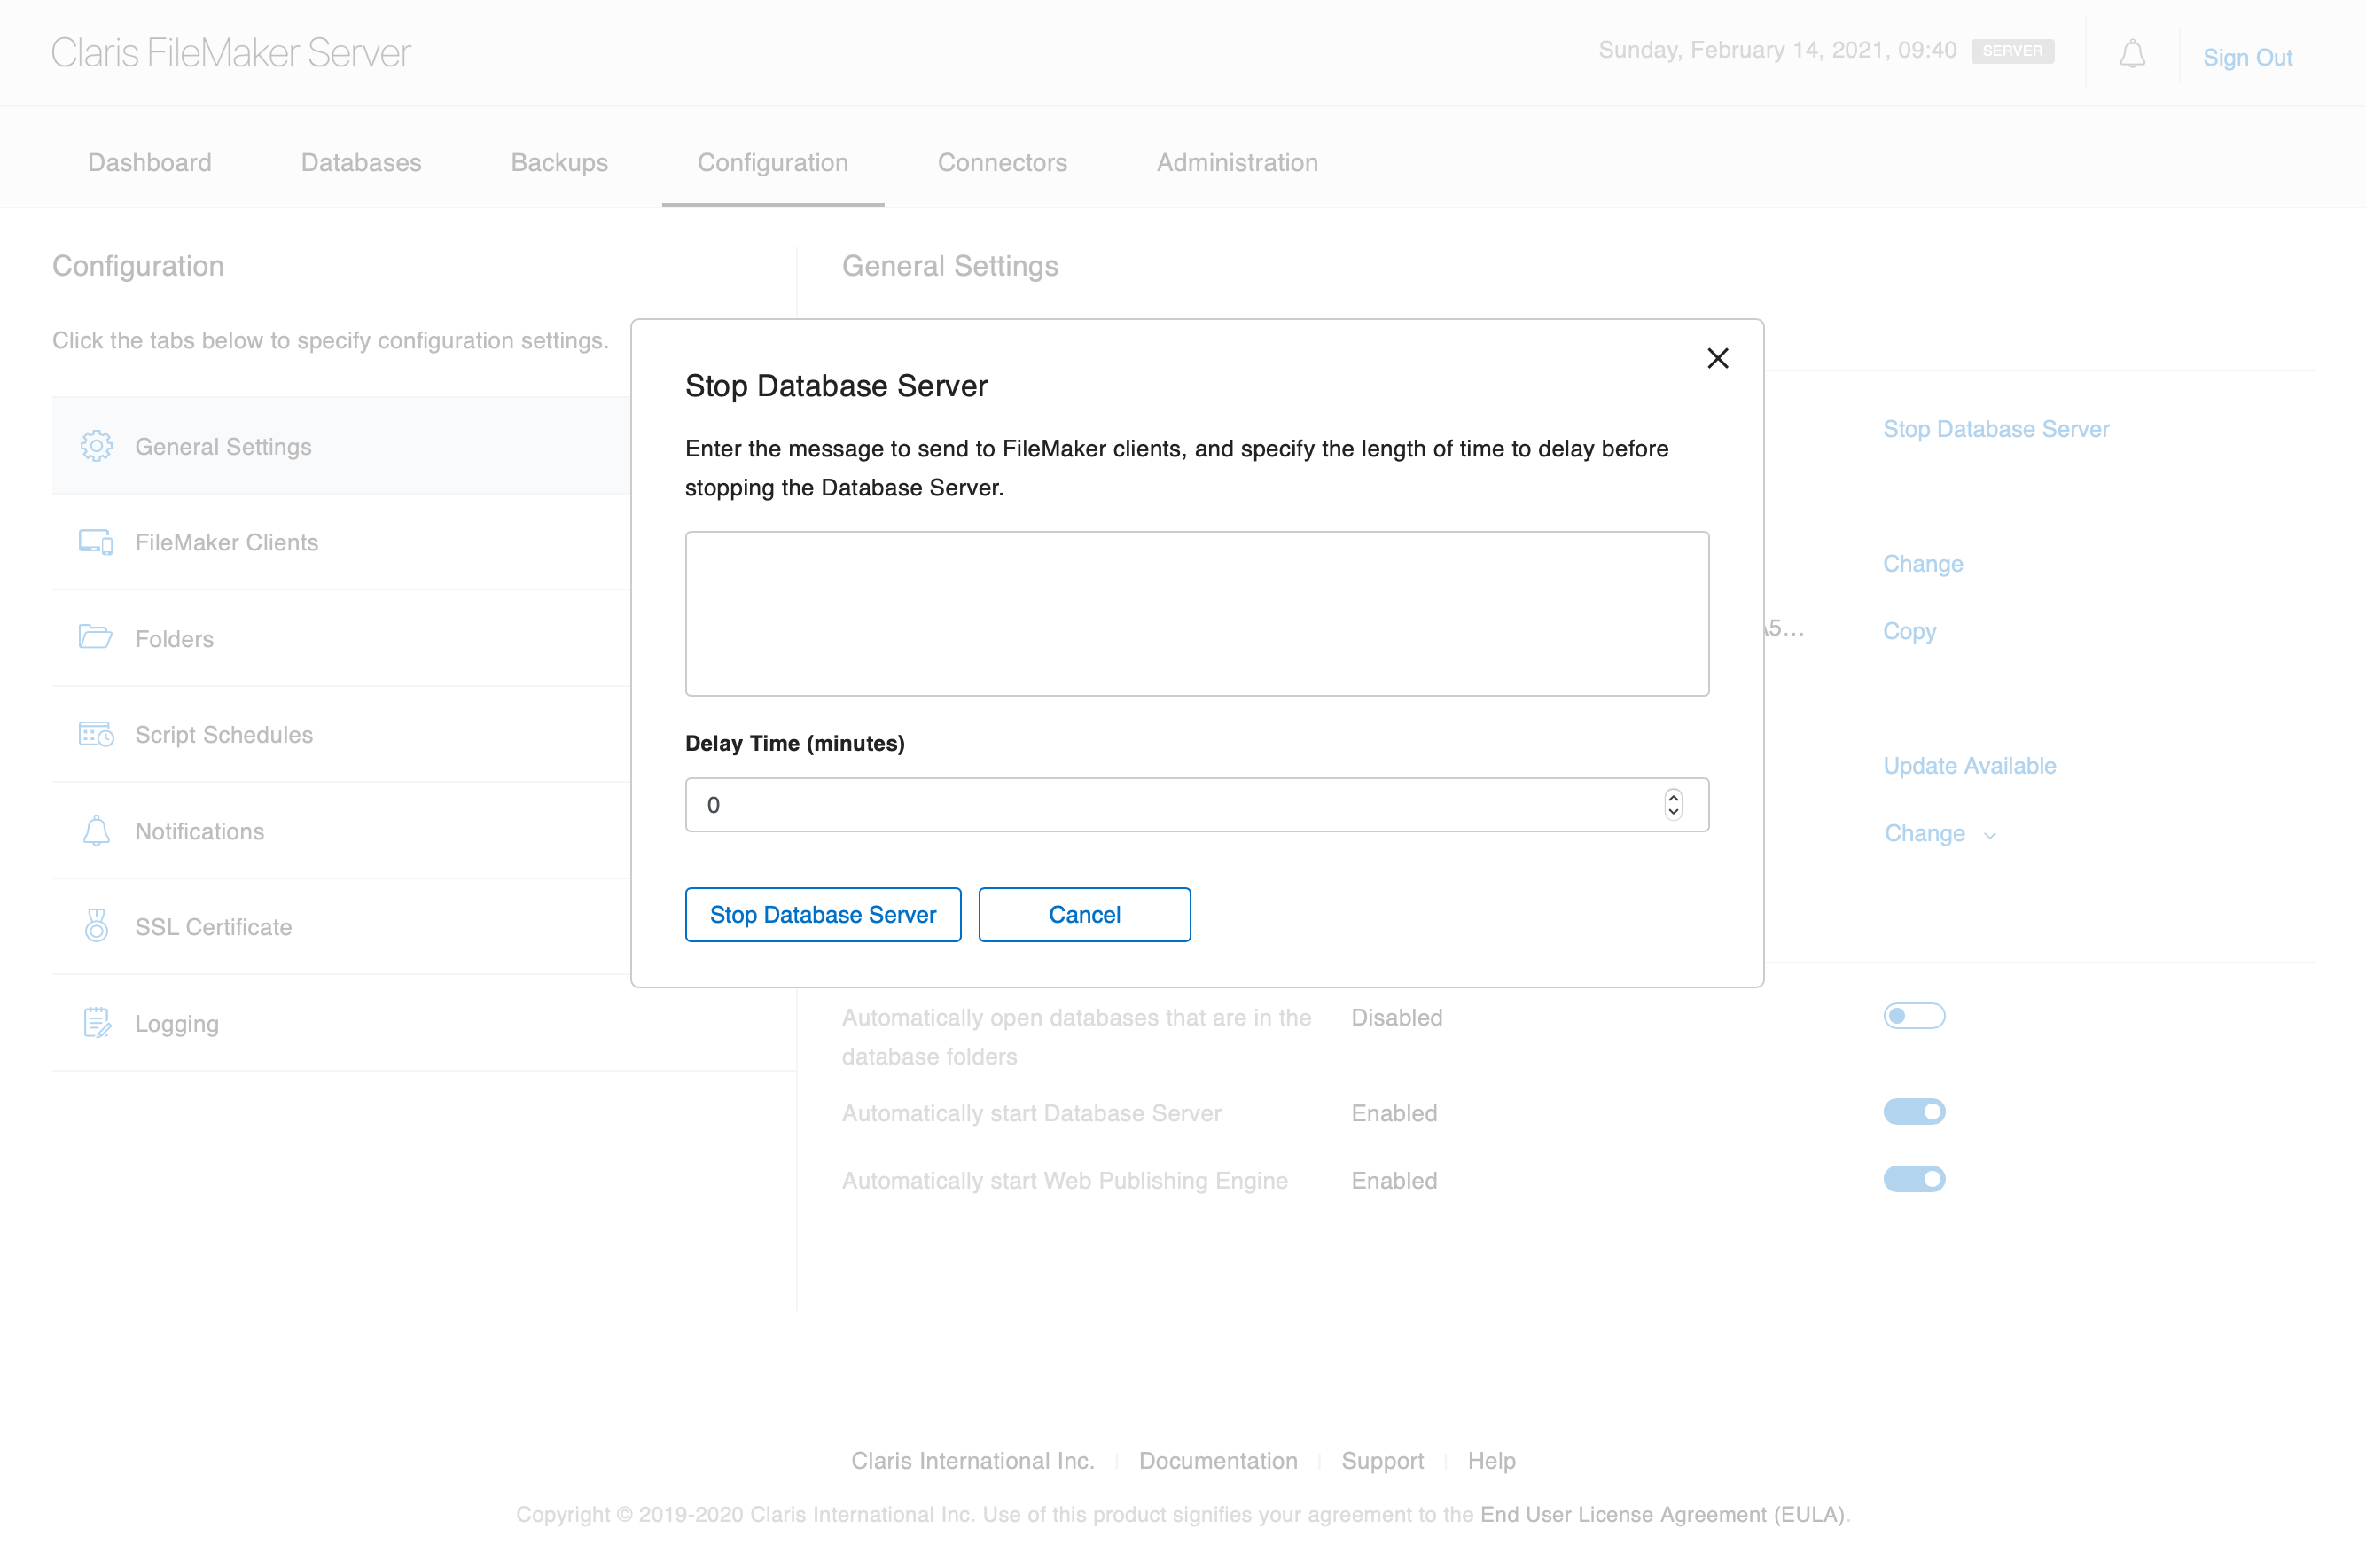
So, next, and this is important, in the FileMaker Server admin console, click the Databases menu item and close all databases. Once they are closed, click the Configuration menu item and under the Server Information section, click Stop Database Server. Put the delay to zero minutes and confirm. As a side note, if you're running monitoring software such as Zabbix (and you are monitoring your server right?) then be careful that it doesn't restart the database server for you!
Now we're going to adjust a buried XML file that currently points the external authentication to Microsoft, and put in our Keycloak details instead. It's a shame we have to repurpose an existing provider rather than have the option to have a custom one, but maybe that will come in a future release.
If FileMaker Server is running on a Mac, navigate to this folder:
Macintosh HD/Library/FileMaker Server/Data/Preferences
If FileMaker Server is running on a PC, navigate to this folder:
C:\Program Files\FileMaker\FileMaker Server\Data\Preferences
In that folder you'll find a file named dbs_config.xml and the first thing we'll do is make a backup copy of that file. So, copy it and paste it to your desktop and a location off the machine - a backup drive or network folder.
Now, open this file with your text or code editor of choice (we like the free Visual Studio Code from Microsoft) and somewhere around line 50 you'll find this chunk of XML:
<keys name="oAuthProviders">
    <keys name="Microsoft">
      <key name="AuthCodeEndpoint" type="string">login.microsoftonline.com/Keycloak/oauth2/authorize</key>
      <key name="AuthType" type="integer">2</key>
      <key name="ClientID" type="string">Keycloak</key>
      <key name="ClientSecret" type="string">AcOfLBVJAbwVs3AokL3Uww==</key>
      <key name="EncryptedClientSecret" type="integer">1</key>
      <key name="Logo" type="string"/>
      <key name="OAuthGroupScheme" type="string">groups</key>
      <key name="OAuthIDName" type="string">id</key>
      <key name="OIDCEnabled" type="integer">1</key>
      <key name="OIDCIssuer" type="string"/>
      <key name="ProfileEndpoint" type="string"/>
      <key name="Provider" type="string">Microsoft</key>
      <key name="ProviderEnabled" type="integer">1</key>
      <key name="ProviderID" type="integer">4</key>
      <key name="RedirectURL" type="string"/>
      <key name="ResponseType" type="string">code</key>
      <key name="Scope" type="string">openid groups</key>
      <key name="TokenEndpoint" type="string">login.microsoftonline.com/Keycloak/oauth2/token</key>
    </keys>
  </keys>
Update the "keys name" tag from Microsoft to Keycloak. We'll need some information from Keycloak to enter in here, so go ahead and log into the Keycloak Admin Console. Make sure you're on the realm we created before, click Realm Settings, and then click OpenID Endpoint Configuration under Endpoints. This will open a new window with a chunk of JSON in it.
- From this JSON, copy the value for "authorization_endpoint" and paste this into the XML document for the entry "AuthCodeEndpoint" - don't include the "https://"
- Next, copy the "token_endpoint" value and paste this into the XML document for the entry "TokenEndPoint" - don't include the "https://" and as of FileMaker Server 19.2.1, this can not have a port listed
- Close the JSON window and back in Keycloak, go to Clients, click on the client you created and copy the Client ID value and paste this in the XML for the "ClientID" entry.
- Back in Keycloak, click the Credentials tab for our Client and copy the Secret value and paste that in the XML for the "ClientSecret" entry.
- In the XML, adjust the "OAuthIDName" entry from "id" to "email"
- Under the "Provider" entry, change that from "Microsoft" to "Keycloak"
- And finally, under "Scope" add "email" after "openid"
<keys name="oAuthProviders">
    <keys name="Keycloak">
      <key name="AuthCodeEndpoint" type="string">DOMAIN_NAME/auth/realms/YOUR_REALM/protocol/openid-connect/auth</key>
      <key name="AuthType" type="integer">2</key>
      <key name="ClientID" type="string">CLIENT_ID</key>
      <key name="ClientSecret" type="string">CLIENT_SECRET</key>
      <key name="EncryptedClientSecret" type="integer">1</key>
      <key name="Logo" type="string"/>
      <key name="OAuthGroupScheme" type="string">groups</key>
      <key name="OAuthIDName" type="string">email</key>
      <key name="OIDCEnabled" type="integer">1</key>
      <key name="OIDCIssuer" type="string"/>
      <key name="ProfileEndpoint" type="string"/>
      <key name="Provider" type="string">Keycloak</key>
      <key name="ProviderEnabled" type="integer">1</key>
      <key name="ProviderID" type="integer">4</key>
      <key name="RedirectURL" type="string"/>
      <key name="ResponseType" type="string">code</key>
      <key name="Scope" type="string">openid email groups</key>
      <key name="TokenEndpoint" type="string">DOMAIN_NAME/auth/realms/YOUR_REALM/protocol/openid-connect/token</key>
    </keys>
  </keys>
Once you've done all that, save and close the XML file. Start the database server again and open your database files.
Configuring The FileMaker Database
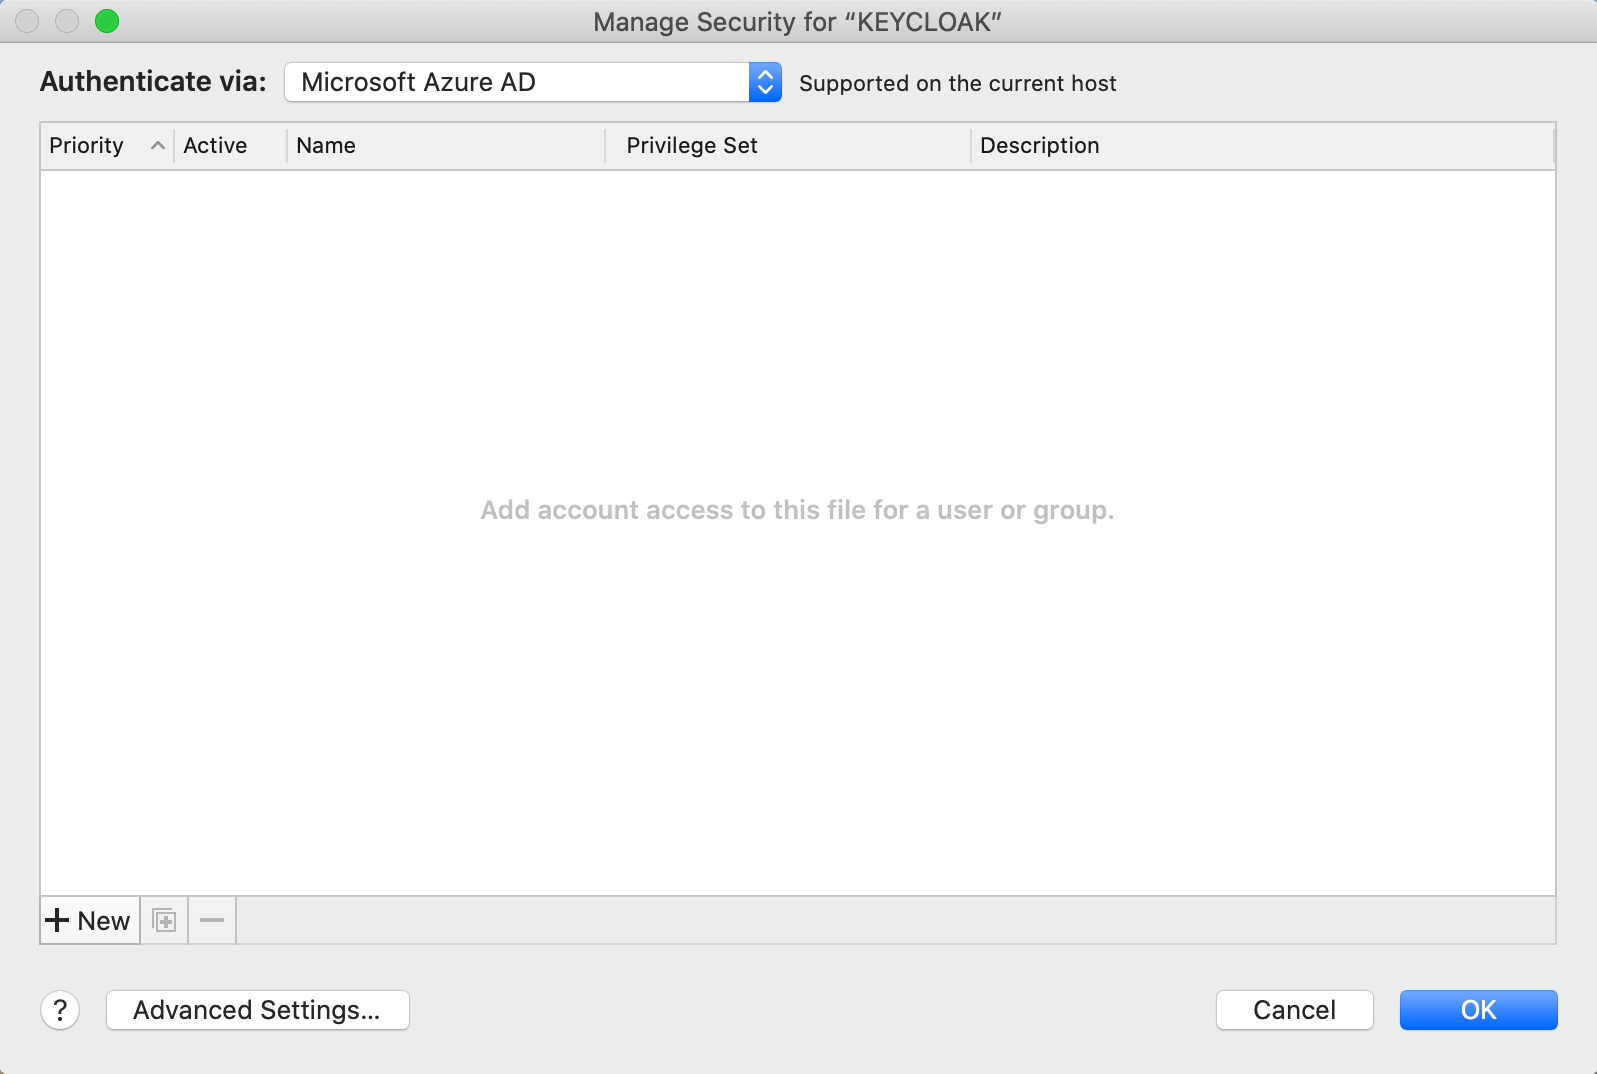
We're nearly there, we just need to configure our FileMaker database to allow access using an external server. Open your database using Full Access credentials and go to File > Manage > Security. Under the Authenticate Via drop down, select Microsoft Azure AD - remember, this isn't actually Azure AD anymore because we changed that XML to point at our Keycloak server.
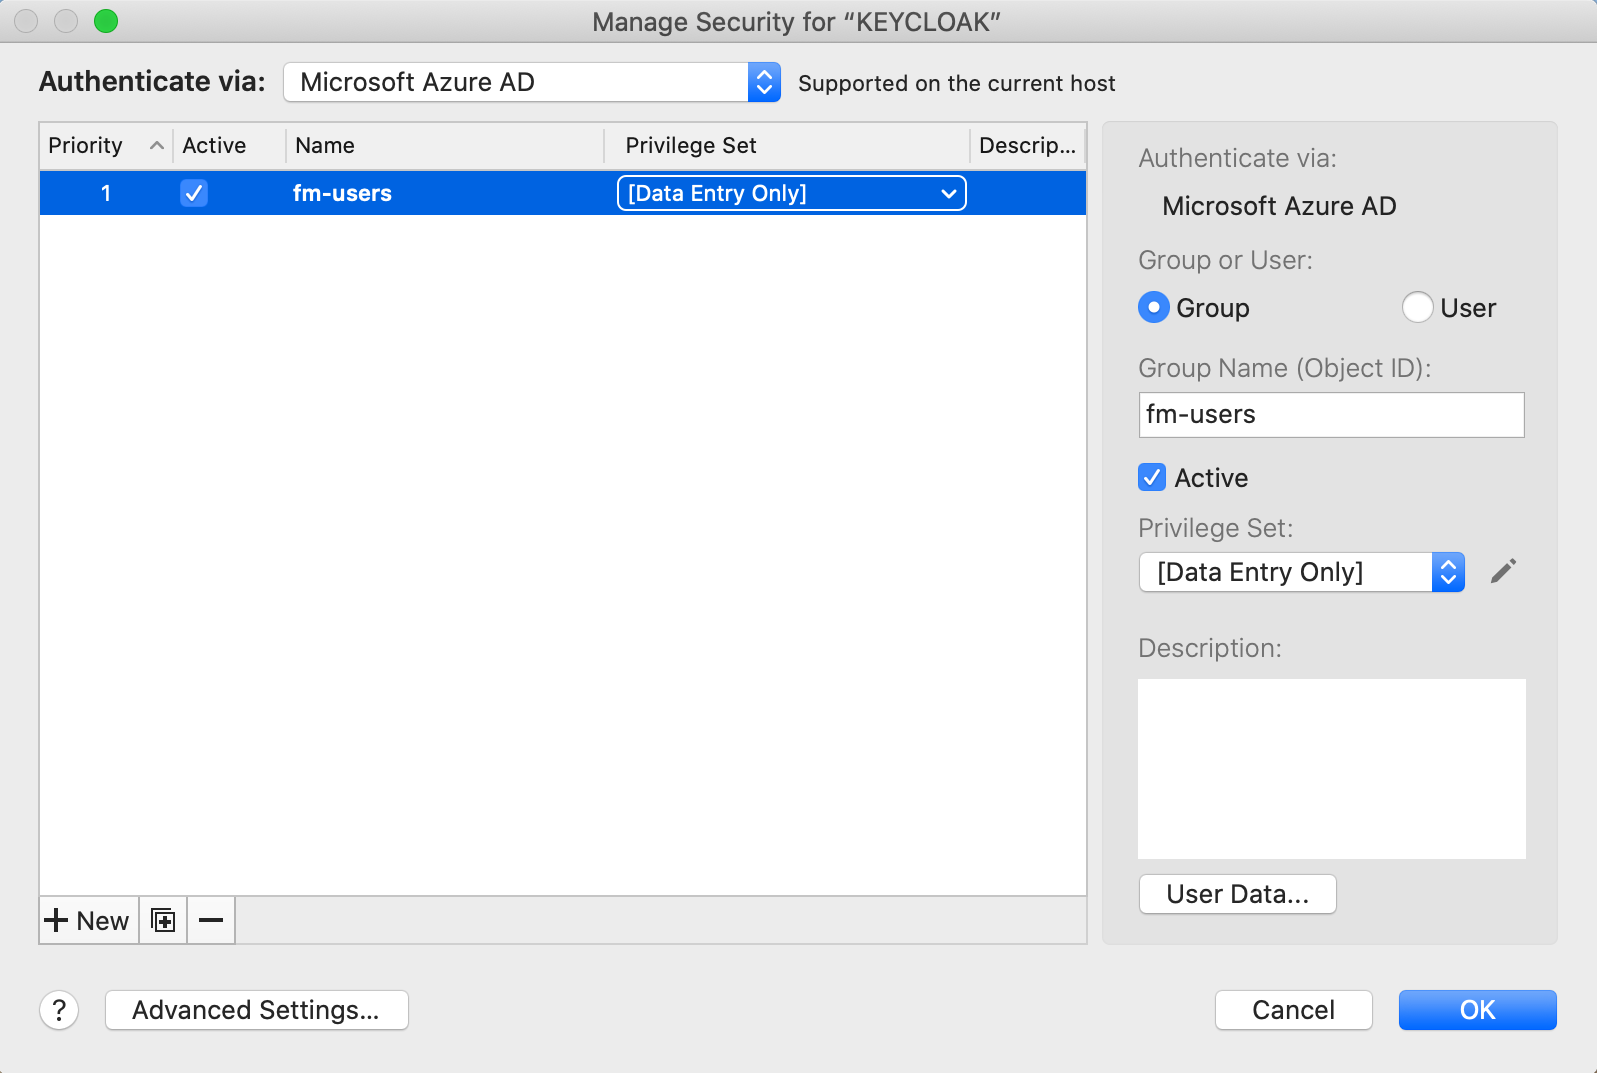
Click New in the bottom left, select Group from the radio button, add the exact name of the group you set up in Keycloak (in our instance that was fm-users) and select the appropriate privilege set for this group. Do this again for any other groups you set up in Keycloak.
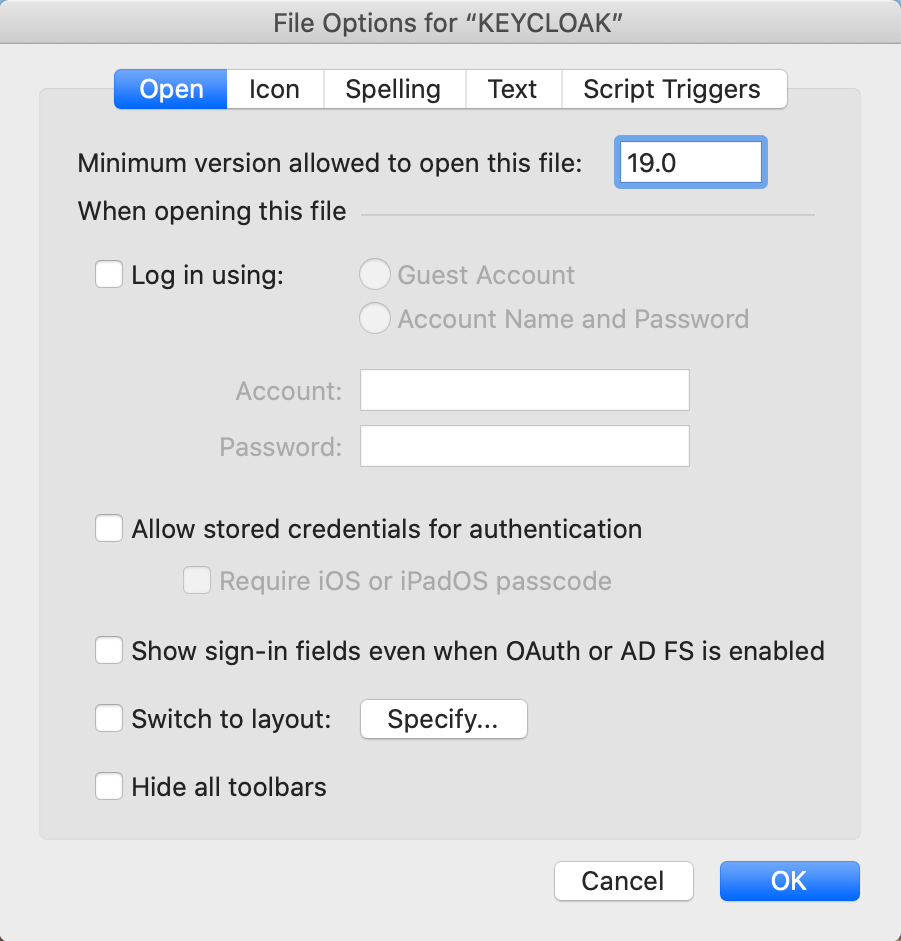
One final thing to point out here is that as of FileMaker Pro 19.2.2, if you open up File > File Options, there's a new setting to show sign in fields on the login prompt when OAuth or AD FS is enabled. Just know that that is there and adjust the setting as required.
Using Keycloak To Log Into The Database
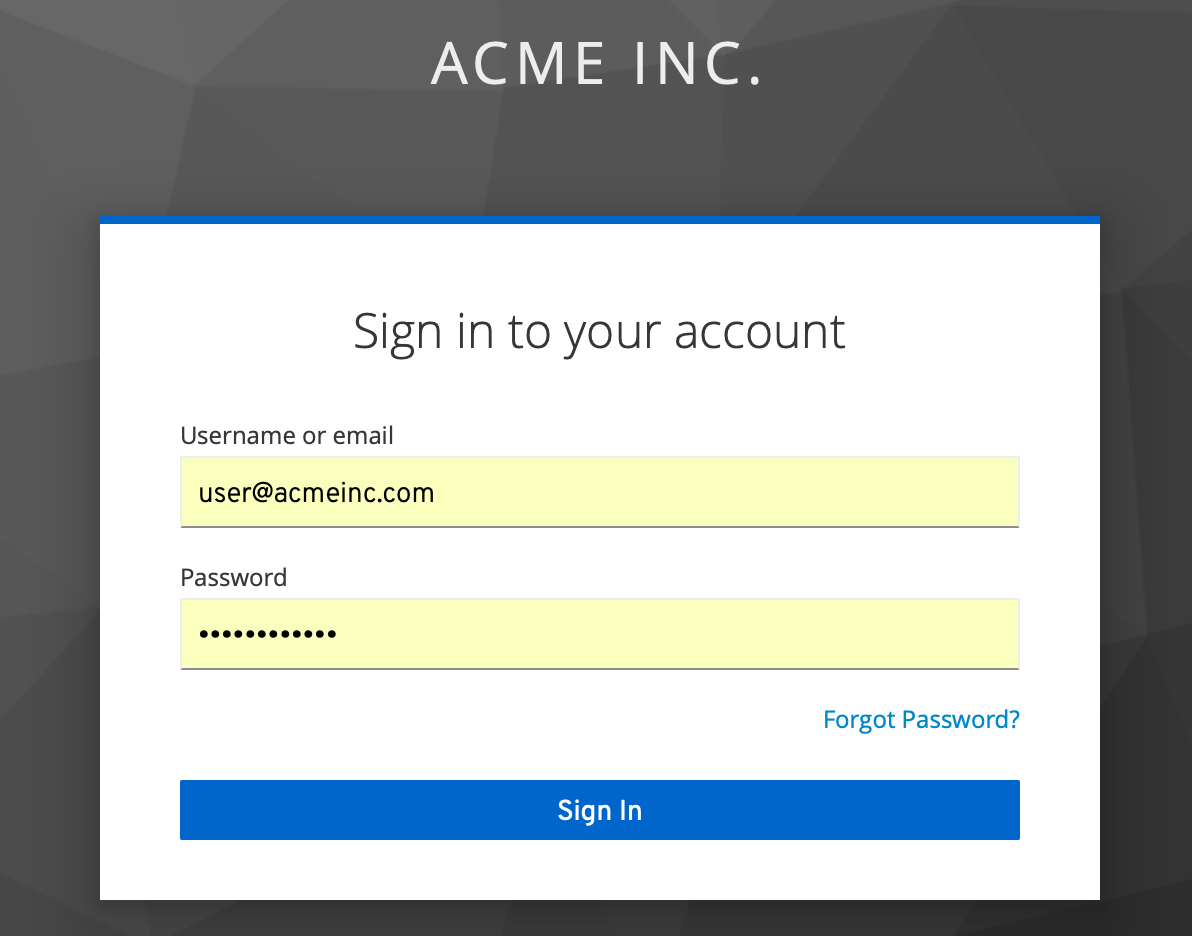
If you close out of your database now and then try to open it again, you'll be presented with the log in prompt as below:
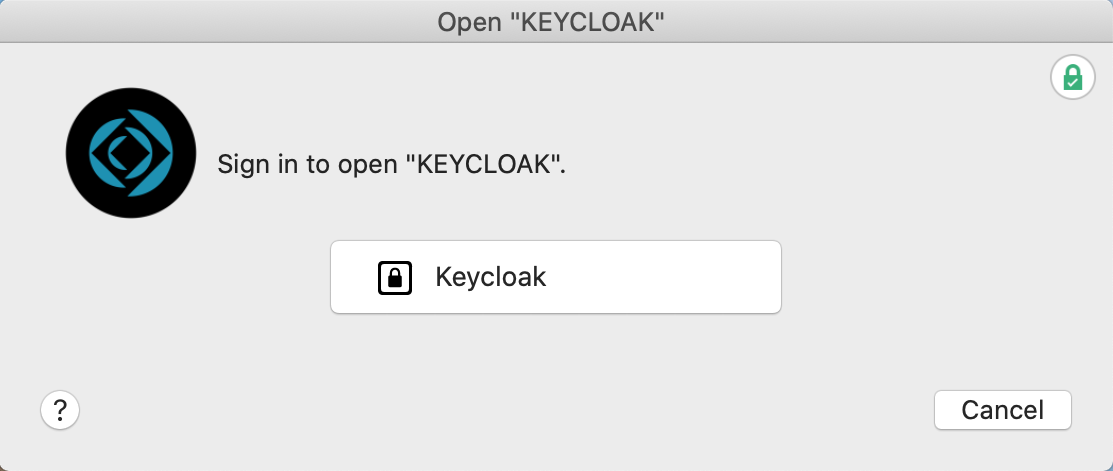
Click the Keycloak button, your browser will open a window asking you to sign into your account.
Use the credentials you set up in Keycloak for your user and then it's possible, depending which browser you're using, that you'll be prompted "Do you want to allow this page to open “FileMaker Pro”?" - click allow and boom, your FileMaker database will open!
It's worth noting some FileMaker Get functions (with sample results) that are useful with external authentication:
Get ( AccountName ) // This email address is being protected from spambots. You need JavaScript enabled to view it.
Get ( AccountGroupName ) // fm-users
Get ( AccountType ) // Azure - again this is because we repurposed the Azure AD entry
Summary
Wow... Finally, we've got our Keycloak server running on Ubuntu, with SSL and MySQL, and we've managed to log into our FileMaker database using our Keycloak credentials. It's... been... epic... So, is that it? Not quite, we have another couple articles to get through and up next is adding two-factor authentication to Keycloak to increase our security stance.


