
Zabbix 5 Appliance: Database Error - Connection Refused
Diagnosing & Fixing A New Installation Of Zabbix 5 Appliance With "Database Error - Connection Refused" Message
If you've recently deployed Zabbix 5 using the downloadable Appliance package and a few hours, days or weeks later you log in and encounter a message telling you "Database Error - Connection Refused", your heart will sink and your plans for the day are likely derailed. All that work setting it up, configuring the templates, adding the hosts and action notifications, wasted... Devastating. You're probably coming to terms with having to spend the day building it from scratch again... But wait! Before you do, read on as it's possible there may be a fairly simple fix!
We're huge fans of the Zabbix monitoring platform and it's the backbone of our OverwatchFM FileMaker Server Monitoring Service which monitors our, and some of our clients', FileMaker servers 24/7/365, in addition to other network devices. We've previously published some articles about setting up a Zabbix server using the Hyper-V virtualization program built into Windows 10, and this article is an extension of those tutorials. We're assuming that you know what Hyper-V is, that your Linux virtual machine is running under Hyper-V, and that you have launched your Zabbix server using the Microsoft Hyper-V 2012 Zabbix 5 Appliance package. That said, some of the rest of this article may be applicable to other environments although Linux commands may be different for different Linux operating systems.
The Problem
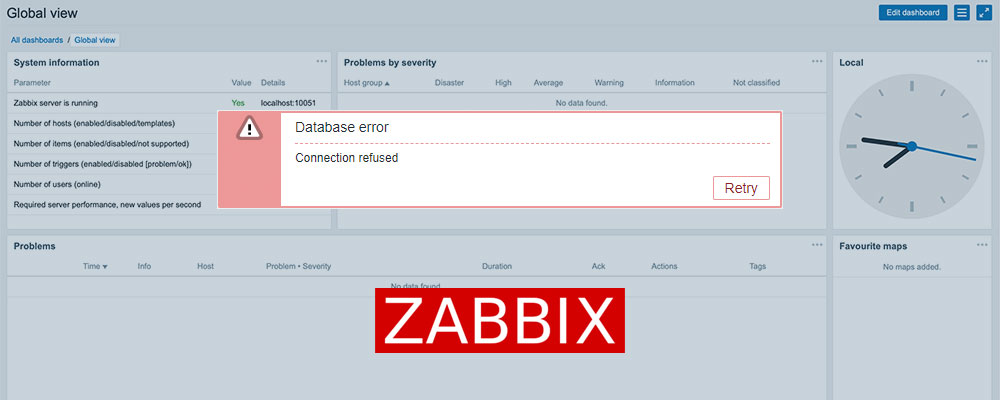
If you log into your Zabbix server from the front end and encounter the message below, this could be for a whole host of reasons, but if everything else was running just fine beforehand then it could be as simple as you have run out of disk space on the partition storing the MySQL database within the Linux environment.

Confirming The Diagnosis
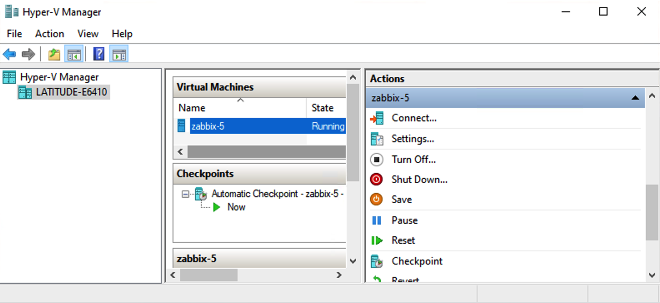
Given the error could be generated for a variety of reasons, let's check the disk space and see what we find. Open Hyper-V Manager, select your Zabbix virtual machine and click Connect from the Actions options on the right. If the machine is not running, click start and wait for it to boot up.
Log in to the virtual machine and now let's check on the disk space by typing this command and hitting enter:
df -h
You should see something like the below.
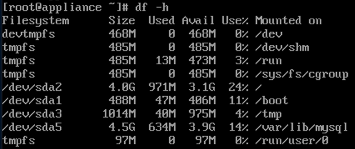
The section we're interested in is towards the bottom that is the allocated space that holds the MySQL database:
/dev/sda5 4.5G 634M 3.9G 14% /var/lib/mysql
In our case, our "Use %" value is 14%, but if yours is at or close to 100% then you have exhausted the allocated disk space of 4.5GB and we'll see how to fix that next. If your value is not close to 100% then it's likely your issues lie elsewhere and, well, we hope it's not too much of a headache figuring it out - we wish you luck!
Preparing To Expand Disk Space
Now we've determined that we're out of disk space for the database, let's do a couple things to prepare before we actually fix the issue. First up, shut down the virtual machine by typing:
poweroff
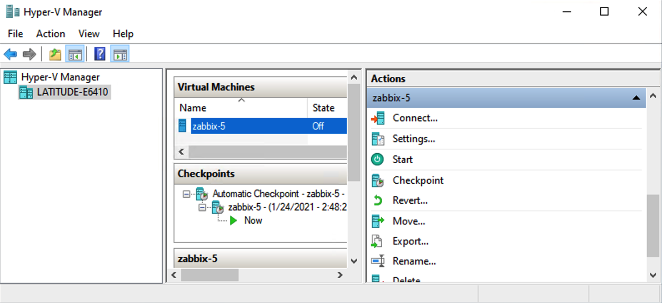
The virtual machine should gracefully shut down. Next, and this is super important, take a backup of the virtual machine. Any time you start interacting with disk space, there's the potential for your data to be impacted. To be clear, we don't expect anything untoward to happen during this process but it's possible, so back in Hyper-V Manager, select the virtual machine, in the Actions options on the right click "Export", save this to the desktop and then move that off the Windows machine to a backup drive or network folder. Note that we can't use checkpoints for this because in order to adjust the virtual machine disk space we're going to need to delete those checkpoints.
Increasing The Virtual Machine Disk Space
So, the first thing we'll do is increase the virtual machine disk space. This is pretty straight forward but we'll walk through it. Back in Hyper-V Manager, again ensure your virtual machine is selected. If you have any checkpoints listed, these will prevent you from editing the disk space. So, assuming you are certain you exported as above to backup your virtual machine, right click on the checkpoints and select "Delete Checkpoint" until they are all gone. Then click "Settings" just under the "Connect" button in the Actions options on the right. Then in the left column of the Settings window, expand IDE Controller if necessary and select "Hard Drive":
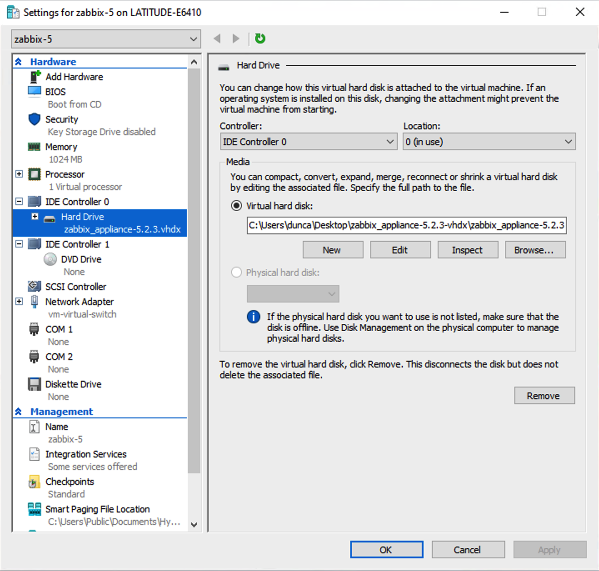
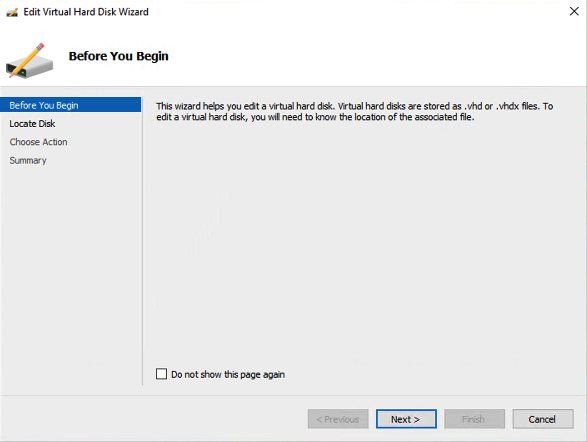
Click the Edit button of the virtual hard disk and the Edit Virtual Hard Disk Wizard should launch, although it may be on the Locate Disk option already.
The virtual hard disk to be adjusted is already selected.

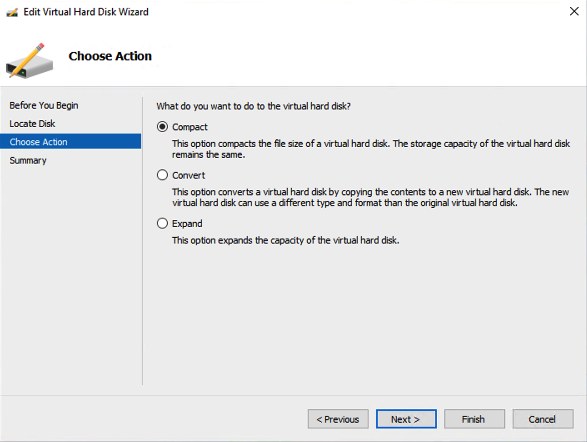
Now we're asked what we want to do to the virtual hard disk and of course we want to Expand it, so select that and click Next:
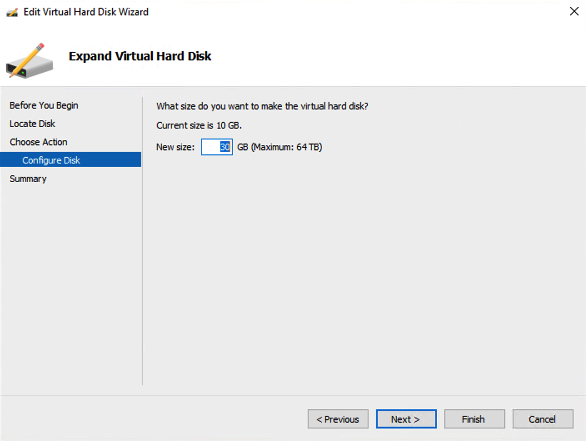
Enter the new size you wish the disk to have and click Next. We're adjusting ours from 10GB to 30GB:
Review the changes that are about to be made and if all looks good, click Finish and we're done with this part!
Adjusting The Linux Partitions Using GParted Live
Although we've increased the available disk space on the virtual machine, we need to allocate this to our partition that houses the MySQL database that is currently full. To do this, we'll utilize a handy little tool call GParted Live. On the Windows machine where you have been working in Hyper-V Manager, download the GParted Live bootable image from here. It's more than likely you need the second one in the list whose filename ends amd64.iso for a 64-bit machine. If you're using a 32-bit machine, then download the i686.iso version.
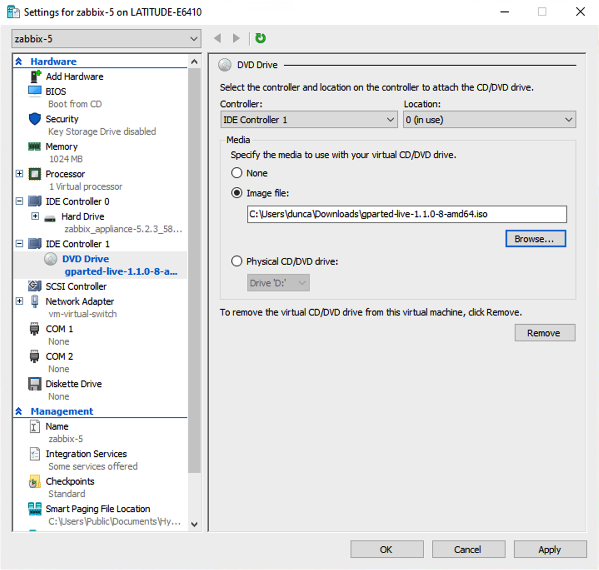
We're going to use this bootable image to launch our virtual machine and then adjust its partitions, so back in Hyper-V Manager, open the virtual machine settings window, and in the left column expand IDE Controller 1, if necessary, and select DVD Drive. As below, browse to the image file you just downloaded and select it. The final thing to check is that in the left column near the top, the BIOS setting says "Boot from CD". If it doesn't, go there and adjust it so the boot order is CD, IDE, Legacy Network Adapter, Floppy.
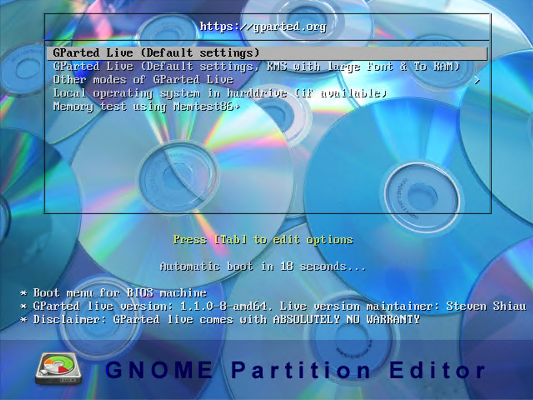
Click OK in the settings window and start your virtual machine. Now instead of booting into your Linux OS, it's booted from the DVD drive that contains the GParted Live software. Hit enter on this screen to select the default option.
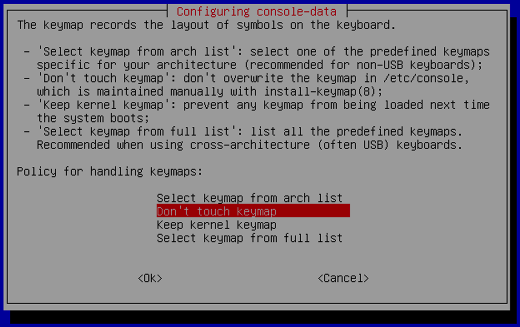
Again just hit enter on the next screen regarding keymap:
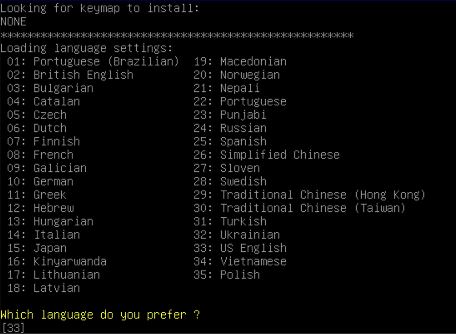
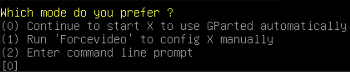
You'll then be asked which language you prefer. Hit enter for the default US English or type your selection and then hit enter.
And finally hit enter again for the default option when asked what mode you prefer:
And we're in! You should be looking at something similar to the below, although your disk space numbers will likely be different:
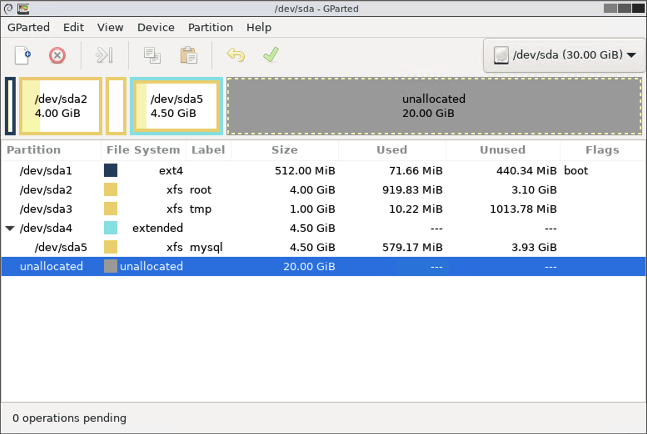
A few things to note at this point:
- The 20GB of drive space we added is visible as unallocated
- The partition we saw when checking our disk space at the beginning was /dev/sda5 and we can see that in this list with the label mysql
- That partition is part of /dev/sda4, so we'll need to first extend /dev/sda4 and then extend /dev/sda5
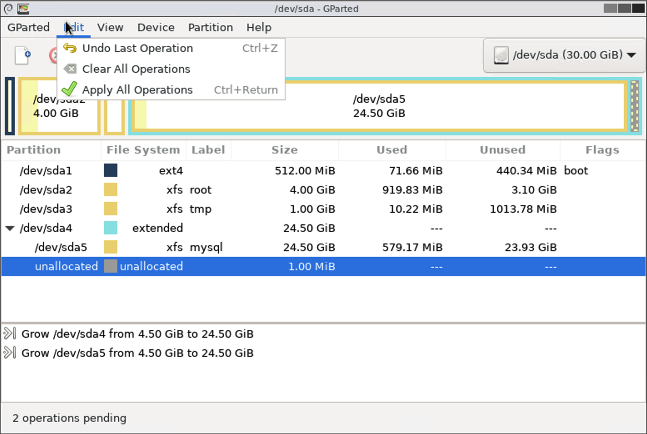
- Note the "0 operations pending" in the bottom left of the window - we'll be setting up actions to the partitions and will then need to apply those actions at the end.
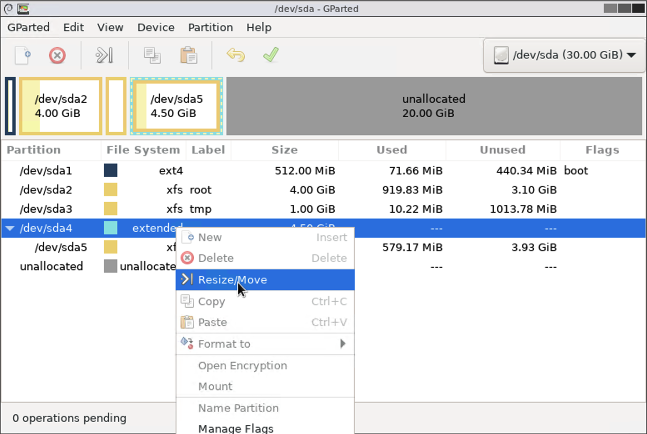
Right click on the /dev/sda4 partition and choose Resize/Move from the menu:
Drag the right arrow all the way over to the right, or enter the Maximum Size value shown in the New Size box and click Resize/Move:
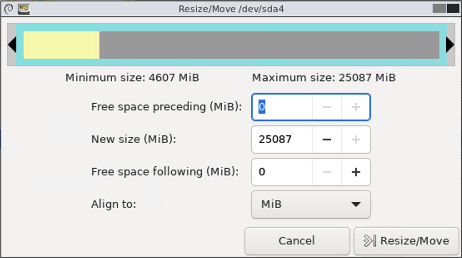
Note that we now have 1 operation pending in the bottom left. Do the same as above for /dev/sda5. Finally, under the Edit menu, select "Apply All Operations".
Click Apply at the prompt to confirm the action. This should complete within a few seconds but that will depend on exactly what you've done and how big your partitions are expanding. Hit close on the completed confirmation prompt and shut down the machine from the Action menu of the main virtual machine menu:
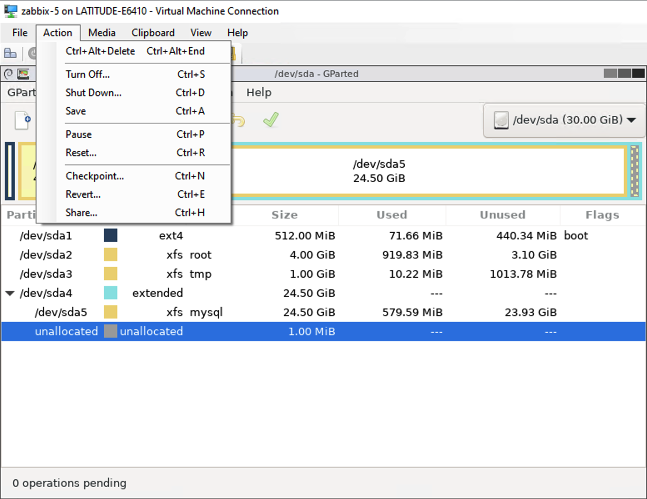
After confirming the shut down request, you'll be prompted to "remove the live-medium" etc - just hit enter to continue. Now start the virtual machine again, and this time it will boot from the hard disk into Zabbix. Once it's booted up, log in and let's check those disks again using:
df -h
You should now see that your /dev/sda5 partition has increased in size and your "Use %" has gone down.

Navigate to the front end address of your Zabbix server and you should be able to log in without issue!
Summary
Thankfully we've not had to rebuild our Zabbix server from scratch, which as you may realize now would have eventually run into the same issue of that partition running out of space. We hope this helps anyone running Zabbix that encounters this issue. If you're interested in having your FileMaker server monitored but setting up Zabbix isn't your thing, consider our OverwatchFM FileMaker Server Monitoring Service.


